
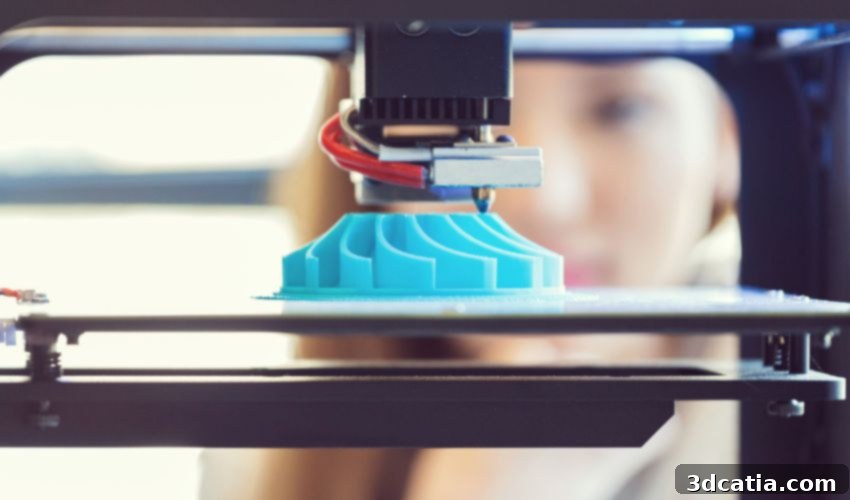
Mastering 3D Printer Bed Leveling: A Comprehensive Guide for Flawless Prints
For anyone involved in 3D printing, from enthusiastic beginners to seasoned professionals, print failures are an inevitable and often frustrating part of the journey. Among the various additive manufacturing technologies, Fused Deposition Modeling (FDM) 3D printing is particularly prone to these issues, primarily because numerous variables can contribute to imperfections in the final part. We’ve previously explored many common print failures and their remedies, including issues like stringing, the unsightly elephant foot effect, over-extrusion, and warping. However, many users overlook one critical yet often misunderstood step that can prevent a multitude of these problems: bed leveling.
While primarily associated with FDM 3D printing, bed leveling principles also apply to vat photopolymerization (resin) printers, making it a universally critical component of the entire 3D printing workflow. In this comprehensive guide, we will demystify bed leveling for 3D printing. We’ll delve into its fundamental definition, explore why it holds such immense importance, and differentiate between the traditional manual and modern automatic bed leveling methods, providing you with a complete understanding of the subject. Achieving perfect bed leveling is the cornerstone of successful 3D prints, ensuring optimal first layer adhesion and overall print quality.
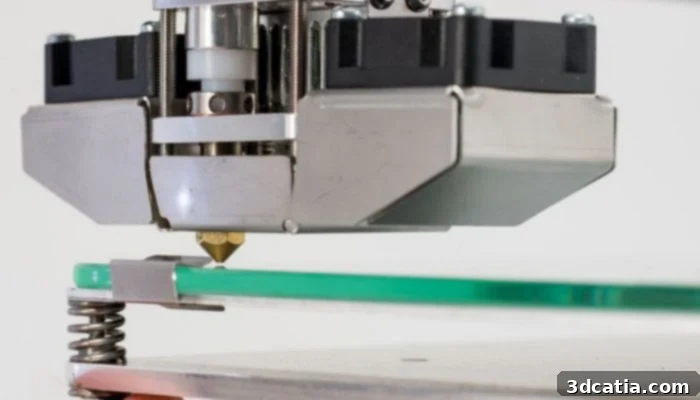
Bed leveling is an essential step in 3D printing to ensure that prints adhere correctly and come out perfectly (photo credits: UltiMaker)
What Is 3D Printer Bed Leveling and Why Is It So Important?
The most common initial question is: what exactly does “bed leveling” mean in the context of 3D printing? Contrary to a literal interpretation, bed leveling does not refer to ensuring your printer’s build plate is parallel to the floor. Instead, it refers to the precise calibration of two critical factors: the parallelism between the print nozzle (or multiple nozzles, as found in IDEX printers) and the entire printing surface, and the consistent height between them. For a truly level bed, this height must be absolutely identical across every point the nozzle traverses on the x- and y-axes.
The importance of this precise calibration cannot be overstated. The first layer of a 3D print is arguably the most critical. It forms the foundation for everything that follows, and its success largely depends on optimal bed leveling. If the nozzle is too far from the bed, the filament will not adhere properly, leading to “spaghetti” prints, poor adhesion, or layers peeling off the bed mid-print. Conversely, if the nozzle is too close, it can scratch the build surface, cause filament to be squished too thinly (leading to “elephant foot” or clogged nozzles), and prevent proper extrusion. A well-leveled bed ensures that the first layer is laid down evenly, with the correct amount of “squish” against the build plate, which maximizes adhesion and sets the stage for a successful print.
Understanding Manual Bed Leveling: A Step-by-Step Guide
To truly grasp the mechanics of bed leveling, it’s beneficial to understand how manual bed leveling works. This traditional method involves the user physically adjusting the build plate’s level. This is typically achieved by turning knobs or screws located at strategic points, usually under each corner of the build plate. These adjustments allow the user to raise or lower specific sections of the bed, bringing it into proper alignment with the print nozzle.
The manual bed leveling process involves several key steps:
- Preparation is Key: Before any adjustments, it is absolutely essential to clean both the print nozzle and the build plate thoroughly. Any residual filament, dust, or grease on either surface can lead to inaccurate measurements and poor adhesion. A clean surface ensures more accurate results and a better starting point.
- Preheating the Bed: There is an ongoing debate among experts regarding whether the printer should be preheated before leveling. Some argue that heating the bed to its printing temperature is crucial because the build plate material can expand slightly when heated. Leveling while heated ensures the surface is truly level during operation. Others contend that this expansion is negligible for most consumer printers and that keeping the printer off or at room temperature can prevent potential safety hazards like burns. For precision, especially with larger beds or specific materials, preheating is often recommended. If preheating, ensure the nozzle is also heated to prevent filament oozing and interference.
- Homing the Printer: The next crucial step is to “home” the printer or all its axes. This command moves the printhead and build plate to their designated home positions, typically 0,0,0 coordinates. Homing ensures that the printer’s internal coordinate system is reset, providing a consistent reference point for accurate leveling.
- Initial Knob Positioning: Before starting the actual leveling, it’s often helpful to adjust the leveling knobs to a halfway position. This provides ample room for both raising and lowering the bed as needed during the calibration process. While not always strictly necessary, it offers a good baseline.
- The Paper Method: The most common technique for manual leveling involves using a thin piece of paper, typically a standard sheet of printing paper (with a thickness ranging from 0.07 to 0.1 mm). The goal is to achieve the perfect gap between the print nozzle tip and the build surface – a gap where the nozzle barely touches the paper, creating a slight drag.
- Adjusting Each Corner: Begin by moving the printhead to one corner of the build plate (you may need to disable steppers or use the printer’s menu for manual movement). Slide the paper between the nozzle and the bed. Adjust the corresponding knob beneath that corner until you feel a slight resistance or “drag” when pulling the paper back and forth. The paper should slide, but not freely, and the nozzle shouldn’t grip it tightly. Repeat this process for all corners of the bed, typically 3 or 4 points depending on your printer’s design. After adjusting all corners once, it’s advisable to go around again, as adjusting one corner can slightly affect others.
- Fine-Tuning with Z-Offset and Baby-Stepping: It’s important to note that since the paper itself has a thickness, the actual distance between the nozzle and the bed isn’t truly zero. To compensate for this and achieve the ideal “squish” for the first layer, settings like Z-offset or baby-stepping are used. The Z-offset is a precise adjustment that tells the printer to move the nozzle a tiny bit closer or further from the bed during printing, effectively subtracting the paper’s thickness. Baby-stepping allows for real-time micro-adjustments during the printing of the first layer, letting you visually optimize the filament’s adhesion and appearance.
- Test Print: After completing the manual leveling, it’s highly recommended to perform a test print of a single-layer calibration pattern (like a large square or grid). This allows you to visually inspect the first layer’s adhesion, uniformity, and overall quality to ensure the bed is truly level and the Z-offset is correct.
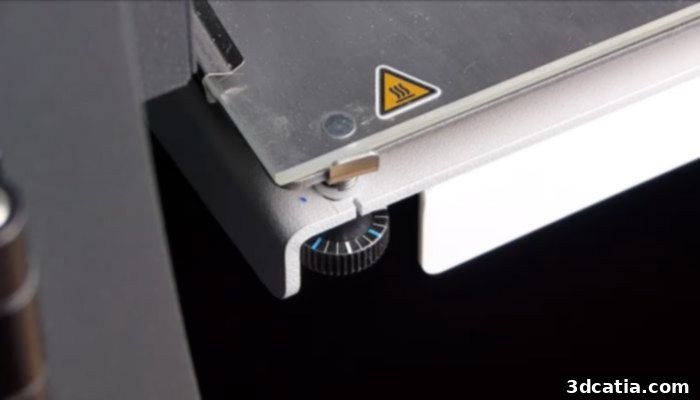
During manual bed leveling, it is necessary to adjust the knobs or screws to raise or lower the bed until the correct gap is achieved (photo credits: 3Dnatives)
When to Level Your 3D Printer Bed
While the manual process can seem time-consuming initially, most experts agree that subsequent adjustments become much quicker. The most critical moments for thorough bed leveling include:
- First-Time Setup: Immediately after setting up a new 3D printer for the very first time.
- Printer Relocation: Whenever the printer is moved to a new location, as vibrations or bumps can affect calibration.
- Persistent Print Failures: When noticing common print failures such as poor first layer adhesion, warping, or inconsistent layer heights.
- Extruder/Nozzle Change: After changing the extruder, hotend, or nozzle, as these components can slightly alter the nozzle’s height relative to the bed.
- Regular Maintenance: As a general recommendation, leveling the print bed at least once a week is a good practice. For less frequent printing, it’s wise to do it every few prints. Of course, this frequency can be adjusted based on the specific needs of a particular 3D printer, its stability, and the demands of the print jobs.
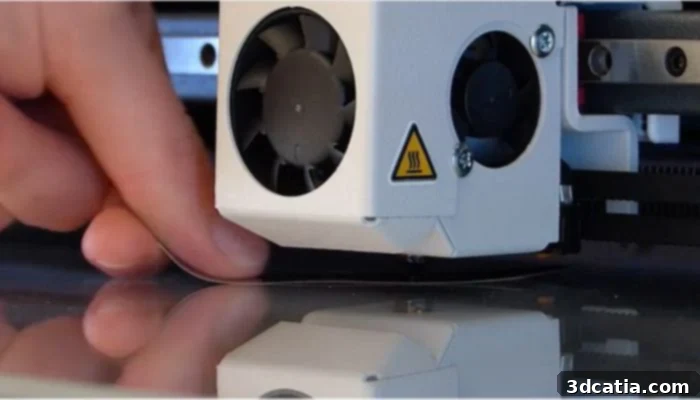
A piece of paper or a feeler gauge can be used in manual bed leveling for precise gap setting (photo credits: 3Dnatives)
The Impact of Poor Bed Leveling on Print Quality
Proper bed leveling is paramount for achieving successful, high-quality prints. A poorly leveled bed can lead to a host of frustrating print failures:
- Nozzle Too High: When the extruder nozzle is positioned too far from the print bed, the filament will not properly adhere. This often results in “spaghetti” prints where the filament curls up, lacks proper adhesion, or produces noticeable gaps between the first layer lines. Subsequent layers will then be laid upon an unstable foundation, inevitably leading to print failure or weak parts.
- Nozzle Too Low: Conversely, if the nozzle is too close to the print bed, it can forcefully drag across the surface, potentially scratching and damaging the build plate. This can also cause the filament to be squished excessively, leading to an effect known as “elephant foot” (where the base of the print bulges outwards). Furthermore, a nozzle that is too low can restrict filament flow, causing under-extrusion, layer delamination, and even nozzle clogging due to back-pressure.
- Inconsistent Leveling: If parts of the bed are too high while others are too low, you might experience a combination of these issues across a single print. This can lead to warping in some areas, poor adhesion in others, and an overall lack of print integrity. The inconsistencies will create internal stresses within the printed part, making it weak and prone to breaking.
Beyond these common issues, precise bed leveling significantly reduces the need for adhesion aids like rafts or skirts, which are often used as compensatory measures for imperfect bed leveling. By mastering bed leveling, you can optimize material usage, reduce post-processing, and improve the overall efficiency and quality of your 3D prints.
Manual vs. Automatic Bed Leveling: A Detailed Comparison
While we’ve explored the manual leveling process, a growing trend in the 3D printing industry is the inclusion of “auto-leveling” systems. As the name suggests, auto-leveling allows a 3D printer to calibrate its bed with minimal direct intervention from the user. But how exactly does this sophisticated technology work, and how does it compare to the traditional manual method?
Understanding Automatic Bed Leveling Systems
At its core, automatic bed leveling relies on sensors or probes. These components are typically attached to or integrated into the printhead assembly. They work by measuring the precise distance to various points across the print bed. Common types of sensors include:
- Inductive Sensors: These sensors detect metal objects and are ideal for metal build plates. They work by generating an electromagnetic field and detecting changes when metal is brought near.
- Capacitive Sensors: More versatile, these can detect various materials (metal, glass, plastic). They work by measuring changes in capacitance as the print bed approaches.
- BLTouch/CRTouch/Strain Gauge Sensors: These popular mechanical probes physically touch the build surface. They are highly accurate and compatible with almost any build plate material, including glass. Strain gauge sensors detect deflection in the nozzle itself.
Once the sensor takes multiple measurements across the build surface, the printer’s firmware creates a “mesh map” – essentially a digital topographical representation of the print bed’s surface. This map identifies any high or low spots. Crucially, most automatic bed leveling systems do not physically adjust the bed itself. Instead, they instruct the printhead to compensate for these deviations during printing. As the nozzle moves across the X and Y axes, the Z-axis motor subtly adjusts the printhead’s height according to the mesh map, ensuring a consistent nozzle-to-bed distance across the entire first layer.
Automatic bed leveling has gained immense popularity not just for its ease of use but also for the enhanced consistency and precision it offers. Sensors are generally more accurate and less prone to human error than manual adjustments, leading to more reliable first layers and overall better print quality.
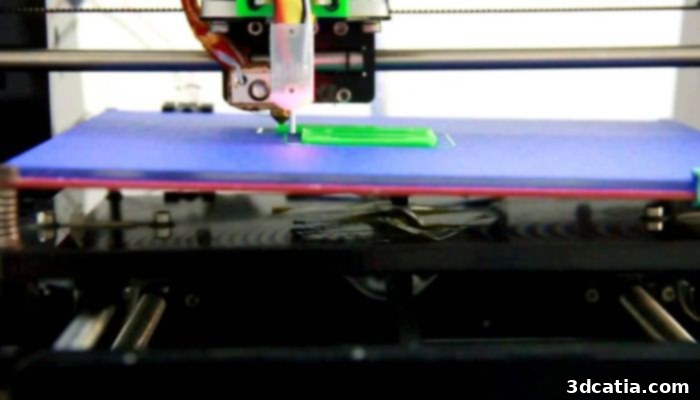
More and more modern 3D printers come equipped with auto-leveling features for enhanced convenience and precision (photo credits: Geeetech)
Advantages and Considerations
Manual Bed Leveling:
- Pros: Cost-effective (no extra hardware), provides a deeper understanding of printer mechanics, essential skill for troubleshooting.
- Cons: Can be time-consuming, requires patience and practice, susceptible to human error, needs frequent re-calibration, less effective on warped beds.
Automatic Bed Leveling:
- Pros: Significant time-saver, highly consistent and precise first layers, compensates for minor bed irregularities/warping, reduces common print failures, user-friendly.
- Cons: Adds to printer cost and complexity, sensor calibration is still required, does not fix a severely unlevel or warped bed (it only compensates), reliance on sensor accuracy, potential for sensor failures.
Ultimately, regardless of the method, a fundamental understanding of bed leveling principles is crucial for any 3D printing enthusiast. For optimal results, many experienced users advocate for a hybrid approach: performing a thorough manual bed level initially to ensure the bed is as physically flat as possible, and then using automatic bed leveling as a fine-tuning mechanism to compensate for any minuscule imperfections and maintain consistency. This combination ensures the highest possible accuracy and reliability for your prints. Without consistent and accurate bed leveling, users will almost certainly encounter a myriad of print failures and quality issues.
Conclusion: The Foundation of Flawless 3D Prints
Bed leveling is not just another step in the 3D printing process; it is the foundational pillar upon which all successful prints are built. From preventing frustrating first layer adhesion issues to mitigating warping, stringing, and other common print failures, a perfectly leveled bed ensures that your 3D printer operates at its peak performance. Whether you opt for the hands-on precision of manual leveling or embrace the convenience and consistency of automatic systems, mastering this crucial calibration will dramatically improve your print quality, save you time, and reduce material waste. By understanding both the “what” and the “how” of bed leveling, you unlock the full potential of your 3D printer and elevate your additive manufacturing projects to a professional standard.
What are your thoughts on the significance of bed leveling in 3D printing? Which method do you prefer, and what tips do you have for achieving the perfect first layer? Share your insights in a comment below or connect with us on ourLinkedIn,Facebook, andTwitter pages! Don’t forget to sign up for our free weeklyNewsletter here to receive the latest 3D printing news directly in your inbox! You can also find all our engaging videos on ourYouTube channel.