
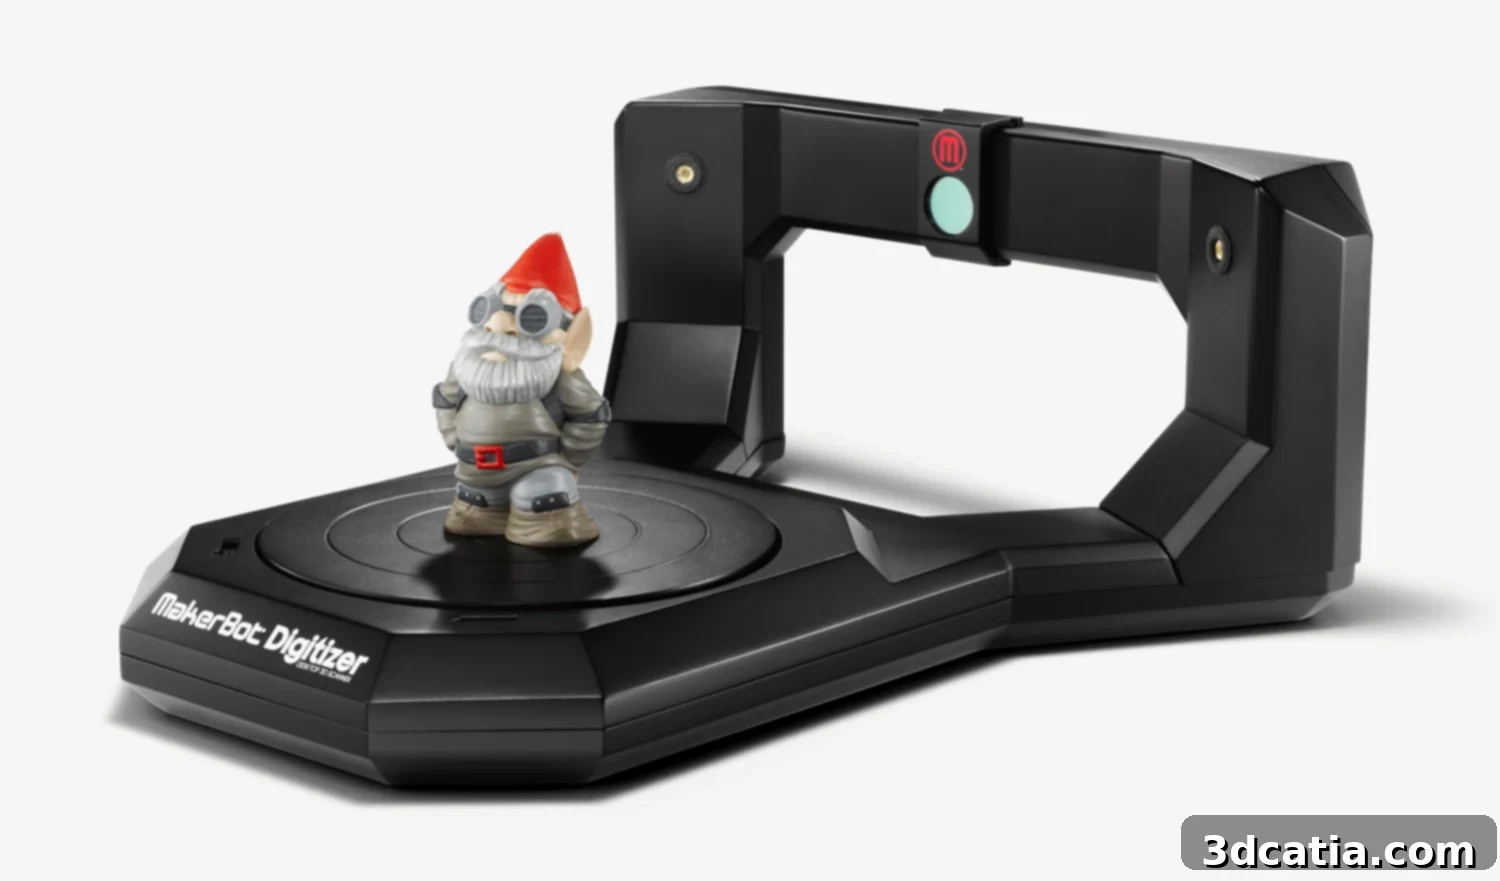
MakerBot Digitizer 3D Scanner Review: Unpacking, Setup, and Performance Test
Welcome to the 3Dnatives lab, where our ongoing quest to thoroughly evaluate the latest 3D printing and scanning technologies continues. In this comprehensive review, we turn our attention to the MakerBot Digitizer 3D Scanner, a device that promised to make 3D digitization accessible to a broader audience. As part of our extensive series of tests on 3D scanners and printers, we’re diving deep into the Digitizer’s capabilities, from the initial unboxing experience to intricate calibration and real-world scanning performance. We aim to provide an unbiased, in-depth analysis to help you understand if this desktop 3D scanner meets your needs. We encourage you to explore our other scanner reviews here and share any comments, tips, or feedback you might have, as your insights are invaluable to our community.
Unboxing the MakerBot Digitizer 3D Scanner
Our journey with the MakerBot Digitizer begins, as always, with the unboxing. The anticipation of new technology is always exciting, and the packaging for the Digitizer did not disappoint. Upon opening the box, we found a thoughtfully organized array of components, each securely nestled to ensure safe transit. MakerBot clearly prioritizes the protection of their hardware, with the main unit precisely positioned between robust foam blocks, safeguarding it from any potential bumps or jostles during shipping. This attention to detail in packaging sets a positive tone right from the start, suggesting a product designed with care.
The contents of the box were as follows:
- The MakerBot Digitizer Main Unit: The scanner itself, securely encased in protective foam, highlighting its delicate components.
- A Regulator for Calibration: An essential tool for ensuring the scanner’s accuracy and optimal performance. This indicates that MakerBot expects users to perform regular calibration for best results, which is a good practice for any precision instrument.
- A Power Supply: Crucial for powering the device. It’s important to note for our European friends that the standard package may not include a European plug. We recommend confirming with your dealer that the appropriate power cord for your region will be provided to avoid any delays in getting started.
- A USB Connection Cable: A standard USB printer-style cable, facilitating a direct and reliable connection between the Digitizer and your computer. This ensures broad compatibility and ease of setup.
- A User Manual: A vital resource for initial setup, operational instructions, and troubleshooting. While many users might jump straight to online guides, the physical manual often contains quick-start information that can be very helpful.

The Digitizer’s careful packaging ensures secure delivery and protection of its components.
The overall unboxing experience was straightforward and professional, providing all the necessary components to get started. The inclusion of a dedicated calibration regulator underscores the importance MakerBot places on accuracy, a fundamental aspect of effective 3D scanning. Our initial impressions suggest a robust and user-friendly approach from the outset, paving the way for a smooth setup process.
Understanding the Digitizer’s Functionality
The MakerBot Digitizer 3D Scanner operates on a relatively intuitive principle: it generates a precise 3D digital model of a physical object by capturing a series of images while the object gracefully rotates on an integrated turntable. This process leverages a combination of laser triangulation and photographic capture to build a comprehensive data set of the object’s geometry and texture. This method is common in desktop 3D scanners and offers a balance between speed and detail, making it suitable for a wide range of applications, from hobbyist projects to more professional prototyping. The integration of hardware and software is key to its seamless operation.
The Scanning Process in Detail
To achieve its high-fidelity 3D models, the MakerBot Digitizer employs a sophisticated, multi-step process:
- Laser and Camera Synchronization: At the heart of the Digitizer are two strategically mounted lasers, positioned on the left and right corners of the device. These lasers perform a precise linear scan, effectively projecting lines across the object’s surface as it rotates. This laser data is crucial for determining the object’s profile and depth information. Simultaneously, a high-resolution camera captures a continuous sequence of photographs of the object. The synchronization between the rotating turntable, the laser projection, and the camera’s image capture is paramount for accurate data acquisition. This combined approach allows for both geometric accuracy and the capture of surface texture.
- Data Fusion via MakerWare Software: Once the initial data capture phase is complete, the proprietary MakerWare software for Digitizer takes over. This intelligent software is responsible for combining the discrete photographs and the detailed linear scan data. It processes this raw information to generate what is known as a scatter plot – a dense cloud of data points representing the object’s surface in three-dimensional space. This scatter plot is the foundational element from which the final 3D model will be constructed, essentially translating real-world geometry into digital coordinates.
- 3D Mesh Generation and Export Options: Following the creation of the scatter plot, the MakerWare software intelligently transforms these individual data points into a cohesive 3D mesh. A mesh is a collection of vertices, edges, and faces that defines the shape of a 3D object. Once this mesh is generated, the Digitizer offers remarkable flexibility in how you can utilize your newly created 3D model:
- Direct to 3D Printer: For seamless integration within the MakerBot ecosystem, the software can directly send the generated mesh to a compatible MakerBot 3D printer. This “scan-to-print” workflow streamlines the process of duplicating physical objects or creating iterative designs.
- Online Sharing: The Digitizer makes it easy to share your creations with the wider 3D printing and scanning community. Models can be uploaded and shared through popular platforms like Thingiverse, fostering collaboration and accessibility.
- External Editing: For users requiring more advanced customization or intricate design modifications, the generated 3D model can be exported and edited with most industry-standard 3D modeling software. This interoperability significantly enhances the Digitizer’s utility for professional applications and complex projects.
- Dimensional Accuracy: An important specification of the MakerBot Digitizer is its dimensional accuracy, which is stated to be up to 2mm. While this might not be sufficient for highly precision-engineered parts, it is generally robust enough for many common applications such as creating replicas, digital archiving, or generating models for artistic purposes. Understanding this tolerance is key to setting appropriate expectations for the scanner’s output, especially when dealing with objects that demand exact measurements.
The combination of dual lasers, a rotating platform, and intelligent software processing allows the Digitizer to efficiently capture and reconstruct 3D objects. Its user-friendly interface and versatile output options make it a powerful tool for anyone looking to enter the world of 3D scanning or enhance their existing 3D workflow.
Initial Setup and Essential Calibration
After successfully unboxing and plugging in your MakerBot Digitizer, the absolute first and most critical step is calibration. This process ensures the scanner’s lasers and camera are perfectly aligned and operating optimally, directly impacting the quality and accuracy of your 3D scans. Neglecting proper calibration can lead to distorted models and wasted time, making this initial setup phase incredibly important for achieving the best possible results. MakerBot has streamlined this process, but attention to detail is still required.
Preparing Your Scanning Environment
To set the stage for a successful calibration and subsequent scans, it’s vital to prepare your environment according to these guidelines:
- Optimal Illumination: The scanner’s tray, where your object will sit, requires bright, even illumination. We recommend using a dedicated light source, such as a desk lamp, to achieve this. However, it is paramount that the light source itself is NOT visible to the Digitizer’s camera. Direct light into the camera can cause glare or interfere with the laser detection, disrupting the scanning process and compromising data integrity. Excellent and consistent brightness across the scanning area is directly correlated with the quality of your scan, enabling the camera to capture clear images and the lasers to detect surface details accurately.
- Uniform Background: Position the Digitizer approximately 20 cm away from a uniformly colored wall. The goal here is to provide a clean, non-distracting background for the scanner’s lasers. When the laser pointers project onto a consistent surface, it aids the scanner in accurately determining depth and minimizing interference from extraneous visual data. A plain, matte wall without patterns or strong textures will yield significantly better calibration and scanning results.
Software Installation and Device Connection
Once your physical environment is prepared, the next step is software setup. It is crucial to install the latest version of the MakerWare software. This ensures you have access to the most up-to-date features, bug fixes, and compatibility improvements. After the software is successfully installed and launched, you will need to power on your Digitizer scanner and connect it to your computer via the provided USB cable. The MakerWare software is designed to quickly detect and establish a connection with the scanner, guiding you through the subsequent calibration steps.
Precise Calibration Steps
Within the MakerWare interface, you will be prompted to perform several key calibration routines:
- Turntable Horizontality: This step involves ensuring that the scanning tray is perfectly level. MakerWare typically provides visual cues or an automated process to help you achieve this, as an uneven turntable can lead to skewed scans.
- Camera Preparation: The software will guide you through adjusting the camera settings, potentially including focus and exposure, to ensure optimal image capture.
- Laser Alignment: Using the calibration template provided with the Digitizer and following the on-screen guidelines in MakerWare, you will precisely align the scanner’s lasers. This is a critical step that ensures the lasers project correctly and that their data is accurately interpreted by the camera and software. The checkerboard gauge (as seen in the image below) is instrumental in this process, providing specific reference points for the software to calibrate against.
- The checkerboard gauge is an essential tool for precise calibration of the Digitizer, ensuring accurate laser and camera alignment.
By meticulously following these calibration steps, you ensure that your MakerBot Digitizer is primed for optimal performance, ready to capture accurate and detailed 3D models with confidence. This foundational process is not merely a formality but a critical enabler for quality scanning results.
Real-World Object Scanning: Our Sphinx Test
To rigorously test the MakerBot Digitizer’s capabilities in a practical scenario, we selected a highly detailed model of a Sphinx. This object, with its dimensions of 15 x 5 x 10 cm, presented an excellent challenge due to its intricate features, including sharp edges, subtle curves, and small hollow areas like the space between its legs. These characteristics are often difficult for 3D scanners to capture accurately in a single pass. The scanning process itself, regardless of the object’s size (within the Digitizer’s operational limits), consistently took 9 minutes to complete. Upon the conclusion of this fixed duration, the software successfully generated the initial scatter plot, providing a preliminary digital representation of our Sphinx model.
The Initial Scan and its Limitations
After the very first scan, the immediate output revealed some of the inherent challenges of 3D scanning, particularly for objects with complex geometries. We observed certain imperfections, most notably in areas with sharp edges and distinct hollow parts. The space between the Sphinx’s legs, for instance, appeared somewhat blurred or incomplete, and some of the finer details on its façade lacked the crispness we desired. This is a common occurrence with many desktop scanners, as a single vantage point and rotation might not be sufficient to capture all angles and hidden surfaces of a complex object.
Leveraging Multiscan for Enhanced Detail
Fortunately, the MakerWare software, specifically version 2.4 which we utilized for this test, offered a robust solution to these challenges: the “Multiscan” option. This feature is invaluable for improving scan quality, especially for objects that have undercuts, intricate details, or areas that are difficult to reach from a single scanning angle. The Multiscan option allows users to perform multiple scans of the same object, strategically repositioning it on the turntable between scans to capture different perspectives. The software then intelligently merges these multiple data sets into a single, more complete, and accurate 3D model. This iterative approach is crucial for achieving high-fidelity results for complex objects.
Video demonstrating the digitization of our Sphinx model:
Through the diligent application of the Multiscan option, we conducted three separate scans of our Sphinx model, repositioning it slightly each time to maximize coverage. The results were remarkably improved. After merging the data from all three scans, the previously problematic areas—the space between the legs and the sharp angles—were now almost perfectly digitized. This highlighted the power of iterative scanning and the software’s ability to intelligently combine data for superior outcomes. However, our testing also revealed an important caveat: while more scans can improve results up to a point, we would advise against performing more than five scans for a single object. Beyond this threshold, the improvements tend to diminish, and in some cases, the repeated processing and potential for cumulative errors can actually lead to a depreciation of the surface quality, resulting in worse outcomes rather than continued enhancement. It seems there’s a sweet spot for optimal data acquisition without over-processing.
Post-Scan Processing and File Management
Once your desired level of detail is achieved and the 3D model is satisfactorily generated, MakerWare offers straightforward options for saving and exporting your creation. You can save the 3D model in a proprietary .thing format, specifically optimized for the MakerBot ecosystem, or choose the widely recognized .STL format. STL (Stereolithography) is an industry-standard file type for 3D printing and computer-aided design, ensuring broad compatibility with almost all 3D modeling software, slicers, and 3D printers, making your digitized object highly versatile for various applications.
Below, you’ll find a direct comparison that vividly illustrates the improvements gained through multiple scans. Observe the digitized Sphinx model after just one scan versus the same Sphinx model after our meticulous third scan, leveraging the “Multiscan” option. You will undoubtedly notice significant enhancements, particularly in the hollow areas and at the base of the model, which appear far more detailed and complete in the multi-scanned version. This comparison underscores the effectiveness of the Multiscan feature in capturing nuanced geometries and enhancing overall model fidelity.
Results with 1 scan:
Results with 3 scans:
Maximizing Your Scans: Expert Advice
While the MakerBot Digitizer is designed for ease of use, the quality of your 3D scans can vary significantly depending on the characteristics of the object you’re digitizing. To help you achieve the best possible results and avoid common pitfalls, we’ve compiled a list of guidelines based on our extensive testing and experience. Following these recommendations will dramatically improve the success rate and fidelity of your scans, ensuring you get the most out of your Digitizer.
Optimizing Object Characteristics for Better Scans
Generally, the Digitizer performs best with objects that possess certain physical attributes. When selecting an object for scanning, aim for the following:
- Optimal Dimensions:
- An object whose dimensions are greater than that of a cylinder with a 50 x 50 mm diameter/height. Objects too small can be difficult for the lasers and camera to register accurately.
- An object whose dimensions are smaller than that of a cylinder with a 203 x 203 mm diameter/height. The Digitizer has a defined scanning volume, and objects exceeding these limits will not be fully captured.
- Weight Limit: Objects that weigh less than 3 kg. Heavier objects can stress the turntable mechanism and potentially lead to inaccurate rotations or even damage.
- Stability: Stable objects that will not shift or wobble during the rotation on the turntable. Any movement during the scan will result in blurred or distorted data.
- Opacity: Opaque objects are ideal. The lasers and camera rely on light reflecting off the surface, and opaque materials provide a clear, detectable surface.
Challenges and Workarounds for Difficult Objects
Conversely, certain types of objects pose significant challenges for laser-based 3D scanners like the Digitizer. To save time and avoid frustration, we strongly advise against attempting to scan:
- Transparent Objects: Materials like clear plastic or glass allow the laser light to pass through them rather than reflect, making it nearly impossible for the scanner to detect their surface geometry.
- Shiny or Reflective Objects: Highly polished metals, chrome, or glossy plastics can cause the laser light to scatter erratically or reflect away from the camera, leading to incomplete or noisy scan data. The reflections can also create false readings.
- Very Dark Objects: Extremely dark or matte black objects absorb a significant amount of laser light, making them difficult for the camera to adequately capture details. The low contrast can hinder accurate data collection.
However, if scanning a challenging object, such as a transparent or highly reflective item, is absolutely necessary, there is a clever workaround. You can apply a temporary, thin coating to the object’s surface. A light dusting of talcum powder, a matte spray paint, or even a removable, washable opaque paint can create a diffuse, non-reflective surface that the Digitizer can easily capture. Just ensure the coating is even and doesn’t obscure fine details. Once the scan is complete, the coating can typically be removed without damaging the original object.
Maintaining Your Digitizer
Regarding maintenance, the MakerBot Digitizer is a relatively low-maintenance device. However, one crucial recommendation for sustaining optimal performance is to recalibrate the Digitizer after approximately every 20 scans. Regular recalibration ensures that the lasers and camera remain perfectly aligned, compensating for any minor shifts that might occur over time or with extended use. Beyond this periodic recalibration, there are generally no other specific maintenance operations that you need to perform on this scanner, making it a reliable and user-friendly piece of equipment for long-term use. Keep the turntable and scanner glass clean to avoid debris interfering with scans.
Here you can find a preview of our 3D printed scan, providing a tangible comparison with the original Sphinx model (the original is on the right). While the result may not be absolutely perfect, the experience of bringing a physical object into the digital realm and then back into the physical world through 3D printing was undeniably fascinating and educational. It showcases the Digitizer’s potential for rapid prototyping and creative replication.
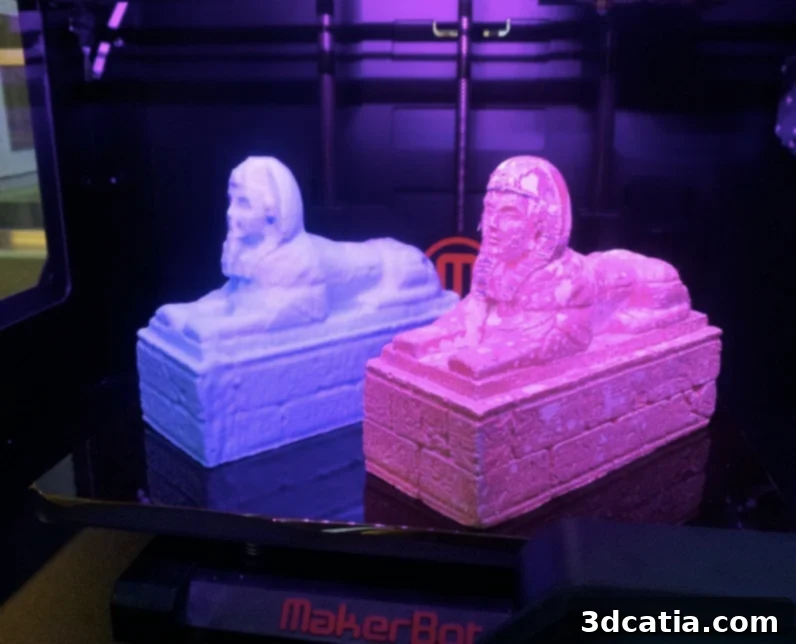
The result, though not without minor imperfections, offers a compelling demonstration of the Digitizer’s capabilities in transforming physical objects into printable 3D models.
Conclusion: Our Verdict on the MakerBot Digitizer
After extensive testing, from unboxing and rigorous calibration to real-world object scanning with a complex Sphinx model, the MakerBot Digitizer 3D scanner has proven itself to be a capable and accessible tool for 3D digitization. Its straightforward operation, combined with the intuitive MakerWare software, makes it an excellent entry point for hobbyists, educators, and small businesses looking to integrate 3D scanning into their workflow. The device excels at capturing opaque, matte objects within its specified size and weight limitations, demonstrating reasonable accuracy for a desktop scanner in its class. The fixed 9-minute scan time simplifies the planning process, and the “Multiscan” option is a powerful feature that significantly enhances the quality of models, especially for objects with intricate details or undercuts.
While the Digitizer boasts a dimensional accuracy of up to 2mm, it’s important for users to set realistic expectations. This level of precision is suitable for creating replicas, generating models for artistic endeavors, or digital archiving, but it might not meet the stringent demands of high-precision engineering or industrial design where sub-millimeter accuracy is critical. Furthermore, the inherent limitations of laser-based scanning mean that transparent, shiny, or very dark objects remain challenging, necessitating workarounds like surface coating. The need for periodic recalibration, while simple, is a minor consideration for maintaining optimal performance.
Overall, the MakerBot Digitizer stands out for its user-friendliness and seamless integration within the MakerBot ecosystem, particularly for those already invested in MakerBot 3D printers. Its ability to directly send models to a 3D printer or export them in standard STL format offers considerable versatility. The comprehensive packaging, clear user manual, and the essential calibration tool further underscore MakerBot’s commitment to a positive user experience. For anyone seeking a reliable, desktop-friendly 3D scanner that can produce good-quality models for a variety of general-purpose applications, the MakerBot Digitizer is a strong contender. It represents a valuable step in making 3D scanning technology more approachable and effective for the broader community.