
Exploring the Landscape of 3D Printing: Technologies, Workflow, and Future Potential
Welcome to the dynamic world of 3D printing, a revolutionary process also widely known as additive manufacturing. At its core, 3D printing involves the sequential deposition of thin layers of material, one atop the other, to construct a three-dimensional object from a digital design. This groundbreaking method stands in stark contrast to traditional subtractive manufacturing techniques, which remove material from a larger block. The power of additive manufacturing lies in its ability to create complex geometries, intricate designs, and custom parts with unparalleled precision and minimal material waste. Today, the field boasts an impressive array of printing techniques, broadly categorized into seven principal families, each offering unique capabilities and leveraging a vast spectrum of materials. From versatile plastics and robust metals to advanced ceramics and flexible silicones, these technologies are transforming industries and pushing the boundaries of what’s possible in manufacturing.
Understanding the diverse landscape of 3D printing begins with exploring these fundamental technology families. Each method operates on distinct principles, offering specific advantages in terms of material compatibility, resolution, speed, and cost. This diversity is precisely what makes additive manufacturing so adaptable, allowing it to cater to a wide range of applications, from rapid prototyping and functional part production to custom tooling and mass customization.
The Seven Core Additive Manufacturing Technology Families Explained
The world of additive manufacturing is defined by distinct methodologies, each with its unique approach to material manipulation and layer creation. Here, we delve deeper into the seven primary categories that encompass virtually all 3D printing technologies available today:
- Material Extrusion: This family encompasses technologies like Fused Deposition Modeling (FDM) or Fused Filament Fabrication (FFF). In this process, a thermoplastic filament is heated to its melting point and then extruded, in liquid form, through a fine nozzle. The nozzle precisely deposits the molten material onto a build platform, layer by layer, following the digital model’s cross-sections. As each layer is deposited, it rapidly cools and solidifies, bonding with the layer beneath it. Material extrusion is widely recognized for its accessibility, affordability, and ability to work with a broad range of engineering-grade thermoplastics, making it popular for prototyping, educational purposes, and even some end-use parts.
- Vat Photopolymerization: This category includes technologies such as Stereolithography (SLA), Digital Light Processing (DLP), and LCD-based 3D printing. These methods rely on a liquid photopolymer resin that cures and hardens upon exposure to specific wavelengths of UV light. During printing, a build platform is incrementally submerged into a vat of resin. A UV light source then selectively hardens areas of the resin, forming each layer. The platform then moves slightly, allowing the next layer to be exposed and solidified. Vat photopolymerization is renowned for its exceptional detail, smooth surface finishes, and high accuracy, making it ideal for intricate models, jewelry, dental applications, and highly detailed prototypes.
- Powder Bed Fusion: This robust family includes Selective Laser Sintering (SLS), Selective Laser Melting (SLM), and Electron Beam Melting (EBM). In these processes, a thin layer of powdered material (which can be plastic, metal, or ceramic) is spread across a build platform. A high-power energy source, typically a laser or electron beam, then selectively melts or sinters specific areas of this powder bed, fusing the particles together to form a solid layer. After each layer is completed, a new layer of powder is spread, and the process repeats until the part is finished. Powder Bed Fusion technologies are celebrated for producing strong, functional parts with excellent mechanical properties, making them suitable for aerospace, medical, and automotive applications, particularly for complex metal components.
- Binder Jetting: This additive manufacturing method works with a variety of powdered materials, including plastics, metals, ceramics, and even sand. Similar to Powder Bed Fusion, a layer of powder is deposited. However, instead of using heat to fuse the powder, a liquid binding agent is precisely jetted from a print head (much like an inkjet printer) onto the powder bed, selectively binding particles together to form each layer. Once the entire part is printed, it typically undergoes a post-processing step, such as curing or sintering in a furnace, to achieve final strength and density. Binder jetting is valued for its ability to produce large parts quickly, often with a wider range of materials, and is commonly used for casting patterns, full-color prototypes, and functional metal parts after secondary processing.
- Material Jetting: Operating on a principle akin to 2D inkjet printing, Material Jetting systems deposit tiny droplets of a liquid photopolymer resin or wax onto a build platform. These droplets are precisely jetted by a print head, creating a layer. Immediately after deposition, these liquid droplets are hardened by photons emitted from a UV light source, solidifying the layer. This process allows for the creation of multi-material parts and full-color prints, as different print heads can jet various materials simultaneously. Material Jetting is known for its ability to produce incredibly smooth surfaces, fine details, and complex geometries, making it suitable for realistic prototypes, medical models, and visual aids.
- Directed Energy Deposition: Often used for repairing or building large metal components, Directed Energy Deposition (DED) is an advanced additive manufacturing process that directly melts and fuses material as it is deposited. A focused energy source, such as a laser, electric arc, or electron beam, creates a melt pool on a substrate, into which a fine powder or metal wire is fed and melted. The material is deposited and fused simultaneously, building up the part layer by layer. DED is particularly effective for working with high-performance metals, including titanium and nickel alloys, and is frequently employed in aerospace, defense, and oil & gas industries for repairing expensive components or adding features to existing parts.
- Sheet Lamination: Also known as Laminated Object Manufacturing (LOM) or Ultrasonic Additive Manufacturing (UAM), Sheet Lamination involves bonding thin sheets of material together. In LOM, sheets of adhesive-coated material (such as paper, plastic, or metal foil) are successively layered, cut to shape using a laser or blade, and then laminated (glued or ultrasonically welded) to each other to form the 3D model. Unused material typically remains as support structures and is removed during post-processing. UAM, a variant, uses ultrasonic vibrations to bond metal sheets together at low temperatures. This technology is recognized for its ability to create large prototypes and models quickly, especially with readily available and inexpensive sheet materials.
Thanks to this immense variety of technologies and their unique capabilities, we are witnessing a manufacturing revolution, capable of producing everything from delicate jewelry and intricate medical implants to robust automotive parts, functional machinery, and even entire buildings or sophisticated rocket components. While each of these technologies boasts a distinct operational mechanism and workflow, a common thread runs through the entire additive manufacturing journey. Regardless of the specific 3D printing technology chosen, the process can be systematically broken down into four fundamental stages. Understanding these steps is crucial for anyone looking to leverage the power of 3D printing effectively, ensuring a successful transition from digital concept to tangible reality. Let’s delve into these essential stages in detail.
The 3D Printing Process: A Universal 4-Step Workflow
Regardless of the specific 3D printing technology employed – be it FDM, SLA, SLS, or any other – the journey from a conceptual idea to a physical object follows a standardized four-step workflow. This structured approach ensures efficiency, precision, and consistency across diverse applications. Understanding each phase is key to successful additive manufacturing.
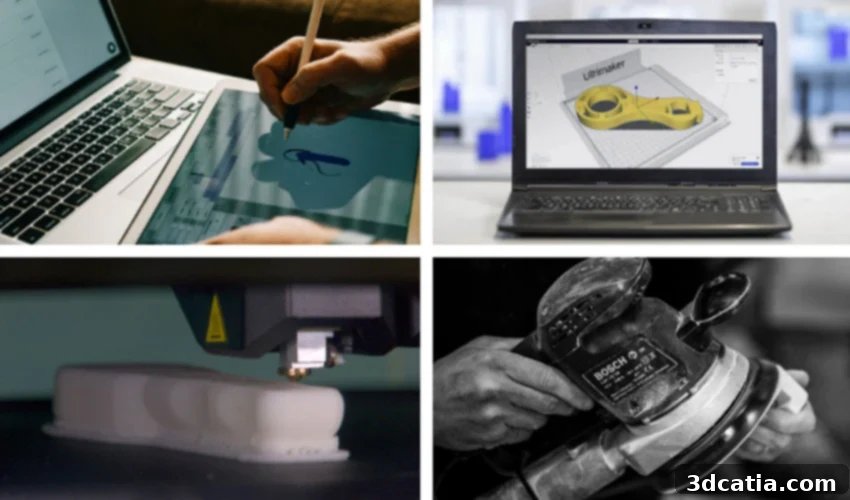
1. Digital Model Creation: CAD, 3D Scan, or Model Download
The foundational first step in any 3D printing endeavor is the establishment of a robust and accurate digital model of the object you intend to print. This digital blueprint serves as the instruction set for the 3D printer and can be acquired through several distinct methods, offering flexibility based on your needs and resources:
- Computer-Aided Design (CAD): This is the most common method for creating original designs. CAD software allows engineers, designers, and hobbyists to digitally sculpt, draw, and define every aspect of their models. Tools like SolidWorks, Fusion 360, Siemens NX, and Autodesk Inventor are industry standards for parametric modeling, ideal for functional parts with precise dimensions. For more organic or artistic designs, sculptural CAD tools like ZBrush or Blender are often preferred. Even beginner-friendly platforms like Tinkercad provide an accessible entry point. The importance of Design for Additive Manufacturing (DfAM) cannot be overstated here; designing with the specific capabilities and limitations of 3D printing in mind (e.g., minimizing supports, optimizing infill, considering layer anisotropy) is crucial for successful outcomes.
- 3D Scanning: When you need to replicate an existing physical object or capture the intricate details of a person, 3D scanning offers an excellent solution. This technology uses various principles – structured light projection, laser triangulation, or photogrammetry (using multiple photographs) – to capture the surface geometry of an object and convert it into a digital 3D model. Specialized 3D scanners provide high accuracy, while even modern smartphones equipped with certain apps can perform basic 3D scanning. This method is invaluable for reverse engineering, custom fitting (e.g., prosthetics), or creating digital archives of physical artifacts.
- Model Download: For those without CAD design skills or the need for a completely custom part, a vast and ever-growing ecosystem of online repositories provides access to millions of pre-designed 3D models. Websites such as Thangs, Thingiverse, Printables, MyMiniFactory, and Cults offer a treasure trove of designs, from decorative items and toys to functional tools and mechanical components. This method is exceptionally convenient for hobbyists and for rapid prototyping when an existing design meets the requirements.
Upon completion of this initial stage, the digital model typically exists as a mesh of points, forming a tessellated surface. Common file formats for these models include 3MF, STL (Stereolithography), or OBJ. These formats essentially describe the surface geometry of the object using a network of small triangles or polygons, ready for the next critical step.
2. Slicing: Preparing the Digital Blueprint for Printing
Once your 3D model is finalized in a suitable digital format, the next crucial step is “slicing.” This process acts as the interpreter between your 3D design and the physical 3D printer. Slicing involves converting the continuous three-dimensional model into a series of discrete, ultra-thin two-dimensional layers, along with specific instructions for the printer to build each layer sequentially. This complex conversion is performed using dedicated software known as a “slicer.”
The slicer software plays a vital role in defining how your model will be printed. Users input various printing parameters, which are critical and dependent on the chosen 3D printing technology, the specific machine model, and the material being used. These parameters include, but are not limited to:
- Layer Height: Determines the thickness of each printed layer, directly impacting print resolution and speed. Thinner layers mean finer detail but longer print times.
- Infill Density and Pattern: Dictates how much internal material is used and its structural pattern. A higher infill percentage results in a stronger, heavier part, while a lower percentage saves material and reduces print time.
- Print Speed: Influences the rate at which the printer moves, affecting both print quality and duration.
- Support Structures: For models with overhangs or intricate features, slicers automatically generate temporary support structures that prevent drooping during printing. These are removed during post-processing.
- Temperature Settings: For extrusion-based printers, this includes nozzle and bed temperatures, crucial for proper material flow and adhesion.
- Shells/Wall Thickness: Defines the number of outer perimeters or walls, impacting the part’s strength and surface finish.
After the user specifies these parameters, the slicer generates a set of machine-readable instructions, most commonly written in G-Code. G-Code is a numerical control (NC) programming language used to control automated machine tools. For a 3D printer, G-Code commands tell the machine precisely where to move the print head, how much material to extrude, when to turn lasers on or off, and various other operational instructions. Popular and highly regarded slicing solutions on the market include Cura, known for its user-friendliness and extensive profiles, and Simplify3D, favored by professionals for its advanced control and customization options. The meticulous calibration of these settings in the slicing stage is paramount for achieving the desired print quality, mechanical properties, and successful completion of the desired part.
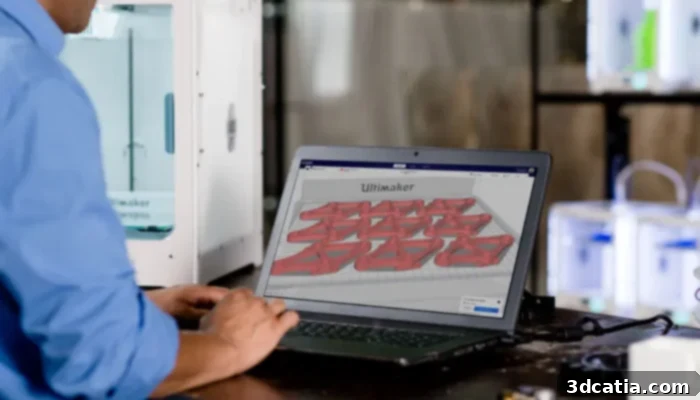
The slicer converts the 3D model into a series of instructions for 3D printing, taking into account the specified parameters.
3. Printing: Bringing the Digital Design to Life
With the G-Code (or another proprietary programming language specific to advanced industrial machines) generated and loaded, the 3D printer is ready to embark on the physical creation of the object. This is the stage where raw material is systematically transformed into a three-dimensional part, guided by the precise instructions from the slicing software. The actual printing process can vary significantly depending on the technology:
- For FDM printers, the machine’s extruder moves along X and Y axes, depositing molten plastic filament onto the build plate. Once a layer is complete, the build plate typically lowers (or the print head raises) by one layer height, and the process repeats.
- For SLA/DLP printers, a light source projects the cross-section of each layer into a vat of liquid resin, solidifying it. The build platform then lifts slightly, allowing fresh resin to flow beneath for the next layer.
- In Powder Bed Fusion systems, a roller or blade spreads a thin layer of powder, and a laser or electron beam traces the part’s geometry, fusing the powder.
A significant advantage of most modern 3D printers, particularly desktop and prosumer models, is their autonomy. Once properly configured and initiated, these machines are generally capable of producing parts without continuous human assistance. This “set it and forget it” capability allows for unattended operation, freeing up valuable human resources for other tasks. However, it’s worth noting that for industrial-grade systems, particularly those dealing with complex materials or large-scale production, monitoring and environmental controls (like temperature and humidity regulation within the print chamber) remain critical to ensure consistent quality and prevent print failures.
The printing phase can take anywhere from minutes to several days, depending on the size and complexity of the object, the chosen material, and the specific technology’s speed. Upon the completion of this stage, the user retrieves the freshly printed part from the build platform. The object is now physically manifest, but depending on the specific 3D printing technology used, the material’s properties, and the desired final aesthetics and functionality, a subsequent step – post-processing – is often necessary to achieve the ultimate desired outcome.
4. Post-Processing: Refining and Finishing the 3D Printed Part
While the printing phase brings the digital design into physical existence, the journey is rarely complete at that point. Post-processing is the essential final stage where the raw 3D printed object is refined, cleaned, cured, or enhanced to meet the required functional, aesthetic, and performance specifications. The extent and type of post-processing needed can vary dramatically, ranging from simple cleanup to highly specialized industrial treatments.
For some printing technologies and materials, post-processing might be minimal, involving just the removal of support structures. For instance, FDM parts often just need supports snapped off. However, for other technologies, it is an integral and indispensable part of the workflow, directly influencing the final part’s mechanical properties, surface finish, and overall usability. For example:
- Support Removal: Almost all 3D prints with overhangs require support structures. These can be easily snapped off, dissolved (if soluble supports were used), or carefully cut away.
- Cleaning and Curing: Resin-based prints (SLA, DLP, Material Jetting) often come out sticky and uncured. They typically require washing in isopropyl alcohol (IPA) to remove excess resin, followed by a post-curing step under UV light to fully solidify the material and achieve optimal mechanical properties.
- Surface Finishing: Achieving a smooth, aesthetic finish often involves sanding, polishing, tumbling, or vapor smoothing (for certain plastics). This can significantly reduce layer lines and improve tactile feel.
- Infiltration and Annealing: Parts printed with Binder Jetting often have a porous “green” state and require infiltration with a binder (like epoxy or bronze) or sintering in a furnace (annealing) to achieve final strength and density. Metal parts from Powder Bed Fusion also frequently undergo heat treatments to relieve stress and optimize material properties.
- Painting and Coloring: For visual prototypes or artistic pieces, parts can be primed, painted, or dyed to achieve desired colors and finishes.
- Machining and Assembly: For highly precise features or to integrate 3D printed components with other parts, secondary operations like drilling, tapping, or even light CNC machining may be performed. Parts may also need to be assembled from multiple printed components.
- Puttying: Filling small gaps or imperfections on the surface before further finishing.
The choice of post-processing techniques directly impacts the final quality, durability, and cost of the 3D printed part. Thoughtful consideration of post-processing requirements during the initial design and material selection phases can lead to more efficient and effective manufacturing outcomes.
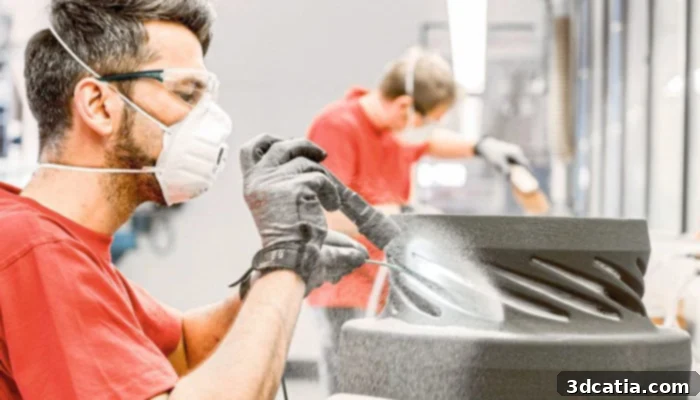
Post-processing is the last step in the 3D printing workflow, essential for refining the final part.
The world of 3D printing is continuously evolving, with new materials, technologies, and applications emerging at a rapid pace. Understanding both the foundational technology families and the universal workflow empowers users to navigate this complex landscape effectively. Whether you’re a seasoned professional or just starting your journey into additive manufacturing, each stage presents unique challenges and opportunities for innovation. Which stage of the 3D printing process do you find most fascinating or challenging? What insights or tips do you have for navigating the different steps? We invite you to share your experiences and thoughts in a comment below or connect with us on ourLinkedIn,Facebook, andTwitter pages! Don’t forget to sign up for our free weeklyNewsletter here to get the latest 3D printing news delivered straight to your inbox! You can also find all our comprehensive videos and tutorials on our dedicatedYouTube channel for deeper insights into this transformative technology.