
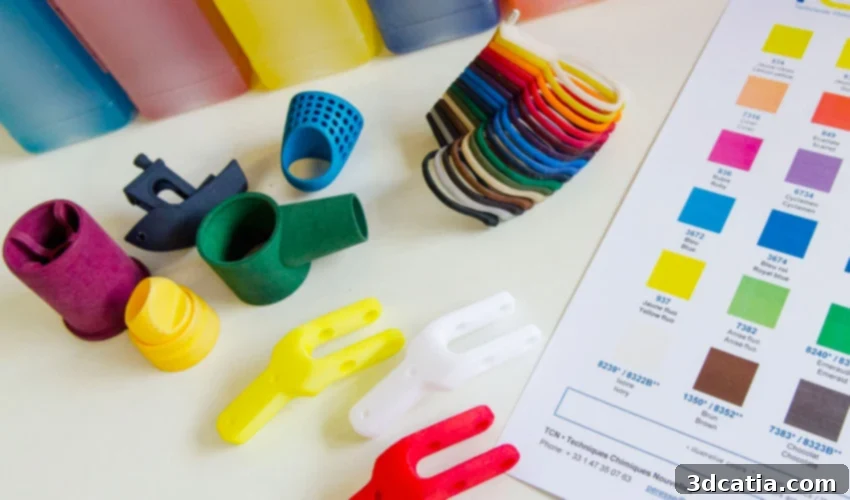
Mastering 3D Print Aesthetics: A Comprehensive Guide to Post-Processing for Vibrant Colors and Special Finishes
Additive manufacturing has revolutionized product development, offering unparalleled design freedom and customization opportunities that were once unimaginable with traditional production methods. However, the raw output from a 3D printer often falls short of the desired aesthetic and functional finish. While the technology excels at intricate geometries, not all 3D printers possess the inherent capability to produce multi-color parts or components with specialized surface textures and metallic lusters directly off the build plate. This is precisely where advanced post-processing systems become indispensable tools, transforming functional prototypes and end-use parts into refined models with the exact visual and tactile appearance required. We’ve previously explored the basics of post-processing in 3D printing, covering fundamental techniques like cleaning and surface finishing. Building upon that foundation, this comprehensive guide delves specifically into post-processing methods dedicated to adding color, enhancing surface aesthetics, and achieving sophisticated special finishes for 3D printed parts. Understanding these techniques is crucial for anyone looking to elevate their 3D prints beyond their initial manufactured state, whether for visual appeal, enhanced durability, or specific functional requirements.
In this detailed exploration, we will address not only the creation of stunning full-color 3D printed parts but also the advanced post-processing techniques available to achieve impressive metallic finishes. Our focus will be on three primary methods that offer distinct approaches to applying color or special surface effects: painting, dyeing, and plating. Each method offers unique advantages and is typically more suitable for certain materials, 3D printing technologies, and desired outcomes. Regardless of the chosen surface treatment, it is almost always recommended to perform certain preparatory steps. This initial preparation is critical to ensure that the printed models have a smooth, uniform finish, free from any imperfections, layer lines, or roughness that might compromise the final appearance. Achieving a pristine, uniform surface through sanding, filling, or other finishing techniques creates the ideal canvas upon which to apply color and other special finishes, guaranteeing a professional and high-quality end result.
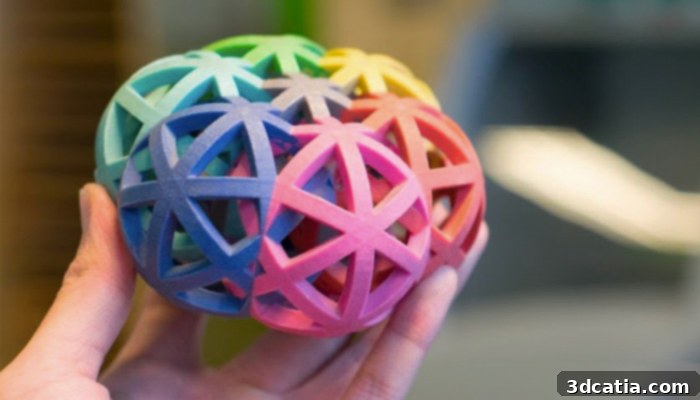
Before applying color to the parts, it is recommended to perform the appropriate post-processing to achieve a smooth and uniform surface
Painting 3D Printed Parts: A Versatile Approach to Color
Painting is perhaps the most accessible and versatile post-processing method for adding color and detail to 3D printed parts, allowing for immense creative freedom and precise control over the final aesthetic. When it comes to applying paint, users typically choose between two primary methods: hand-painting with brushes or applying paint with spraying tools. Hand-painting with brushes, often using acrylic paints, offers a more cost-effective solution, especially for smaller batches or intricate details. This technique demands significant time and a steady hand to achieve a professional finish, but its main advantage lies in the ability to combine a multitude of shades and create highly detailed, multi-colored pieces, making it ideal for artistic models, miniatures, and prototypes requiring specific visual segmentation. Artists can blend colors, create gradients, and add fine textures that are difficult to achieve with other methods.
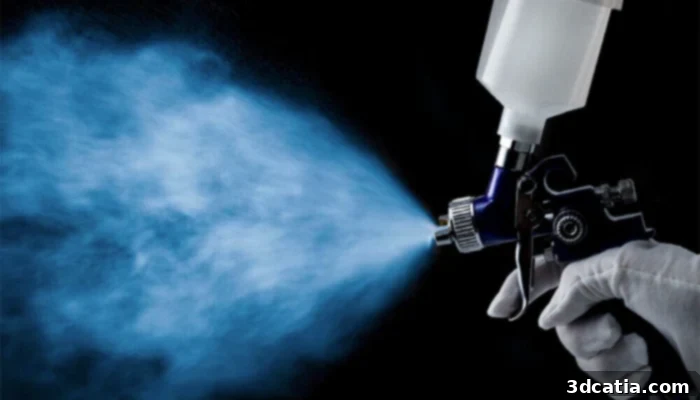
On the other hand, using spray paint or professional spray guns provides a much faster and more uniform coating over the entire surface of the parts. This technique is widely adopted across various manufacturing industries, including traditional machining, due to its efficiency and ability to produce smooth, consistent finishes. For successful spray painting, it is advisable to securely clamp the part with wire or place it on a stable support to ensure all surfaces are accessible and to prevent smudges. Position the spraying tool at a consistent minimum distance, typically around 15-20 cm from the model, and apply the paint in even, sweeping motions until the entire surface is covered. Multiple thin coats are always preferable to a single thick coat, as this prevents drips, ensures better adhesion, and results in a more durable finish. Proper ventilation is also crucial when using spray paints due to fumes.
These two methods, while distinct, can also be used complementarily. Many professionals begin with a general spray application for a base coat and overall uniformity, then transition to brushes for adding finer details, shading, or intricate designs. Following the paint application, a subsequent varnish or clear coat can be applied. This step serves multiple purposes: it protects the paint from scratches and wear, enhances durability, and allows for control over the final sheen, whether a glossy, satin, or matte finish is desired. However, applying varnish will naturally extend the overall turnaround time for the parts due to additional drying and curing stages. A significant consideration when painting is that the paint coating is purely superficial; it adheres to the surface but does not penetrate the material. Consequently, if the painted part is scratched, chipped, or subjected to significant wear, the original color of the underlying 3D printed material will be exposed. Furthermore, it’s important to account for the thickness of the applied layers: multiple coats of paint and varnish will incrementally increase the overall dimensions of the part, which could be a critical factor for precision components or assemblies.
Dyeing 3D Printed Parts: Achieving Deep and Durable Color
Dyeing represents a sophisticated post-processing method for 3D printing, offering a distinct advantage over painting by embedding color much more deeply into the material. Unlike painting, which applies a surface layer, dyeing saturates the material itself with pigment, resulting in models with exceptionally vivid, uniform, and durable colors. This deep penetration inherently prevents issues such as peeling, chipping, or scratching of the color, as the dye becomes an integral part of the printed object. Furthermore, because no additional outer layer is applied, the original dimensions and fine details of the 3D printed part are perfectly preserved, respecting the intricate design of the piece. It is important to note that this advanced coloring technique is primarily compatible with specific powder bed fusion 3D printing technologies and their associated polymers. This includes processes such as Selective Laser Sintering (SLS), Multi Jet Fusion (MJF), and Selective Absorption Fusion (SAF), among others. Consequently, the most commonly used compatible materials for dyeing are highly porous polymers like TPU, PA11, PA12, and Alumide (a nylon-based material infused with aluminum powder), which readily absorb the dye.
The dyeing process typically involves immersing the meticulously cleaned and prepared 3D printed parts into a heated dye bath. The temperature of the bath, the concentration of the dye, and the immersion time are critical parameters that are carefully controlled to achieve the desired color saturation and consistency. As the parts reside in direct contact with the hot, pigmented solution, the dye molecules deeply penetrate the porous structure of the 3D printed layers. This penetration extends even into the most intricate and inaccessible recesses of the model, ensuring a truly vibrant and uniform finish regardless of the part’s geometric complexity. After the desired color is achieved, the parts are removed from the bath, rinsed thoroughly to remove any excess dye from the surface, and then carefully dried. An essential factor to consider for successful dyeing is the initial color of the material used. Dyeing white 3D printed parts, where the pure pigment can easily permeate and transform the surface, will yield different results than dyeing parts that are initially gray or have another base color. The existing base color will influence the final hue and vibrancy, requiring adjustments in dye selection and concentration to achieve the intended result. Specialized dyeing systems, such as those offered by DyeMansion, have been developed to automate and optimize this process, providing precise color matching and consistent quality for industrial applications.
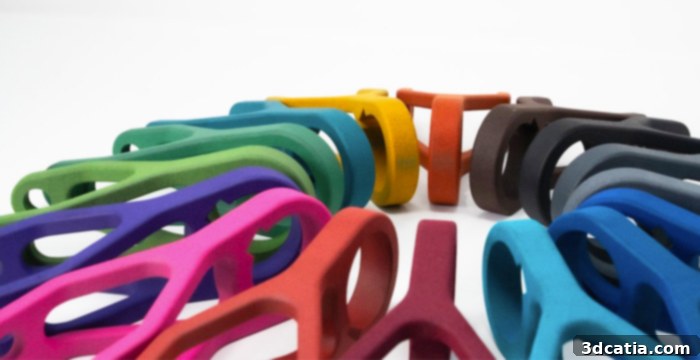
In the dyeing process, the pigment penetrates the part to give it a purer color (photo credits: Stratasys / DyeMansion)
Plating 3D Printed Parts: Achieving Premium Metallic Finishes
Plating is an advanced post-processing technique used to apply a thin, durable layer of metal onto the surface of 3D printed parts, primarily to achieve a shiny, metallic finish. This process allows manufacturers to create parts with the aesthetic and, in some cases, the functional properties of metal, even when the underlying component is 3D printed from polymers, ceramics, or other non-metallic materials. The most commonly chosen plating finishes include gold, silver, nickel, copper, and chrome, each offering distinct visual characteristics and performance benefits. However, a wider array of options is available, including more specialized processes like electroplating, electroless plating, and vacuum vapor deposition (PVD/CVD), to cater to specific industrial and aesthetic demands. The process itself can vary significantly depending on the desired metal and the base material of the 3D print.
One of the most common approaches, especially for producing a high-quality metallic sheen, involves preparing a uniform surface and then applying a metal layer through various methods. For instance, electroplating requires the part’s surface to be electrically conductive. If the 3D printed part is made from a non-conductive polymer, it must first undergo a surface activation process, typically involving a sensitizer and an activator (often palladium), followed by an electroless plating step (e.g., electroless nickel or copper) to create a conductive base layer. Once conductive, the part is immersed in an electrolytic bath containing metal ions, and an electric current is passed through, causing the metal ions to deposit uniformly onto the surface. This creates a strong, aesthetically pleasing, and often highly functional metallic coating. Other methods available include tin plating, copper plating, and various forms of vacuum deposition where metal vapor is condensed onto the part’s surface in a vacuum chamber, resulting in extremely thin, highly adherent coatings. Specialized techniques like cold spray or metal spray can also deposit metal particles onto the surface for a different type of metallic finish, often used for repair or wear resistance.
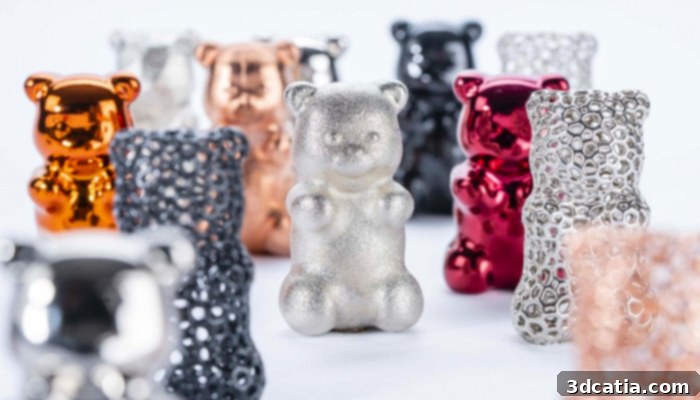
Pieces with different metallic and shiny finishes (photo credits: Metalizz)
The benefits of plating extend beyond mere aesthetics. A metallic coating can significantly enhance the durability and strength of a 3D printed part, providing increased wear resistance, corrosion protection, and improved electrical conductivity. This makes plated parts suitable for a wide range of applications, from intricate jewelry and decorative items to functional components requiring electromagnetic interference (EMI) shielding or improved thermal management. The choice of plating material dictates the specific properties imparted; for example, nickel offers hardness and corrosion resistance, while gold provides excellent conductivity and a luxurious finish. Proper surface preparation, including thorough cleaning and often a degree of surface smoothing (e.g., sanding or vapor polishing), is paramount to ensure optimal adhesion and a flawless final appearance. Plating transforms ordinary 3D prints into premium, high-performance parts, bridging the gap between plastic and metal capabilities.
The world of 3D printing post-processing offers incredible avenues for enhancing the aesthetic and functional properties of your printed parts. Whether you opt for the artistic freedom of painting, the deep, durable colors of dyeing, or the premium metallic luster and performance benefits of plating, each technique presents unique advantages. By understanding these different methods and their specific compatibilities with various 3D printing technologies and materials, you can select the most appropriate approach to achieve your desired outcome. Post-processing is not just an optional step; it’s a critical phase that elevates raw 3D prints into finished products that meet high standards of quality, aesthetics, and performance.
What do you think of these diverse post-processing techniques for coloring and special finishes in 3D printing? We’d love to hear your experiences and insights! Share your thoughts in a comment below or connect with us on our social media channels: LinkedIn, Facebook, and Twitter. Don’t forget to sign up for our free weekly Newsletter here to get the latest 3D printing news delivered straight to your inbox! You can also find all our engaging videos and tutorials on our YouTube channel for more visual guides and insights into the world of additive manufacturing.
*Cover Photo Credits: TCN