
Mastering 3D Print Quality: A Comprehensive Guide to Preventing Curling, Warping, and Delamination
Additive manufacturing, a revolutionary suite of technologies, has fundamentally transformed product development and production. It enables the creation of complex parts with remarkable speed and material efficiency, often surpassing the capabilities of traditional subtractive manufacturing methods. However, like any advanced technology, 3D printing is not without its challenges. To ensure successful outcomes, numerous parameters must be meticulously controlled to avert common printing errors that can compromise part quality and structural integrity. Among the most frequently encountered issues are curling, warping, and delamination – phenomena that, while distinct, are closely related by their underlying causes and impact on the final printed object. Understanding these anomalies is the first step toward producing flawless 3D prints.
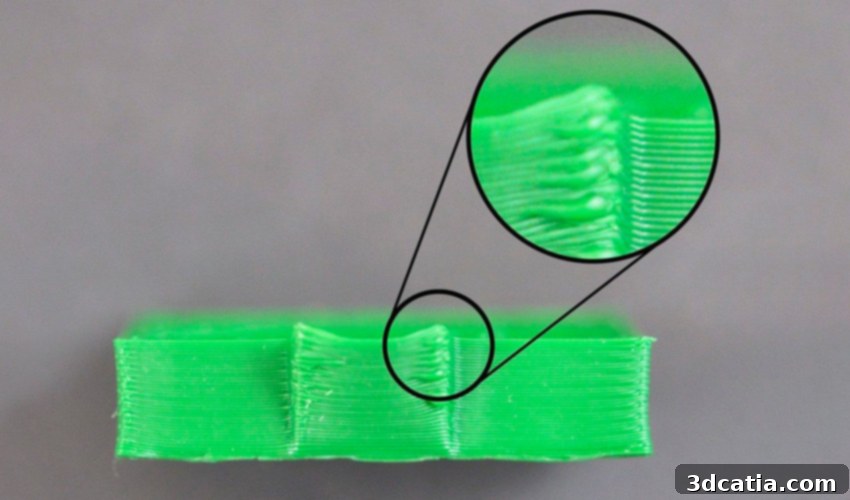
Let’s delve into the specific definitions and characteristics of these frustrating print failures. **Curling**, often referred to as rough corners or overextension on corners, primarily manifests as a deformation of the *upper layers* of a 3D-printed object. This distortion is particularly noticeable at the edges or corners of the print, causing them to lift upwards and away from the intended geometry. If left unaddressed, curling can lead to aesthetically flawed parts and, in severe cases, functional defects. It’s a clear indicator of localized stress within the print.
**Warping**, a more widely recognized issue, shares similarities with curling but affects a different region of the print. Warping occurs when the *lower layers* of the part, specifically those in contact with the print bed, contract unevenly and lift, causing the entire base of the print to detach or curl away from the build plate. This can lead to a print failing entirely, becoming distorted, or simply losing its dimensional accuracy. Both curling and warping are manifestations of internal stress, but their locations on the print differ significantly.
Beyond these two, **delamination** represents an extreme progression of layer separation. Characterized by the splitting or separation of various printed layers throughout the object, delamination indicates poor adhesion between successive layers. While warping and curling often originate from issues at the print bed or outer edges, delamination can occur anywhere within the Z-axis, leading to weak, brittle, and ultimately failed parts. All three issues fundamentally stem from thermal stresses within the material during the printing process. Understanding these closely related but distinct notions is crucial for any 3D printing enthusiast or professional.

The curling phenomenon leads to deformation of the part, particularly at its edges.
Understanding the Root Causes: Thermal Stress in 3D Printing
At its core, the primary cause of curling, warping, and to a significant extent, delamination in 3D printing is an excessive temperature difference between the extruded material and its immediate surroundings. When a thermoplastic filament is melted and extruded through a hot nozzle, its temperature is typically very high – for instance, around 200°C for common PLA filament. As this molten material is deposited onto the print bed or previous layers, it rapidly cools down to the ambient temperature of the printer’s environment. This sudden cooling induces thermal contraction. If this contraction occurs unevenly or too quickly, it creates internal stresses within the printed part. The greater the temperature disparity, the more pronounced these stresses become, leading to the material pulling inward and upwards, manifesting as curling or warping.
This temperature-induced stress is particularly prevalent in Fused Deposition Modeling (FDM) 3D printing, where molten plastic is laid down layer by layer. The hot filament solidifies almost instantly upon leaving the nozzle, and the subsequent layers are printed on top of an already cooling structure. The continuous cycle of heating and cooling creates a battle between adhesion and contraction. This issue is not exclusive to FDM; it also occurs with technologies like Directed Energy Deposition (DED), especially when working with metals. DED often involves heating metal to extreme temperatures, creating an even more significant temperature difference between the molten metal and the previously deposited, cooling part. This amplified thermal disparity can lead to severe residual stresses and distortions, making temperature control even more critical.
The Critical Role of Material Properties
Different 3D printing materials exhibit varying coefficients of thermal expansion (CTE), which dictate how much they expand when heated and contract when cooled. Materials with a high CTE, such as ABS and Nylon, are much more susceptible to warping and curling because they undergo significant dimensional changes with temperature fluctuations. When these materials cool down from their extrusion temperature, they shrink considerably. If one part of the print cools faster than another, the uneven contraction creates strong internal forces that pull the edges upwards. Materials like PLA have a lower CTE and a lower glass transition temperature, making them inherently less prone to these issues. Understanding your filament’s thermal properties is paramount to successful printing.
Environmental Factors and Print Settings
Beyond the material itself, external factors and specific printer settings play a crucial role. A cold ambient room temperature or sudden drafts from an open window can exacerbate the problem by accelerating the cooling process, particularly at the edges of a print. Similarly, incorrect print settings, such as an overly high print speed for a particular material, inadequate bed adhesion, or insufficient initial layer squish, can all contribute to these deformation issues. The interplay between material properties, environmental conditions, and printer settings dictates the likelihood and severity of curling, warping, and delamination.
Comprehensive Solutions to Prevent 3D Printing Curling and Deformations
As the core issue lies with temperature differences, effective temperature control is the most critical strategy to prevent curling, warping, and delamination. Here’s a detailed approach:
Mastering Temperature Control
Optimizing Extrusion Temperature
Finding the optimal extrusion temperature for your filament is essential. For materials like ABS, recommended extrusion temperatures typically range between 230°C and 260°C. Printing within this ideal window helps to ensure proper material flow and layer adhesion without introducing excessive heat that could lead to subsequent cooling stress. Setting the temperature too low can result in poor layer bonding and under-extrusion, while too high can cause stringing, oozing, and contribute to curling by maximizing the temperature difference with the ambient air. Always refer to the filament manufacturer’s recommendations and fine-tune based on your specific printer and environment.
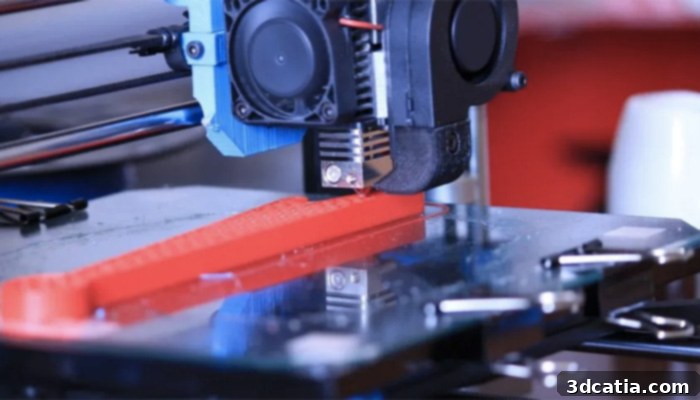
ABS can deform easily if printed in poor conditions due to its high thermal expansion (photo credits: Sculpteo).
The Importance of a Heated Print Bed
A heated print bed is a cornerstone in preventing warping and curling, especially for materials prone to shrinkage. By maintaining the base of the print at an elevated temperature, it significantly reduces the temperature gradient between the extruded material and the print surface. This allows the layers to cool more gradually and uniformly, mitigating rapid contraction and internal stresses. For ABS, a print bed heated to between 80°C and 130°C is often necessary. Without these conditions, ABS plastic can shrink by approximately 1.5% or even more, depending on the part’s size and geometry, leading to severe warping. In contrast, PLA, with its lower melting point (170-180°C) and reduced thermal expansion, often does not strictly require a heated bed, although a slightly warmed bed (around 40-60°C) can still improve first layer adhesion. PETG, similar to ABS in its thermal behavior, also greatly benefits from a heated bed to prevent warping and ensure optimal adhesion.
Utilizing Enclosures for Thermal Stability
Employing a closed or heated enclosure around your 3D printer is one of the most effective methods to combat curling and warping. An enclosure creates a stable, elevated temperature environment around the print, dramatically reducing the temperature difference between the part and the surrounding air. This constant temperature minimizes thermal shock and uneven cooling. Furthermore, a closed enclosure acts as a protective barrier, shielding the print from ambient air currents, drafts, and sudden temperature drops, all of which can induce rapid cooling and stress. If your 3D printer lacks a built-in enclosure, you can opt for a readily available printing cabinet or even construct a DIY solution to achieve similar thermal benefits. For materials like ABS, Nylon, and Polycarbonate, an enclosure is almost indispensable for successful prints.
Strategic Print Settings Adjustment
Perfecting the First Layer
The quality of the first layer is paramount. It must adhere perfectly to the build plate to provide a stable foundation for the rest of the print. This involves precise bed leveling, accurate Z-offset calibration, and ensuring the nozzle is at the correct distance from the bed to achieve optimal “squish.” A slightly slower first layer print speed and a slightly wider first layer extrusion width can also significantly improve adhesion and prevent early detachment, which is a precursor to warping.
Balanced Cooling Fan Settings
While cooling fans are essential for solidifying molten filament, particularly for intricate details, overhangs, and bridges, their settings must be carefully balanced. Excessive cooling, especially on initial layers or with materials like ABS and Nylon, can exacerbate rapid contraction and introduce thermal stress, directly contributing to curling and delamination. For high-temp materials, it’s often recommended to reduce or even turn off the cooling fan for the first few layers, gradually increasing its speed as the print progresses. PLA generally benefits from consistent cooling, but even then, fan speed should be adjusted to prevent over-cooling.
Adjusting Layer Height and Print Speed
Reducing the layer height can encourage better inter-layer adhesion by allowing more heat transfer between layers and reducing the individual layer’s mass that needs to cool. Thinner layers also mean less material contracting per layer, distributing stress more evenly. Additionally, for materials prone to warping, a slightly slower overall print speed can allow each layer more time to cool gradually, further minimizing thermal stress. Conversely, printing too slowly can sometimes lead to heat creep or oozing, so a balanced approach is necessary.
Employing Adhesion Aids: Brims, Rafts, and Skirts
These are invaluable tools in your slicing software to enhance print bed adhesion and counteract warping.
- **Brims:** These are single-layer perimeters printed around the base of your part, expanding its surface area in contact with the print bed. This increased adhesion surface helps anchor the part, effectively resisting lifting and curling at the corners. Brims are easily removed after printing.
- **Rafts:** A raft is a disposable base layer printed underneath your part, providing a strong, flat foundation that adheres robustly to the print bed. The part is then printed on top of the raft. Rafts are particularly useful for parts with a small footprint, poor bed adhesion, or those printed with materials highly prone to warping.
- **Skirts:** While primarily for priming the nozzle and ensuring consistent flow before the actual print begins, a skirt can also create a small thermal buffer zone around the print, indirectly helping with temperature stability near the base.
Enhancing Print Bed Adhesion
Beyond temperature and slicer settings, specialized adhesion promoters can significantly improve the bond between your print and the build plate. These include:
- **PVA Glue Sticks:** Simple, effective, and washable, glue sticks create a tacky surface that helps many filaments adhere.
- **Hairspray:** Specific brands of hairspray (often those with strong hold and minimal additives) can provide a reliable adhesive layer.
- **Specialized Adhesives:** Products like Magigoo or 3D Gloop are formulated to provide superior adhesion for specific filament types, drastically reducing warping.
- **Build Plate Surfaces:** The choice of build plate material also impacts adhesion. Glass, PEI sheets, Garolite, and various proprietary build surfaces each offer different adhesion properties for various filaments. Ensuring your build surface is clean and free of oils or dust is always critical.
Choosing the Right Filament for the Application
Sometimes, the simplest solution is to select a filament that is less prone to warping for your specific application, especially if your 3D printer lacks features like a heated enclosure. PLA is an excellent example of a material that is generally easy to print and less susceptible to these thermal issues. If you require the strength and durability of materials like ABS, investing in the necessary environmental controls (like an enclosure and heated bed) becomes essential. Always consider the material’s properties and your printer’s capabilities when choosing filament for a project.
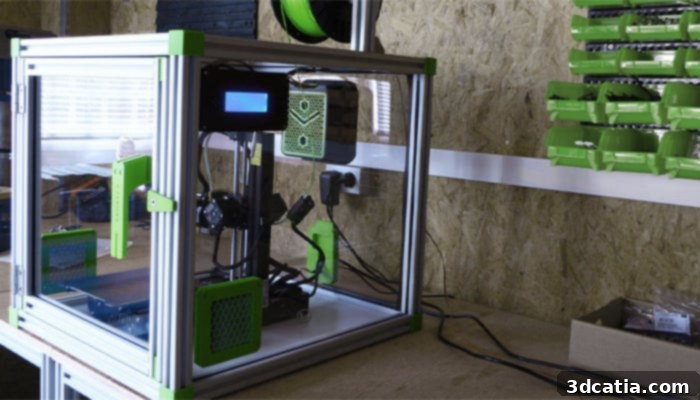
A 3D printer can be covered with a printing box or enclosure to create a stable thermal environment and protect it from drafts (photo credits: Alveo3D).
Advanced Tips and Troubleshooting
For persistent issues, consider these advanced troubleshooting steps:
- **Calibrate Extruder E-steps:** Ensure your extruder is pushing out the correct amount of filament, as under-extrusion can worsen layer adhesion.
- **Monitor Ambient Humidity:** While not directly causing curling, high humidity can affect some hygroscopic filaments (like Nylon), leading to bubbles during extrusion which can compromise layer strength and contribute to delamination.
- **Firmware Settings:** Some advanced firmware settings can allow for fine-tuning of thermal management or even provide active chamber heating control.
- **Print Orientation:** Sometimes, reorienting a part on the build plate can change how stresses are distributed, reducing the likelihood of warping in critical areas.
Conclusion: Achieving Flawless 3D Prints
Curling, warping, and delamination are common frustrations in the world of 3D printing, but they are not insurmountable. By understanding their root cause – thermal stress due to uneven cooling – and implementing a combination of strategic solutions, you can dramatically improve your print success rate. Prioritizing temperature control through optimized extrusion and bed temperatures, utilizing printer enclosures, and carefully adjusting print settings like layer height, fan speed, and adhesion aids are key. Moreover, selecting the right material for your application and printer’s capabilities will pave the way for consistently high-quality, dimensionally accurate 3D prints. With patience, experimentation, and a systematic approach to troubleshooting, you can master these challenges and unlock the full potential of your additive manufacturing journey.
Have you ever experienced curling, warping, or delamination in your 3D printing endeavors? We’d love to hear about your experiences and successful solutions! Share your insights in a comment below or connect with us on our LinkedIn, Facebook, and Twitter pages! Don’t forget to sign up for our free weekly Newsletter here to receive the latest 3D printing news straight to your inbox! You can also find all our engaging videos on our YouTube channel.
*Cover Photo Credits: Simplify3D