

Unlock the Future of 3D Printing: Remote Control and Smart Automation with Home Assistant and OctoPrint
A mere century ago, the concept of unlocking your front door with a smartphone or issuing voice commands to a digital assistant like Alexa or Siri to control your home’s lighting and music would have been considered pure science fiction. Today, these remarkable technologies are not just futuristic dreams; they are integral parts of our daily lives, heralding an era of unprecedented remote control and intelligent convenience. This transformative wave of smart technology is sweeping across various domains, and the world of 3D printing is certainly no exception. In fact, it’s embracing this evolution with open arms. That’s precisely why we’re delving into the revolutionary integration of Home Assistant for 3D printers, seamlessly powered by OctoPrint. This powerful combination empowers users to effortlessly monitor, manage, and optimize their 3D printing processes directly from their connected devices, regardless of where they are. Imagine the freedom and efficiency this brings to both hobbyists and professionals alike, transforming the traditional, often hands-on, approach to 3D fabrication into a streamlined, automated, and truly smart experience.
At its core, Home Assistant is a robust, open-source home automation platform meticulously designed for controlling and monitoring a diverse array of systems within any home or office environment. Its capabilities span a wide spectrum, encompassing everything from smart lighting and electronic appliances to advanced heating systems, secure door locking mechanisms, and much more. The true magic, however, begins when you extend its reach to your 3D printing setup. By simply adding the OctoPrint integration, users gain the ability to effortlessly synchronize their 3D printer with their entire smart home ecosystem. This integration ensures that the 3D printer, along with all its intricate functions and operational parameters, can be centrally controlled and monitored over a unified network. This means no more tethering yourself to your printer; instead, you gain the power to oversee and manage your prints from anywhere, turning your 3D printer into a truly smart, connected device that perfectly complements the modern automated living space.
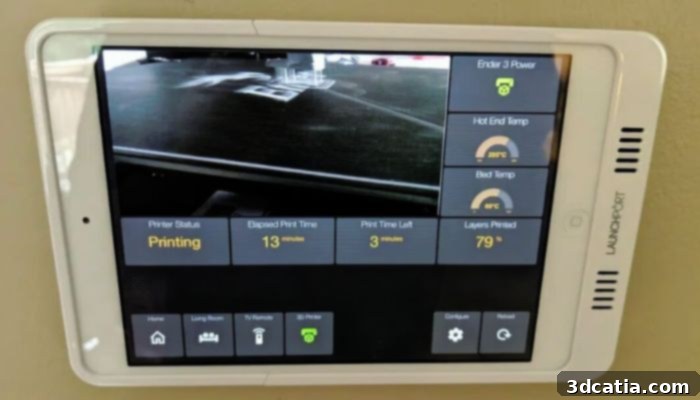
An installed Home Assistant monitoring a 3D printer (Credits: Reddit)
Unlocking Smart Fabrication: The Powerful Advantages of Linking Home Assistant to Your 3D Printer
The most significant and immediately apparent advantage of integrating Home Assistant with your 3D printer is the unparalleled capability for remote operation. This isn’t just about turning the printer on or off from another room; it’s about a comprehensive suite of features that redefine how you interact with your fabrication projects. But what precisely does this remote control entail? Beyond monitoring rudimentary printer functions, Home Assistant provides a rich stream of real-time data, offering invaluable insights into your printing process. Users can instantly check the current printing status, receive accurate estimates for the time remaining until completion, and even track the precise percentage of work already accomplished. This level of transparency allows for proactive management and reduces the need for constant physical presence next to the machine.
The benefits extend further with the option to connect a camera directly to your 3D printer. This integration enables live video monitoring, allowing you to visually inspect your print’s progress from anywhere in the world. Whether you’re at the office, on vacation, or simply in another part of your house, you can keep a watchful eye on your fabrication. This visual feedback is crucial for identifying potential issues like spaghetti messes, layer shifts, or filament runouts early, giving you the opportunity to intervene before significant material or time is wasted. Additionally, a camera setup can be leveraged for creating captivating time-lapse videos of your prints, showcasing the entire creation process from start to finish. This capability adds a creative dimension to your 3D printing endeavors, perfect for sharing your work with communities or simply documenting your projects.
Beyond passive monitoring, users can actively interact with their 3D printer through the Home Assistant interface. This includes fundamental controls such as initiating new prints, pausing ongoing operations, or even completely canceling a print if an issue arises. The true power unfolds when users delve into creating a series of personalized configurations and automations within Home Assistant. This customization dramatically expands the range of remote control possibilities. For instance, you can remotely preheat the print bed and extruder to the optimal temperature even before you arrive home, ensuring your printer is ready to start as soon as you are. Imagine starting a print job while you’re still commuting, or pausing it instantly if you receive a notification about a detected anomaly. Furthermore, with advanced setups, you can configure automations to control cooling fans, enclosure lighting, or even trigger emergency shutdowns based on specific sensor readings. This level of intelligent control not only enhances convenience but also significantly improves print reliability and safety, making your 3D printing workflow more efficient and less prone to manual errors. Home Assistant effectively transforms your 3D printer from an isolated machine into an integral, intelligent component of your connected smart ecosystem.
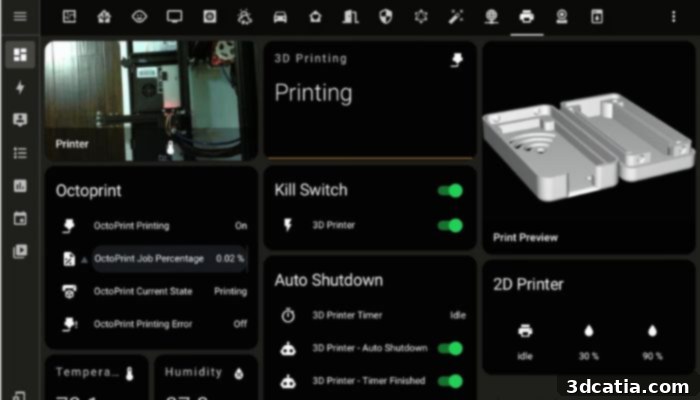
An example of a visualization while a 3D printer is working (Credits: Harshit’s Blog)
Seamlessly Integrating Your 3D Printer into Your Smart Home Ecosystem
The journey to a smarter 3D printing experience begins with a crucial preparatory step: the installation and configuration of OctoPrint. This open-source web interface acts as the indispensable bridge, linking your physical 3D printer to your digital control devices and, subsequently, to Home Assistant. OctoPrint, typically run on a dedicated mini-computer like a Raspberry Pi, provides a robust platform for local printer control, file management, and monitoring. Once OctoPrint is successfully installed, configured, and firmly connected to your 3D printer – usually via a USB cable – it effectively transforms your printer into a network-enabled device. This means that your printer’s presence will then be detectable on your local network, ready to be discovered and integrated by other smart platforms. When OctoPrint is operational and linked to your machine, it will appear as a new, discoverable device within Home Assistant’s main menu, signaling its readiness for integration. The final step in this initial phase is simply accepting the link through OctoPrint’s interface, which then firmly establishes the connection between your 3D printer and your Home Assistant installation, laying the groundwork for advanced control.
With OctoPrint acting as the intermediary, it’s now time to integrate the 3D printer into Home Assistant itself. This critical integration process can generally be accomplished through one of two distinct methods, each offering varying levels of functionality and complexity. The first method, often referred to as native configuration, is the more straightforward and accessible option. This approach is designed for ease of use, requiring minimal technical knowledge, and follows an intuitive, guided process within the Home Assistant interface. While it offers essential monitoring and basic control functionalities, its range of features is somewhat limited compared to the alternative. It’s perfect for users who primarily seek remote print status, basic start/stop commands, and temperature readings without delving into deep customization.
For those seeking a more powerful, customizable, and feature-rich integration, the second method involves leveraging the MQTT plugin for OctoPrint. MQTT (Message Queuing Telemetry Transport) is a lightweight messaging protocol specifically designed for IoT (Internet of Things) devices, making it exceptionally efficient for communicating data between your 3D printer (via OctoPrint) and Home Assistant. While configuring the MQTT plugin requires a slightly higher degree of technical understanding and typically involves setting up an MQTT broker (a central hub for message distribution) on your network, the benefits far outweigh the initial effort. This advanced configuration unlocks a wealth of features for your 3D printer that are simply not available with the native plugin. MQTT allows for granular control over almost every aspect of your printer, enabling you to access specific sensor data, implement complex automations, and even trigger events based on real-time printer metrics. Among these advanced features is enhanced access to a connected camera for superior remote monitoring, often with more control over streaming options and recording capabilities. This method transforms your 3D printer into a truly intelligent device, capable of deep interaction with your entire smart home ecosystem.
To successfully integrate your 3D printer into Home Assistant, you essentially need three core components. First, you’ll require a dedicated computer or, more commonly and cost-effectively, a Raspberry Pi. This device will serve as the host for both your Home Assistant installation and, crucially, your OctoPrint instance. Second, you need your 3D printer, which must be fully operational and already connected to and managed by OctoPrint. This establishes the necessary digital bridge to your physical machine. Finally, you’ll need a working Home Assistant installation running on your chosen host device. Once these three fundamental components are in place, you can proceed to link your 3D printer to your Home Assistant setup using either the user-friendly native integration or the more powerful and customizable MQTT configuration, depending on your desired level of control and technical proficiency. For comprehensive guides and to explore the OctoPrint integration for Home Assistant further, you can click HERE to visit the official Home Assistant documentation.
What are your thoughts on utilizing Home Assistant to remotely manage and automate your 3D printers? Do you foresee this becoming a standard in the 3D printing community, or do you have any unique automation ideas you’ve implemented? We’d love to hear your insights and experiences! Feel free to let us know your comments below or engage with us on our LinkedIn or Facebook pages! Moreover, to stay on the cutting edge of additive manufacturing, don’t forget to sign up for our free weekly Newsletter, ensuring you receive the very latest 3D printing news directly to your inbox. You can also explore all our informative and engaging videos on our dedicated YouTube channel for visual insights into the world of 3D printing.
*Cover Photo Credit: Home Assistant