
Mastering 3D Print Quality: A Comprehensive Guide to Eliminating Stringing and Oozing
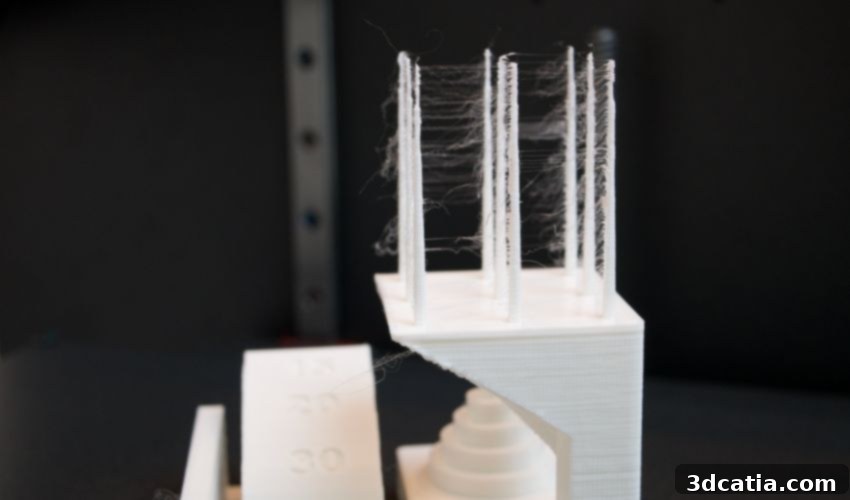
In the dynamic world of 3D printing, achieving flawless results is the ultimate goal for enthusiasts and professionals alike. However, the journey often presents a myriad of challenges, and one of the most common and frustrating issues users encounter is stringing. This phenomenon manifests as unwanted, extremely thin plastic threads or wisps that appear on the 3D printed part, often resembling a spider’s web or fine hairs. These unsightly strings not only detract from the aesthetic appeal of a print but can also compromise its dimensional accuracy and functionality, leading to wasted material and valuable time.
Stringing is a particularly prevalent problem in Fused Deposition Modeling (FDM) 3D printing, where melted filament is extruded layer by layer. Unlike some other print defects, there are currently no automated machine applications that can effectively remove these threads post-printing. Consequently, users are often left with the tedious task of manual removal, which can be time-consuming and challenging, especially on complex geometries or parts with numerous small details. Understanding the root causes of stringing and implementing effective preventative measures is crucial for elevating your 3D printing success. In this comprehensive guide, we delve into the mechanics of why stringing occurs and provide actionable strategies to troubleshoot and eliminate this common 3D printing headache.
Understanding the Mechanism: How 3D Printing Stringing Occurs
At its core, stringing occurs when melted filament continues to ooze or drip from the printer’s nozzle while the extruder is traveling through open air, moving from one point of the print to another without actively extruding material. This is a direct consequence of the filament’s fluidity at printing temperatures and the residual pressure within the hot end. To better visualize this, consider the common experience of using a hot glue gun: even after releasing the trigger, a thin strand of melted glue often continues to pull from the nozzle. This is due to the inherent stickiness of the molten material and the lingering pressure inside the gun. The same principle applies to your 3D printer.
When the extruder finishes printing one section of an object and needs to move to another, the filament inside the nozzle is still hot and under pressure. If this pressure isn’t adequately relieved, or if the material is too fluid, a small amount of plastic will continue to escape. As the nozzle moves, this escaping plastic stretches into a fine thread, which then solidifies in mid-air, attaching itself to different points on your print. Factors such as the filament diameter (e.g., 1.75mm) and nozzle size (e.g., 0.4mm) create a system where pressure naturally builds, making it imperative to manage this pressure effectively to prevent oozing and subsequent stringing during non-print moves.
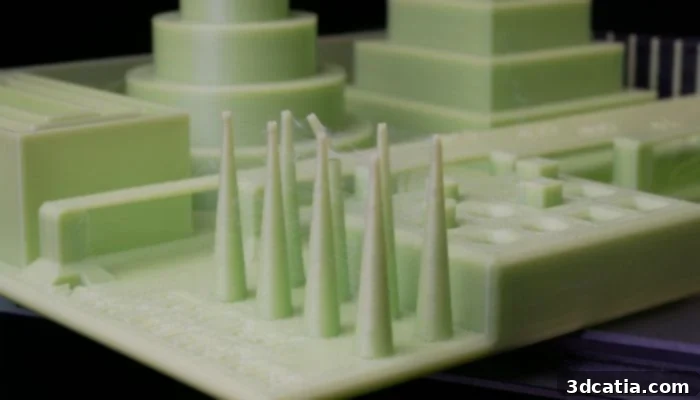
Photo Credits: Elliot Saldukaite/3Dnatives
The constant innovation in 3D printing technology, particularly in FDM processes, means that while capabilities are expanding rapidly, so too are the nuances of troubleshooting. Stringing is often a symptom of incorrect slicer settings that fail to account for the specific properties of the chosen filament and the printer’s mechanics. Fortunately, by systematically adjusting a few key parameters, you can significantly reduce or even eliminate these frustrating plastic cobwebs, ensuring cleaner, higher-quality 3D prints.
Effective Strategies to Combat Stringing in 3D Printing
To avoid the frustration of dealing with stringing, proactive adjustments to your 3D printer settings and maintenance routines are essential. Here are the most impactful strategies you can employ:
1. Optimizing Printing Temperature
Temperature is perhaps the most fundamental setting impacting filament behavior. The rule of thumb is simple: the hotter the filament, the more fluid it becomes, and consequently, the higher the likelihood of it oozing from the nozzle during travel moves. Conversely, a temperature that is too low can lead to insufficient melting, resulting in poor layer adhesion, clogs, and under-extrusion. The key lies in finding the “sweet spot” – the lowest possible temperature that still allows for smooth extrusion and strong layer bonding.
Always start with the manufacturer’s recommended temperature range for your specific filament. From there, if you observe stringing, try reducing the temperature in small increments (e.g., 5°C at a time). It’s crucial to perform a calibration print, such as a temperature tower, to systematically test different temperatures and visually identify the point where stringing is minimized without compromising print quality. General temperature guidelines for common filaments include: PLA (180-210 °C), ABS (210-250 °C), PETG (210-230 °C), PVA (160-190 °C), and TPU (220-240 °C). Remember that these are ranges, and individual printer setups and filament brands may require slight variations.
2. Fine-Tuning Movement and Travel Speed
The speed at which your extruder moves between non-printing points, known as travel speed, plays a significant role in stringing. If the travel speed is too slow, the heated filament has more time to ooze out of the nozzle while the extruder is in transit. Increasing the travel speed gives the molten plastic less opportunity to drip and form strings before the nozzle reaches its next extrusion point. A faster travel speed essentially shortens the “window of opportunity” for stringing to occur.
While increasing travel speed is beneficial for reducing stringing, it’s important to find a balance. Excessively high travel speeds can sometimes lead to other issues, such as ghosting or ringing on the print surface, or mechanical stresses on the printer itself. Experiment with your slicer’s travel speed settings, gradually increasing them until you notice an improvement in stringing without introducing new defects. Many slicers also offer advanced features like “Combing Mode,” which attempts to keep travel moves within the printed part’s boundaries whenever possible, or increasing travel speed only for non-print moves, further reducing stringing potential.
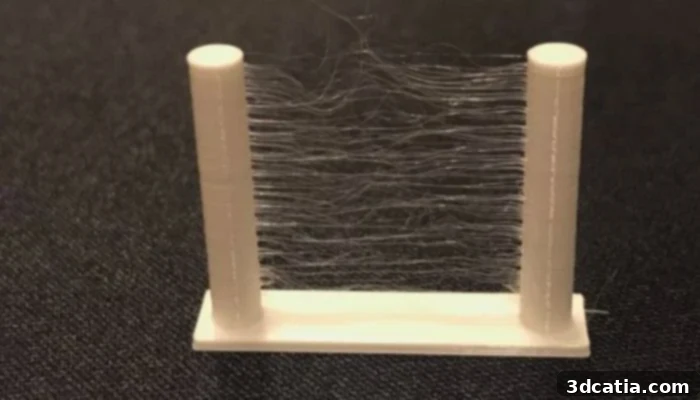
Photo Credits: Prusa
3. The Power of Retraction Settings
Retraction is arguably the most effective and widely used solution for stringing. This crucial slicer setting instructs the extruder motor to briefly pull back the filament a small, specific distance into the hot end *before* a travel move begins. This action relieves the pressure inside the nozzle and prevents molten plastic from oozing out. Once the extruder reaches the next point where printing is to resume, the filament is pushed back down to continue extrusion.
Think of the hot glue gun analogy again: if you could manually pull back the glue stick slightly every time you lift the gun, you would prevent those annoying threads. Retraction automates this process. Two primary parameters govern retraction: retraction distance and retraction speed.
- Retraction Distance: This specifies how far the filament is pulled back. Too little distance, and oozing will persist. Too much, and you risk creating clogs, grinding the filament, or causing air bubbles within the molten plastic, leading to inconsistent extrusion. Typical distances range from 0.5mm to 2mm for direct drive extruders and 3mm to 7mm for Bowden extruders, which require longer distances due to the longer path the filament travels.
- Retraction Speed: This dictates how quickly the filament is pulled back. A speed that’s too slow may not be effective enough to prevent oozing, while a speed that’s too fast can cause the filament to snap, stretch, or grind, leading to filament flow issues. Optimal speeds generally fall between 25mm/s and 60mm/s.
Most modern slicers have retraction enabled by default, but it often requires fine-tuning. Calibration prints designed specifically for retraction are invaluable here. You may also encounter related settings like “Z-Hop” or “Lift Z,” which slightly raises the nozzle during travel moves to prevent it from dragging across the print surface, further reducing stringing and surface artifacts.
4. Proper Nozzle and Filament Maintenance
Neglecting basic maintenance can significantly exacerbate stringing. A clean and undamaged nozzle is paramount. Any material residues, carbonized plastic, or even minor damage (like a burr or rough edge) inside or at the tip of the nozzle can create an uneven flow path, promoting oozing and string formation. Regularly inspect your nozzle for wear and tear, and perform cleaning procedures like a “cold pull” to remove internal debris. If the nozzle appears damaged, replace it promptly.
Perhaps even more critical is the condition of your filament. Many filaments, particularly PLA, PETG, and nylon, are hygroscopic, meaning they readily absorb moisture from the air. When moist filament is heated in the hot end, the absorbed water turns into steam, creating bubbles within the molten plastic. These bubbles can cause inconsistent extrusion, popping at the nozzle and ejecting tiny amounts of plastic during non-print moves, which then form strings. Printing with wet filament also leads to weaker parts, poor layer adhesion, and a degraded surface finish.
To combat this, always store your filament in a dry, sealed environment, ideally with desiccant packets. For severely moist filament, consider using a dedicated filament dryer box or a food dehydrator to dry it out before printing. This simple step can dramatically improve print quality and virtually eliminate stringing, among other issues.
5. Calibrating Fan Speed / Part Cooling
While less direct than retraction or temperature, appropriate part cooling can also help reduce stringing. By quickly solidifying the extruded plastic immediately after it leaves the nozzle, cooling minimizes the time it remains molten and susceptible to oozing during travel moves. For materials like PLA, which benefit greatly from cooling, ensuring your part cooling fan is operating effectively can make a noticeable difference.
However, it’s a balancing act. Excessive cooling, especially for materials like ABS and ASA, can lead to warping, cracking, or poor layer adhesion. For PLA and PETG, start with a fan speed of 50-100% after the first few layers. For ABS and other engineering filaments, cooling is often kept to a minimum or off to prevent thermal stress and cracking. Adjust cooling settings in conjunction with temperature to find the best compromise for your specific material and print.
Post-Printing: Dealing with Existing Strings
Despite your best efforts, some minor stringing might still occur, especially on very intricate models. As previously mentioned, there’s no automated solution for removal, so manual intervention is required. Fortunately, the thin nature of these strings often makes them relatively easy to remove.
- Bare Fingers: For very fine, wispy strings, simply rubbing them gently with your fingers can often remove them without leaving a trace.
- Tweezers or Craft Knife: For thicker or more stubborn strings, a pair of fine-tipped tweezers or a sharp craft knife (like an X-Acto knife) can be used to carefully snip them away. Exercise caution to avoid damaging the print surface.
- Heat Gun or Lighter: A very quick, controlled pass with a heat gun or even a lighter can melt away fine strings without affecting the main print. This method is particularly effective for highly detailed parts but requires extreme care to prevent melting or deforming the part itself. Test on a non-critical area first and apply heat sparingly.
- Sanding and Post-Processing: For prints that will undergo further post-processing (sanding, painting), minor stringing can often be removed during those steps.
Conclusion: Achieve Flawless 3D Prints
Stringing is a common hurdle in 3D printing, but it is by no means an insurmountable one. By understanding its underlying causes and systematically applying the troubleshooting strategies outlined above, you can significantly improve the quality and aesthetic appeal of your 3D prints. Remember that successful 3D printing often involves a degree of experimentation and calibration. Start by adjusting one setting at a time and conducting test prints to observe the impact of each change. Optimizing temperature, fine-tuning retraction settings, managing travel speeds, ensuring proper filament storage, and maintaining your printer’s nozzle are all crucial steps toward achieving consistently clean, string-free 3D prints. Embrace the calibration process, and you’ll unlock a new level of print quality and efficiency in your additive manufacturing endeavors.
Have you struggled with stringing? Let us know in a comment below or on ourLinkedIn,Facebook, and Twitter pages! Don’t forget to sign up for our free weeklyNewsletter here, the latest 3D printing news straight to your inbox! You can also find all our videos on ourYouTube channel.
*Cover Photo Credits: Elliot Saldukaite/ 3Dnatives