
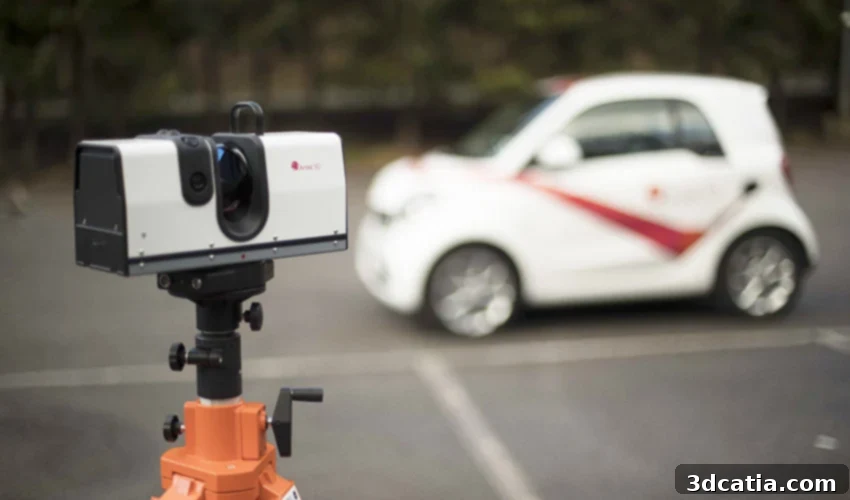
Artec Ray 3D Scanner Review: Mastering Large-Scale Precision with LiDAR Technology
Luxembourg-based manufacturer Artec 3D has firmly established itself as a leader in the development of cutting-edge portable 3D scanning solutions. Over the years, the company has introduced highly successful models like the versatile Eva, the high-resolution Space Spider, and the revolutionary, untethered Leo, each designed to meet diverse scanning needs from small objects to medium-sized artifacts. More recently, Artec 3D has significantly broadened its application spectrum by venturing into specialized 3D scanning domains. This expansion includes the unveiling of innovative scanners tailored for specific requirements, such as the Artec Micro, an automated, stationary 3D scanner optimized for the precise capture of minuscule parts, and the Artec Ray, a long-distance laser 3D scanner engineered for accurately digitizing immense objects or expansive indoor/outdoor environments. These larger targets can range from industrial assets like wind turbines and massive ship propellers to entire airplanes or intricate architectural structures such as buildings.
The Artec Ray, which first made its debut in 2018, represents a significant leap in long-range 3D scanning technology. It is fundamentally built upon advanced LiDAR (Light Detection and Ranging) technology, a sophisticated method that utilizes pulsed laser light to measure distances. On paper, the Artec Ray boasts impressive specifications that position it squarely within the upper echelon of professional-grade scanning equipment. It offers an exceptional accuracy of less than a millimeter, ensuring highly detailed and reliable data capture. Its formidable range extends up to 110 meters, complemented by an expansive field of view of 360º horizontally and 270º vertically, allowing for comprehensive coverage of vast scenes. The scanner achieves an rapid acquisition speed of 208,000 points per second, facilitating efficient data collection even for the largest projects. Furthermore, its integrated battery provides a substantial maximum autonomy of four hours, enabling extensive fieldwork without constant power access. These advanced features, coupled with a recommended retail price of $60,000 (€56,000), unmistakably place the Artec Ray within the professional range of 3D scanners, targeting industries that demand uncompromising precision and efficiency for large-scale digitization. Following our in-depth evaluations of the compact Artec Micro and the highly portable Artec Leo, 3Dnatives was granted the invaluable opportunity to conduct a comprehensive test of the Artec Ray 3D scanner. Our primary objectives were to explore the full capabilities and applications this powerful equipment offers, assess its ease of use in real-world scenarios, and determine the types of projects where the Ray truly excels. We delve deeper into these aspects in the following sections.

The Artec Ray scanner comes complete with power cables, a USB cable, two batteries and chargers, three SD cards, a tripod adapter and a carrying case
1. Unboxing and Physical Design of the Artec Ray Scanner
Upon unboxing, the Artec Ray immediately impresses with its robust yet refined construction. Visually, it presents itself as a sleek, rectangular prism, measuring approximately 11.3″x7.9″x4.6″ (287×200×118 mm) and weighing in at around 13 lbs (just under 6 kg). This compact and manageable size belies its powerful capabilities. The scanner’s design integrates several key components essential for its operation. At its core, it features a precisely engineered rotating mirror, which is central to its LiDAR-based data capture. Complementing this, two 5-megapixel cameras are strategically positioned to capture high-quality texture data, ensuring that the final 3D models are not only geometrically accurate but also visually rich. For real-time operational feedback, the Artec Ray is equipped with two distinct LED indicators on its top panel, clearly communicating the scanner’s status – whether it’s powered ON/OFF, ready for scanning, or actively engaged in a scanning process. A separate power light is situated on the base, and another indicator signals the WiFi or autonomous operational mode. Thoughtful design extends to user convenience, as Artec has incorporated a sturdy carrying handle on the top of the unit, greatly facilitating transport and positioning in the field. Along one side, users will find accessible slots for the external battery, an SD card for data storage, and the main ON/OFF power button. Essential connectivity ports, including the input for the power cable and the USB port for data transfer or tethered operation, are intelligently located on the base of the scanner, ensuring a clean and functional setup.
The Artec Ray comes with a comprehensive set of accessories designed to get users operational quickly. This includes all necessary power cables and a pair of removable 14V 49Wh Li-Ion batteries, along with their dedicated chargers, providing extended field autonomy. A 3-meter USB cable is supplied for connecting the scanner to a PC for tethered operation and data transfer. For mounting, a robust tripod adapter is part of the package. The entire kit is housed in a durable carrying case, ensuring safe transport and storage. Additionally, two 32GB SD cards are provided for onboard data storage, alongside an SD card backup system, highlighting Artec’s attention to data security. While these core accessories are included, the manufacturer also offers a range of additional, non-standard equipment that can significantly enhance scanning efficiency and accuracy. These optional accessories include a specialized tripod for stable mounting, magnetic targets, positioning spheres (crucial for multi-scan alignment), and an even more rigid, heavy-duty transport case for extreme environments or frequent travel. Investing in these supplementary tools can greatly optimize the workflow and achieve superior results in challenging scanning scenarios.
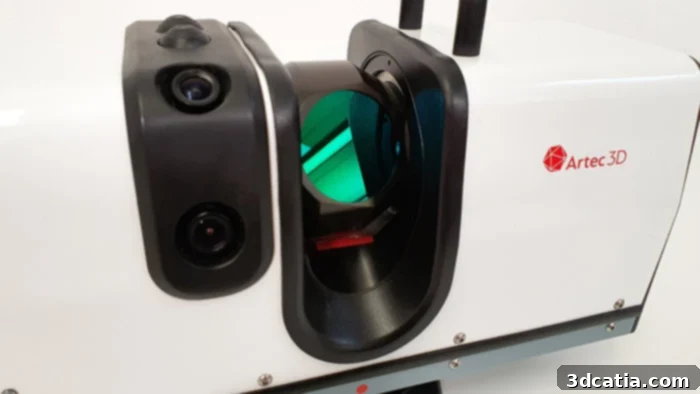
In the center of the Ray, you can see the rotating mirror that captures the reflection of the laser while the 2 cameras recover the texture
At the technological heart of the Artec Ray is its advanced LiDAR (Light Detection and Ranging) system. This sophisticated process works by emitting a laser pulse and precisely measuring the time it takes for that pulse to reflect off an object and return to the scanner. By calculating this ‘time-of-flight’ delay, the system can accurately determine the exact distance between the scanner and every point on the object’s surface. These individual distance measurements are then compiled to create a dense ‘cloud of points,’ which is a digital representation of the scanned object’s geometry. For the Artec Ray, a Class 1 laser is employed, ensuring safety during operation, even for prolonged use in public or industrial environments without special precautions.
In practical terms, the scanning process with the Artec Ray is a meticulously orchestrated sequence of movements and data acquisition. The device initiates by emitting its Class 1 laser. Simultaneously, the internal mirror, positioned at the center of the unit, rapidly rotates on its axis. This rotation allows the laser to sweep across a wide 270° vertical field of view, capturing an extensive vertical slice of the environment. As the laser beam hits various surfaces, its reflections are detected by the scanner, generating a vertical plane of countless precise 3D points. Once this initial vertical point cloud is acquired, the entire base of the Artec Ray precisely rotates a predetermined increment clockwise. This subtle but crucial movement repositions the scanner for the next acquisition, enabling it to capture a subsequent, adjacent vertical plane of data. This operation is seamlessly repeated, with the scanner rotating a full 360°, ensuring a complete volumetric capture of the surrounding scene or object. Upon completion of the full rotation, a comprehensive raw point cloud is generated. This raw data is then meticulously processed by the scanner’s dedicated software. During this post-processing phase, extraneous data is filtered out, individual point clouds are aligned and merged, and finally, the dense point cloud is transformed into a clean, triangulated mesh, which is the final 3D model ready for various applications.
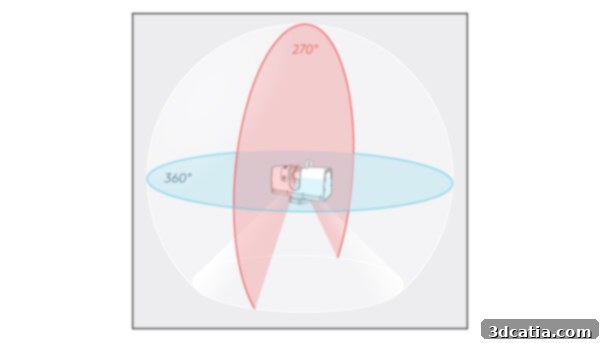
The Artec Ray acquires a point cloud at 270° in the vertical plane and 360° in the horizontal plane
2. Setting Up and Preparing for Scanning with the Artec Ray 3D Scanner
Initiating the use of the Artec Ray begins with a straightforward setup procedure. The primary step involves securely mounting the scanner onto a stable, appropriate tripod. It’s important to note that a tripod is not supplied by default with the scanner, so users will need to procure one separately, ensuring it can support the Ray’s weight and provide the necessary stability for accurate scanning. Once mounted, the power supply must be connected to the base of the 3D scanner, specifically the non-rotating part, to ensure continuous power or to charge the internal batteries. Connectivity to a PC can be established via two methods: either through the supplied USB cable for a wired connection, or wirelessly via WiFi using the dedicated Artec Remote application. When operating in WiFi mode, it’s crucial to remember that scan data is automatically saved onto the installed SD card within the scanner. Furthermore, the Artec Ray offers a highly convenient stand-alone mode, allowing operation without a connected PC. This mode is particularly recommended for simpler models or scenes where immediate visualization and complex parameter adjustments are not critical. For standalone operation, an SD card must be installed to ensure all acquired data is saved. The final step in the physical setup is simply to power on the Ray using the switch located on its side panel.
A significant operational consideration for the Artec Ray revolves around its removable batteries. These provide a combined maximum autonomy of four hours, typically translating to two hours per battery, offering considerable flexibility for fieldwork. For users planning to operate the scanner primarily on mains power, Artec provides an important recommendation: it is advisable to keep the battery installed inside the scanner even when connected to external power. This seemingly minor detail is critical for maintaining the scanner’s optimal center of gravity. Neglecting this could potentially impact the stability of the unit and, consequently, compromise the quality and accuracy of the acquired scan data, particularly during long or high-precision scanning sessions.
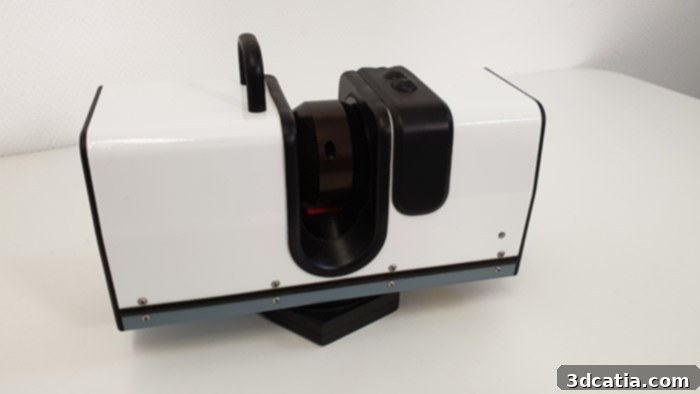
The Ray offers a maximum range of 360.9′ (110m) with an acquisition speed of 208,000 points/s
Once the Artec Ray 3D scanner is physically prepared and powered, the next critical phase involves preparing the model or scene to be scanned. This preparation phase, a cornerstone for achieving optimal results with any 3D scanner, is particularly vital for optical scanners like the Ray. The Artec Ray, like many optical systems, can encounter difficulties when attempting to scan certain types of surfaces: highly reflective objects (e.g., polished metal, glass), extremely dark surfaces (which absorb laser light), or transparent materials (e.g., clear plastic, glass). These surfaces often fail to reflect the laser pulse effectively or cause irregular reflections, leading to incomplete or noisy data.
In such challenging cases, it is frequently recommended to apply a matte scanning spray to the problematic surfaces. This spray creates a temporary, thin, non-reflective coating that allows the laser to be consistently reflected, thereby ensuring complete and accurate data capture. Beyond surface characteristics, the objects or scenes themselves must meet certain conditions. They should be completely immobile throughout the scanning process to prevent distortion in the captured data. Uniform lighting is also beneficial, as uneven illumination can affect the texture capture by the 5-megapixel cameras. Finally, objects should ideally offer a minimum level of geometry or surface texture. Featureless, perfectly smooth objects can be harder for scanning software to align during multi-scan processes. Overall, the initial startup of the Artec Ray typically does not require any specific calibration, allowing for relatively fast deployment. The most time-consuming aspects of the scanning workflow are generally the meticulous preparation of the scene itself and the careful adjustment of the scanner’s parameters, which must be uniquely tailored to each individual scanning project to ensure the best possible outcome.
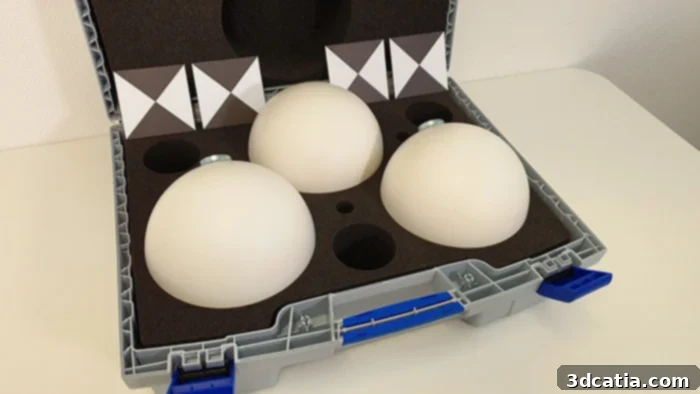
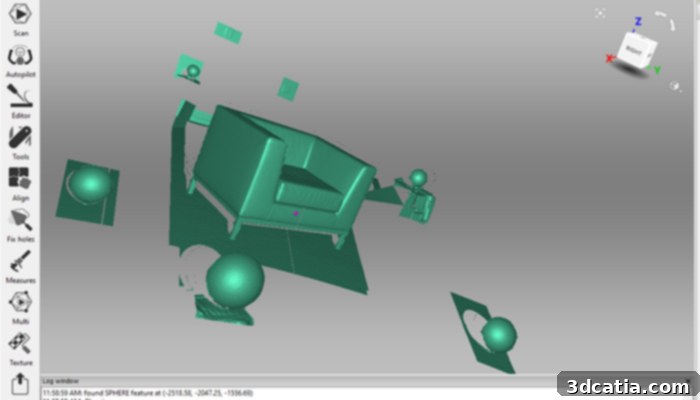
Consistent with best practices for 3D scanning, and especially when dealing with complex or very large objects/scenes, it is often necessary to perform multiple scans from different positions. This approach ensures that the object or scene is captured in its entirety, eliminating blind spots and improving the overall quality and completeness of the final 3D model. For subsequent merging of these individual scans into a single, cohesive model, the use of reference markers is indispensable. While not included by default with the scanner, targets or spheres play a crucial role in providing common geometric points that the software uses to accurately align and stitch together the various scan datasets. Although an optimal solution often involves a combination of both, each type of marker offers distinct advantages. Positioning spheres are highly visible from virtually any viewing angle, making them excellent for broad coverage and robust initial alignment. Conversely, Artec suggests that targets, while requiring more careful placement to ensure visibility from multiple scan positions, can offer superior scan quality, particularly when high precision is paramount. For detailed guidance on the strategic placement and utilization of targets and spheres, Artec provides extensive tips and resources within the Support section of its official website, empowering users to achieve the most accurate and efficient scan results.
3. The Artec Studio Software and Artec Remote App
As with all of Artec 3D’s sophisticated scanning hardware, the Artec Ray seamlessly integrates with the company’s powerful proprietary software, Artec Studio. This robust software suite is available in an impressive 15 languages, making it accessible to a global user base. Artec Studio serves as the central hub for the entire 3D scanning workflow, enabling users to precisely set up scan parameters before acquisition and, crucially, to finalize and refine the raw point cloud data obtained after the scan. Through a comprehensive array of post-processing tools, users can meticulously clean, align, fuse, and ultimately transform the dense point cloud into a high-quality, watertight final mesh. The software supports a wide range of industry-standard export formats, catering to diverse professional needs. These include various point cloud formats such as BTX, PTX, XYZ, and essential mesh formats like OBJ, PLY, WRL, STL, AOP, ASC, Disney PTEX, E57, and XYZRGB, ensuring compatibility with virtually any CAD, CAM, or 3D modeling software.
As we’ve highlighted in our previous product reviews of other Artec scanners, the advanced computational demands of Artec Studio necessitate a relatively powerful computer system for optimal performance. Users should anticipate needing a minimum configuration featuring an Intel Core i5, i7, or i9 processor, at least 32GB of RAM, and a dedicated GPU with a minimum of 2GB of VRAM. The software is compatible with Windows 7, 8, or 10 (x64 operating systems). It is also an important reminder that the Artec Studio software, while indispensable, represents an additional annual operational cost of approximately €800. Alternatively, for long-term users, Artec offers an unlimited subscription option at around €2,000, which can be a more cost-effective solution over several years. To allow potential users to experience its capabilities firsthand, a fully functional 30-day trial version of Artec Studio is also readily available, providing ample time for evaluation.
Beyond the desktop software, Artec has also developed a specialized mobile application called Artec Remote, available for both Android and iOS devices. This innovative app offers unparalleled flexibility by allowing users to wirelessly connect the Artec Ray 3D scanner via WiFi, effectively transforming a smartphone or tablet into a portable control unit. The Artec Remote app empowers users to control the scanner remotely and save all acquired data directly to the SD card within the device. This provides immense convenience for field operations where a laptop might be impractical. Users can adjust various critical parameters even before initiating a scan, such as the desired resolution. Furthermore, it allows for fine-tuning more advanced settings like laser sensitivity, horizontal and vertical resolution, and the crucial option for texture capture, ensuring the scan is perfectly tailored to the specific environment and object. The app also provides real-time access to essential information, including the current status of the scanner, the remaining battery level, and the available storage space on the SD card. Generally, Artec recommends utilizing the full-featured Artec Studio software for complex scanning projects or for novice users who benefit from its guided workflows and extensive post-processing capabilities. Conversely, the streamlined Artec Remote application is ideally suited for advanced users who require quick, on-the-go control for simpler projects or for monitoring ongoing scans in dynamic environments.
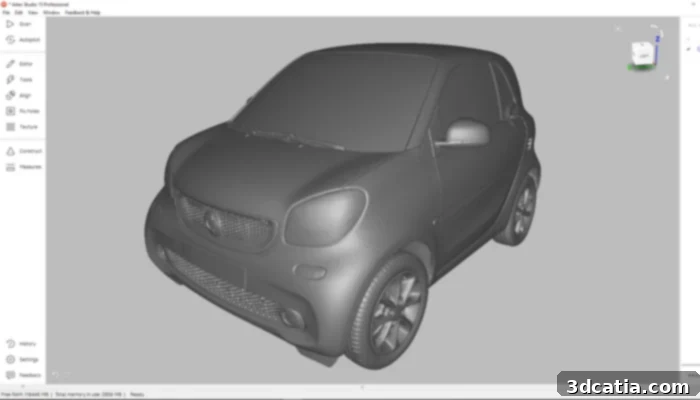
Car scan test – result after post-processing of the scene
4. Conducting First Scans and Optimizing Parameters
When embarking on a new scanning project with the Artec Ray, the preliminary steps are crucial for ensuring efficient data acquisition and high-quality results. Users can initiate a “preview mode” directly from either the comprehensive Artec Studio software or the convenient Artec Remote mobile application. This preview generates a contrast map of the scene, providing an immediate visual representation of the environment’s reflectivity and how the scanner perceives different surfaces. A significant advantage of this preview capability is the ability to define a smaller, more focused scanning area if only a specific portion of a larger scene is of interest. By narrowing down the target region, users can significantly reduce both the overall scanning time and the ultimate size of the final data file, optimizing resource usage and post-processing efforts.
Before commencing the actual scan, it is imperative to adapt several key parameters based on the specific characteristics of the scene and the desired output. These parameters include “density by degree,” “sensitivity,” and “texture.” The “density by degree” setting directly correlates to the number of individual points captured per degree of rotation. This parameter represents a critical trade-off: a higher density yields a more detailed and accurate point cloud, but it also increases the scanning time, the computational resources required for post-processing, and the ultimate file size. Therefore, users must carefully balance the need for resolution with practical considerations of time and data management. Choosing the appropriate density is crucial for optimizing the workflow for each unique project.
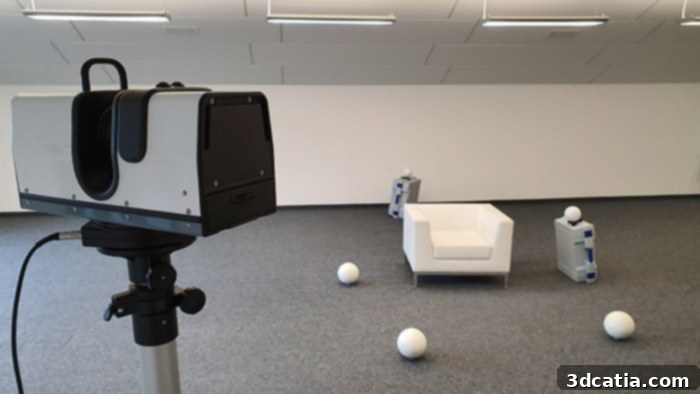
The preparation of the scene to be scanned with the spheres or positioning targets is a key step
The “sensitivity” parameter requires careful evaluation, as it directly impacts the scanner’s ability to capture data from various surfaces and distances. This setting should be adjusted based on the distance to the object and the inherent difficulty of scanning its surfaces—for instance, if they are dark, highly reflective, or lack distinct geometry. The “High Quality” mode is generally recommended for straightforward scanning tasks involving objects located closer than 50 meters, where the surfaces are relatively cooperative. Conversely, the “High Sensitivity” mode should be preferentially selected for scans extending up to the maximum range of 110 meters or when dealing with challenging surfaces. This mode enhances the scanner’s ability to detect weak reflections, thereby yielding better results on difficult-to-scan materials or at greater distances. Finally, the “texture” option should be explicitly selected if the objective is to capture the color information of the scene, which is crucial for creating photo-realistic 3D models.
Compared to handheld, portable 3D scanners, the Artec Ray offers distinct and significant advantages, particularly for large-scale projects. Its primary benefit is its inherent autonomy and ability to simplify and drastically accelerate the scanning of voluminous objects and expansive environments. While successfully scanning complex, large structures with a portable scanner often demands a high degree of operator skill, meticulous technique, and considerable time, the Artec Ray automates much of this process. It can efficiently digitize massive models by systematically capturing data from various positions, provided, of course, that multiple scan positions are replicated to ensure the object is captured in its entirety. This automation frees the operator from the intensive, manual sweeping motions required by handheld devices. However, it is also important to acknowledge a trade-off: the post-processing of data acquired by the Artec Ray can, quite logically, be more time-consuming. This is primarily due to the sheer volume of highly detailed point cloud data that the Ray is capable of capturing. This extensive data, while offering unparalleled precision, requires more computational power and time for cleaning, alignment, and mesh generation within Artec Studio. Throughout this article, we’ve showcased various results from scans we’ve conducted or those generously provided by the Artec team, illustrating the impressive capabilities of this long-range scanner. For readers seeking more in-depth technical specifications, usage guidelines, and application examples, comprehensive information about the Artec Ray is available on Artec’s official website, which can be accessed HERE.

8.5
You can find all the 3Dnatives Lab Tests here