
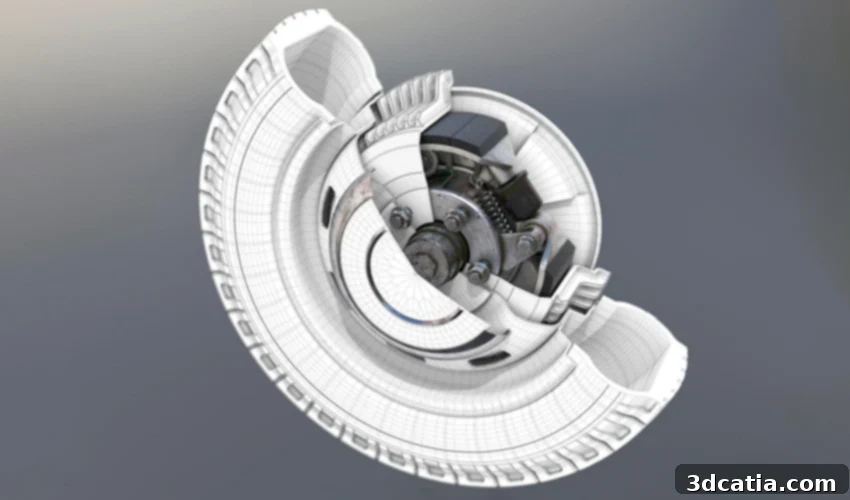
Mastering 3D Printing with Cinema 4D: A Comprehensive Guide to Model Preparation
The journey from a digital concept to a tangible 3D printed object invariably begins with the creation of a precise and well-designed 3D model. While a plethora of pre-existing models are readily available across popular platforms like Thingiverse, Yeggi, Printables, and MyMiniFactory, the true power of additive manufacturing often lies in its ability to produce highly customized, bespoke parts. This necessitates the creation of unique models tailored to specific needs, a task heavily reliant on proficient 3D modeling software. Navigating the vast landscape of available software can be overwhelming, making the choice of the right tool a critical decision. Today, we turn our attention to one such powerful and versatile solution: Cinema 4D, exploring its unexpected but highly capable role in the world of 3D printing.
What is Cinema 4D? A Versatile Powerhouse from Maxon
Cinema 4D is a sophisticated 3D software suite developed by the German company Maxon. Since its initial launch in 1990, it has steadily grown into a professional-grade tool revered for its capabilities in 3D modeling, animation, simulation, and rendering. It stands as a formidable competitor to industry giants such as Blender, Maya, and Autodesk 3ds Max, distinguishing itself with a reputation for speed, power, unparalleled flexibility, and most notably, an incredibly user-friendly interface. While it is predominantly celebrated within the motion graphics, visual effects, and game development industries for its robust toolset and intuitive workflow, what often comes as a surprise to many is its significant applicability and distinct advantages when adapted for 3D printing and additive manufacturing. Its inherent design strengths, though not initially conceived for physical output, can be leveraged effectively for creating complex and detailed models suitable for fabrication. In the following sections, we will take a closer look at how this dynamic software can be harnessed for your 3D printing projects, uncovering the specific steps and considerations required to bridge the gap between digital design and physical reality.
Cinema 4D is well known for its ease of use and powerful modeling tools.
Leveraging Cinema 4D for Successful 3D Printing Projects
Cinema 4D stands as a remarkably popular choice among 3D modeling software users, and its widespread adoption is underpinned by solid reasoning. Its exceptionally intuitive interface allows even newcomers to quickly become proficient in navigating its extensive features and powerful toolset. Beyond its accessibility, the software boasts an impressive array of valuable tools, including diverse texturing options, an expansive content browser for efficient asset management, seamless integration with sculpting software like ZBrush, and much more. Despite these significant strengths and its general versatility, Cinema 4D may not be the first software that comes to mind when considering tools specifically for 3D printing. This perception, however, belies its genuine viability and distinct advantages within the realm of additive manufacturing, provided users understand and apply specific workflow adjustments. Let’s delve into the crucial steps and considerations that transform Cinema 4D into a highly effective tool for creating print-ready 3D models.
Essential File Format and Design Considerations
A fundamental advantage of Cinema 4D for 3D printing is its native support for STL files. This means that models can be effortlessly imported into or exported from the software in this universally recognized format. Given that STL (stereolithography) is arguably the most prevalent and widely accepted 3D printing file format, this capability is incredibly beneficial for streamlining your workflow. Whether you’re starting with an existing STL model or creating one from scratch within Cinema 4D, the ease of handling this format ensures compatibility with virtually all 3D slicers and printers. It’s important to note, however, that while STL is fully supported, other popular 3D printing formats like OBJ and 3MF are not natively available for direct export within Cinema 4D without the use of third-party plugins or external converters. Therefore, for most direct 3D printing applications, your primary focus will remain on utilizing STL files.
Beyond file formats, several critical design considerations must be addressed to ensure your Cinema 4D model is optimized for additive manufacturing. First and foremost, you must carefully adjust the size settings and project scale within the software. It is highly recommended to set your project scale to 1 millimeter. This ensures that the dimensions you design in Cinema 4D accurately translate to the physical world when printed, preventing unexpected scaling issues that can lead to parts being too large or too small. Many issues encountered during 3D printing can be traced back to incorrect unit scaling, so this initial setup is paramount.
Another crucial step is to disable Phong Shading. Cinema 4D automatically applies Phong Shading to smooth the appearance of surfaces, making polygonal objects look aesthetically pleasing and organic during rendering. While this is excellent for visual presentation, it can be misleading for 3D printing. In reality, a 3D printer interprets the underlying polygonal mesh, which consists of flat, square polygons, not the visually smoothed surface. Printing a model with Phong Shading active might result in a physically faceted object despite its smooth appearance on screen. To avoid this, you should delete the Phong tag from your objects. To achieve a truly smooth surface for physical printing, users will need to manually adapt their model by increasing the number of segments or subdivisions in the geometry itself. This process directly adds more polygons to the mesh, creating a denser, genuinely smoother surface that the 3D printer can accurately replicate.
Ensuring Internal Integrity and Watertight Models
The internal structure of your 3D model is just as critical as its external appearance. 3D printers, and more specifically their slicing software, cannot properly interpret objects that are merged together, connected, or overlapping in a non-manifold way. Such errors, often invisible from an exterior view, can lead to printing failures, holes in the print, or incorrect infill generation. To diagnose and rectify these hidden issues, it is essential to be able to look inside your model. Cinema 4D offers a valuable feature for this: by going into your project settings and adjusting the options for View Clipping. By increasing the clipping plane settings and manipulating the zoom level, you gain access to a cross-section view of your model. This X-ray-like perspective allows you to identify and correct any internal mistakes, such as intersecting geometries or non-manifold edges, before the model is sent to the printer. This proactive approach saves significant time and material by catching errors that would otherwise result in failed prints.
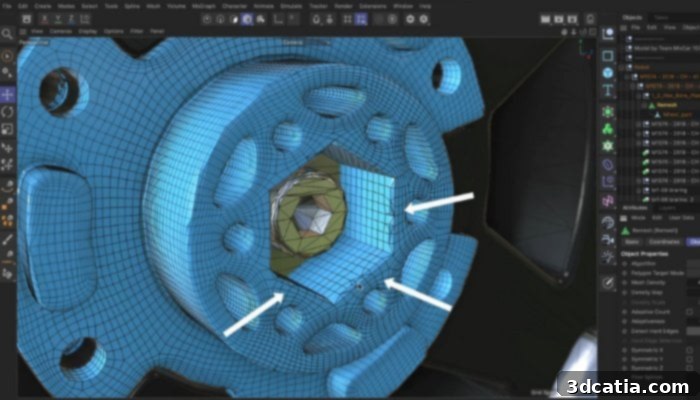
With Cinema 4D, you can create highly detailed parts for 3D printing, provided you tailor the software to suit your requirements.
Some final, yet equally crucial, considerations to keep in mind revolve around the structural integrity and printability of your model. It is absolutely crucial to ensure that your model is “watertight.” A watertight model is one that has no holes, gaps, or inversed normals, effectively forming a completely enclosed volume, much like a real-world object that could hold water without leaking. While modeling software explicitly designed for 3D printing (like some CAD programs) may automatically address or flag such issues, Cinema 4D, not originally intended solely for physical fabrication, won’t necessarily highlight these problems by default. Fortunately, you can actively identify and correct any gaps or open edges in your mesh by activating the Mesh Check and Boundary Edges features located within the Attribute Manager. These tools provide visual cues, allowing you to systematically repair any areas that would prevent your model from being a solid, printable object.
Additionally, always remember to confirm that every wall and feature within your model maintains a suitable thickness. Unlike applications tailored for 3D printing which often incorporate minimum wall thickness checks, Cinema 4D, frequently employed for animation projects where structural integrity for physical objects isn’t a primary concern, may overlook this critical requirement. However, a 3D printer will simply not be able to read or reproduce features that are too thin to be physically printed. Thin walls can lead to fragile parts, incomplete prints, or features that simply don’t materialize. It’s essential to be aware of the minimum wall thickness capabilities of your specific 3D printer and material, and then design your model accordingly within Cinema 4D, perhaps by using thickness measurement tools or employing solidifying modifiers to ensure robust geometry.
Conclusion: Unlocking Cinema 4D’s Potential for Additive Manufacturing
In summary, it is unequivocally possible and highly effective to create sophisticated 3D models for 3D printing using Cinema 4D, provided you diligently keep these essential tips and workflow adjustments in mind. Its powerful modeling capabilities, intuitive interface, and native STL support make it a surprisingly robust tool for additive manufacturing, particularly for those already familiar with its environment. However, it’s also important to acknowledge that Cinema 4D is a professional, paid software. For many hobbyists or casual 3D printing enthusiasts, other dedicated and often free or more affordable software solutions like Fusion 360 or FreeCAD might be more accessible starting points tailored specifically for engineering and physical fabrication.
Nevertheless, for designers, artists, or professionals who already leverage Cinema 4D for other creative endeavors, or for those seeking its advanced modeling and sculpting features for complex designs intended for 3D printing, it presents a compelling and powerful option. Its flexibility allows for unparalleled creative freedom, and with the right preparation, those intricate digital models can transition seamlessly into high-quality physical prints. If you are interested in exploring Cinema 4D further for your 3D printing projects, you can find more information and download the software HERE.
Do you currently use Cinema 4D for your 3D printing projects? What are your experiences and what do you think of its suitability for additive manufacturing? We invite you to share your insights in a comment below or engage with us on ourLinkedIn,Facebook, andTwitter pages! Don’t forget to sign up for our free weeklyNewsletter here for the latest 3D printing news, delivered straight to your inbox! You can also discover all our compelling videos and tutorials on ourYouTube channel for more in-depth content.
*All Photo Credits: Cinema 4D