
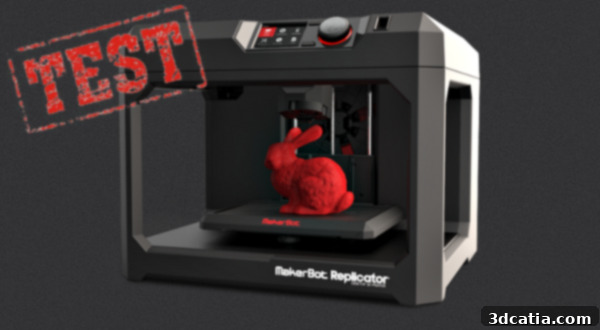
MakerBot Replicator 5G Review: Unveiling the Next Generation of User-Friendly 3D Printing
In an era increasingly defined by additive manufacturing, the allure of 3D printing technology continues to captivate enthusiasts and professionals alike. Our ongoing exploration of 3D printers aims to demystify this fascinating field, guiding you toward the perfect machine for your needs. Today, we embark on a journey back to the highly anticipated 5th generation of MakerBot’s flagship series, the Replicator 5G. This review holds particular significance for us, as our long-standing reference machine has been the venerable Replicator 2. We are eager to scrutinize the enhancements and innovations implemented in the 5G model, particularly how it addresses common challenges encountered with its predecessor. This comprehensive evaluation will also provide an excellent opportunity to delve into critical aspects such as genuine Plug&Play functionality and overall reliability in real-world 3D printing scenarios.
A special note of gratitude goes to FabShop for generously providing us with the opportunity to thoroughly test and evaluate this impressive machine.
First Impressions: Packaging and Hardware Innovations
MakerBot has consistently demonstrated a commitment to excellent packaging, and the Replicator 5G is no exception. The printer arrives meticulously secured within its robust cardboard casing, ensuring optimal protection during transit. All essential accessories are thoughtfully positioned directly above the printer, though their discreet placement might initially lead one to believe they are absent due to the impressive thickness of the protective layers. The unboxing experience itself feels premium and well-considered, setting a positive tone for what’s to come. This attention to detail in packaging not only protects the investment but also reflects MakerBot’s dedication to a seamless user journey from the very first interaction.
- The Printer Box
- The Accessories Box
- PLA Filament, Cables, and Extruder
Even before fully unboxing the printer, we were pleased to discover that MakerBot provides a spool of filament, allowing users to start printing almost immediately. This included filament is the same transparent 1.75mm PLA type that accompanied our Replicator 2. However, a notable design change immediately caught our eye: the new coil is significantly thinner and consequently much larger in diameter compared to its predecessor. This alteration is more than just aesthetic; it represents a fundamental shift in how filament is housed and managed within the Replicator 5G system.
- Replicator 2 coil and the new Replicator 5G coil
- Thinner, larger design of the new coil
- Replicator 2, Replicator 5G, and a Traditional Coil
The images above clearly illustrate the distinct differences: from left to right, we see the coil for the Replicator 2, followed by the newly designed coil for the Replicator 5G, and finally, a standard filament reel commonly purchased online (blue filament). Upon extracting the printer from its packaging, the rationale behind MakerBot’s filament modification becomes apparent. The filament coil is no longer a separate unit mounted at the rear of the machine; it is now an integrated component, housed within a retractable drawer at the front. While this design initially suggests a proprietary system, it’s reassuring to note that using ‘traditional’ coils is still possible with the aid of a separate coil stand. This design choice by MakerBot could significantly impact filament manufacturers, potentially pushing for a standardized format across the industry. Such a development, though perhaps a topic for another discussion, would undoubtedly benefit the entire 3D printing community by offering greater interoperability and reducing reliance on manufacturer-specific consumables.
- The new reel in its retractable drawer
- A closer look at the integrated filament system
- An “old” coil secured by simple adhesive
Beyond the filament, the accessory count in the box is rather minimalist but perfectly adequate. It includes a USB cable, power supply, the aforementioned filament coil, an extruder, and quick-start instructions for seamless setup. Our attention was particularly drawn to the extruder, a component that generated considerable discussion upon its initial release with the Replicator 2. This new extruder, at first glance, resembles the high-quality designs often seen from manufacturers like E3D. It is elegantly encased in a protective plastic housing and features a magnetic attachment mechanism, allowing for effortless and secure fixing within the printer. This design not only contributes to the Replicator 5G’s aesthetic appeal but also promises enhanced ease of maintenance and replacement, addressing some of the prior criticisms regarding extruder reliability and user-friendliness. It’s a truly well-engineered piece of hardware that speaks volumes about MakerBot’s dedication to improving core components.
Another point of contention with the Replicator 2 was its acrylic construction tray, known for its susceptibility to deformation, often even arriving pre-deformed. It appears MakerBot has keenly listened to user feedback, as the Replicator 5G now features a robust glass construction tray. This upgrade represents a significant improvement in both durability and print bed consistency. The dimensions of this new tray are also slightly altered, measuring 26.5 cm in width (X-axis) and 20.5 cm in depth (Y-axis), a departure from the Replicator 2’s 30 cm width and 15 cm depth. While a smaller X-axis print area might seem like a step back, the increased Y-axis depth offers a different build volume dynamic, potentially optimizing for different types of prints. Among the accompanying documentation, we found the customary ‘blue tape,’ recommended for enhancing PLA adhesion. However, from our experience, we personally favor the brown TESA tape (model 4309), which has consistently delivered superior adhesion and reliability in our tests, making it a staple in our 3D printing toolkit.
- The glass build tray out of the box
- Our preferred TESA 4309 brown tape
- The mounted and ready-to-use glass build tray
Connectivity and communication options have received a significant overhaul, reflecting modern expectations for smart devices. Gone are the days of reliance on an SD card; the Replicator 5G now boasts convenient USB ports situated at both the front and back of the machine, facilitating direct connection to your computer or USB storage devices. Furthermore, the inclusion of an RJ45 Ethernet port allows for seamless network integration, opening up possibilities for remote printing and monitoring within a connected environment. Another notable and highly welcomed improvement is the integration of the power supply directly into the printer chassis. This eliminates the need for an external power brick, contributing to a cleaner, more compact setup and enhancing the overall aesthetics of the workstation. These changes collectively streamline the user experience, making the Replicator 5G a much more versatile and accessible 3D printer for various operational settings.
The control panel has undergone a complete redesign, now featuring a vibrant color screen navigated by a prominent ‘Jog Dial’ — a simplified button that smoothly turns left or right for selection — flanked by two smaller pushbuttons for additional controls. Aesthetically, this new interface seamlessly integrates with the printer’s overall design, presenting a much more intuitive and user-friendly experience compared to the Replicator 2’s sometimes clunky controls. The larger buttons and clear display minimize the chances of accidental selections, a welcome improvement for users with larger fingers. The menu system itself is thoughtfully organized, offering six primary options for direct, manual control of the printer, empowering users with immediate access to key functionalities without needing a computer.
- Print: This central feature provides comprehensive access to all printing functionalities. Users can easily navigate through their object libraries, whether stored on a USB key, in the printer’s internal storage, or accessed directly from Thingiverse libraries and purchased files.
- Filament: Dedicated controls for managing filament, including loading and unloading procedures, making filament changes quick and hassle-free.
- Preheat: Allows users to initiate or cease the extruder’s heating process independently, useful for maintenance or pre-print preparations.
- Utilities: Offers access to advanced printer features, such as firmware upgrades, management of the built-in camera system, various printer settings, and power management options.
- Settings: A direct portal to customize printer parameters, network configurations, and other operational preferences.
- Info: Provides crucial information about the printer, including operational statistics, current firmware version, and device diagnostics.
- Color display with a sleek and intuitive design
- Neat, clear, and accurate menu navigation
- Viewing images directly from your stored files
A minor observation regarding the internal storage space revealed that only one object was actually present, rather than the expected five. This could potentially indicate a localized issue with our specific test unit. More importantly, the included files were identical to those found on all previous versions of MakerBot printers. This lack of updated or fresh sample files suggests that MakerBot might have missed an opportunity to showcase the Replicator 5G’s capabilities with more intricate or contemporary models, which could enhance the initial user experience and demonstrate the printer’s true potential.
Software Experience: MakerBot Desktop
With the single pre-loaded file in the internal memory, our excitement to commence printing was palpable. In our eagerness, we bypassed the initial plate calibration, opting to trust the factory settings – after all, a true Plug&Play experience implies immediate usability. This decision, while perhaps risky for complex prints, was a testament to the anticipated out-of-the-box readiness of the Replicator 5G. The printing process was initiated directly from the machine’s intuitive control panel. Following the automatic tray alignment, the axes smoothly returned to their home positions, and the nozzle rapidly ascended to its optimal printing temperature. The print then commenced and proceeded without any hitches, concluding successfully. This smooth start was indeed promising, reinforcing the “Plug&Play” aspirations of the 5th generation Replicator.
Next on our agenda was the installation of the accompanying printing software. As many users are aware, MakerBot’s software ecosystem has evolved significantly since the introduction of the Replicator 2X, marking a transition from the familiar Makerware to the new MakerBot Desktop. Our test machine, running Windows 8.1 with the latest updates, provided a standard environment for installation. The software installation itself proceeded without significant issues, though it’s crucial to remember to run it in administrator mode for optimal performance. A minor, yet somewhat inconvenient, detail emerged: to install MakerBot Desktop, users must first uninstall Makerware. While this might seem like a small hurdle, the current version of MakerBot Desktop exclusively supports the 5th generation Replicator and newer models. This implies that owners of older machines, such as the Replicator 2, would require a separate computer or alternative software like ReplicatorG to manage their older printers if they wish to use MakerBot Desktop for their new 5G model. This bifurcation of software support, while understandable from a developmental perspective, creates a fragmented user experience for those operating a mixed fleet of MakerBot printers. However, as MakerBot has since progressed to its 6th generation printers, MakerBot Desktop has solidified its position as the standard software for their modern lineup, offering a unified platform for contemporary models.
Once MakerBot Desktop is successfully installed, users will immediately notice the deep integration with Thingiverse, MakerBot’s renowned 3D model sharing platform. This seamless integration allows users to browse, download, and prepare models directly from Thingiverse within the printing software itself. Whether this tight coupling is to everyone’s taste is subjective, but its functionality is undeniable. It creates a remarkably streamlined workflow, transforming the entire process from model discovery to actual printing into a cohesive and efficient experience. This synergy between hardware and software, leveraging a vast online community, positions MakerBot Desktop as more than just a slicer; it’s a comprehensive hub for 3D printing creativity.
Focusing on the software’s simplicity and efficiency, we then explored some of its key announced new features. The most immediately impactful of these is the enhanced print preview functionality. Users can now simulate the entire printing process on their screen, layer by layer, offering a clear visual representation of how the object will be constructed. This powerful tool goes beyond simple visualization; it allows for proactive identification of potential issues such as overhangs, support structure requirements, or problematic print paths before committing to a physical print. This diagnostic capability significantly reduces material waste and saves valuable time, elevating the efficiency of the 3D printing workflow. The sidebar on the left facilitates easy navigation through the layers, providing granular control over the preview.
The sidebar on the left allows you to navigate among the layers in print preview
Beyond the visual simulation, this preview also delivers crucial operational parameters that were previously absent, such as estimated printing time and the precise amount of filament required. These metrics are invaluable for planning, budgeting, and ensuring uninterrupted print runs. No longer will your print be abruptly halted midway due to an unexpected lack of filament, as you can now accurately gauge supply needs before starting. This foresight translates directly into greater reliability and a more professional printing experience, aligning perfectly with the ethos of the Replicator 5G.
It’s important to acknowledge, however, that even with advanced features, unforeseen incidents can occur. During one of our test prints, the printer unexpectedly halted for no apparent reason. We hypothesized this might have been due to insufficient filament remaining on the new spool, or possibly a detection issue related to its novel design. Despite this setback, it provided a perfect opportunity to witness the Replicator 5G’s robust reporting and recovery system in action. When the printer stops due to an anomaly, it intelligently prompts the user to identify and rectify the problem, then offers the option to seamlessly resume printing from the exact point of interruption. This print resume functionality is a genuine, significant improvement that many users have long requested, dramatically enhancing the printer’s reliability and mitigating the frustration of failed long prints. It showcases MakerBot’s commitment to real-world usability and problem-solving.
Another feature prominently highlighted by MakerBot is the integrated onboard camera. On paper, the concept of remotely monitoring your print progress via a live feed sounds incredibly appealing. In practice, however, its current implementation leans more towards a novelty gadget than a truly essential tool. The camera’s operational options are limited, and users should not expect high-definition quality. With a sensor resolution of just 320 x 240 pixels, the resulting images are adequate for a quick social media share but fall short of professional monitoring needs. We believe there’s significant room for improvement here. Enhancements such as time-lapse video capabilities, automatic photo capture at critical print stages, and deeper integration with Thingiverse – perhaps even a dedicated “I Made One” photo category directly from the camera – would transform this feature into a truly powerful asset, fostering greater community engagement and providing invaluable data for print optimization. As it stands, the camera is a promising concept yet to fully realize its potential.
Conclusion: A Step Forward for MakerBot’s 5th Generation
The MakerBot Replicator 5G represents a significant evolutionary step for the company, building upon the foundations laid by its predecessors while introducing crucial innovations aimed at enhancing user experience and print reliability. From the robust packaging to the thoughtfully redesigned hardware components, MakerBot has clearly invested in addressing previous criticisms and delivering a more polished product. The integrated filament system, the durable glass build plate, and the refined magnetic extruder all contribute to a more robust and maintenance-friendly machine. The improved connectivity options, including dual USB ports and Ethernet, alongside an integrated power supply, underscore a commitment to modern usability and flexible workflow integration.
On the software front, MakerBot Desktop, despite its initial compatibility quirks with older models, offers a powerful and intuitive platform. The seamless integration with Thingiverse, coupled with advanced features like the detailed print preview and estimated print times, significantly empowers users to manage their prints with greater precision and confidence. The most impactful software enhancement, however, is the intelligent print resume functionality, which dramatically boosts reliability and minimizes wasted materials by allowing users to recover from unexpected interruptions. While the onboard camera currently remains more of a promising gadget than a fully realized feature, its inclusion hints at future possibilities for remote monitoring and community engagement.
Ultimately, the Replicator 5G largely fulfills its promise of being a more “Plug&Play” and reliable 3D printer. It’s designed for users who value ease of use, consistent performance, and a streamlined experience. While some minor areas, such as the initial sample files and the camera’s resolution, could see further refinement, the overall package delivers a compelling offering for anyone looking to enter or upgrade their 3D printing journey with a dependable FDM machine. MakerBot’s 5th generation Replicator demonstrates a clear trajectory towards more accessible, efficient, and ultimately, more reliable additive manufacturing for a broader audience.