
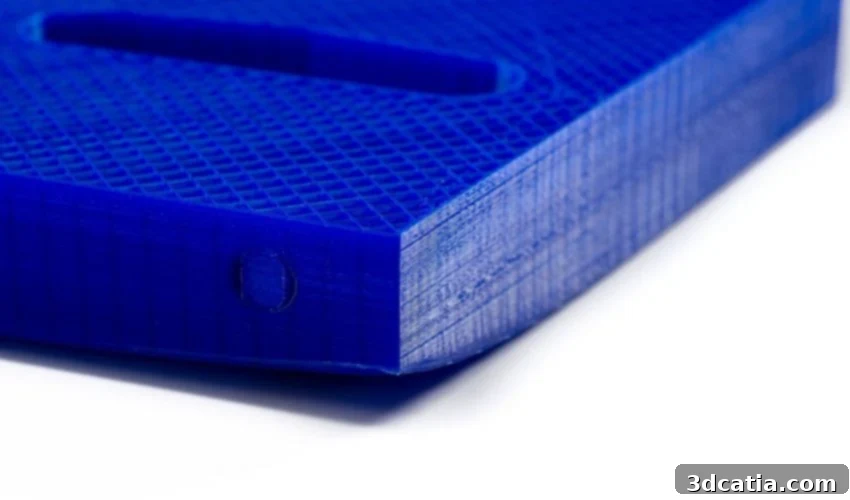
Mastering 3D Printing: A Comprehensive Guide to Preventing Warping
If you’re deeply involved in the world of 3D printing, especially with FDM (Fused Deposition Modeling) technology, you’ve likely encountered a range of frustrating challenges beyond mere ghosting or stringing. Among these, warping stands out as one of the most common and disheartening issues. Warping manifests as an unwanted upward curvature or lifting of the edges of your 3D printed object, primarily affecting the crucial first layers that are supposed to adhere firmly to the print bed. This phenomenon can be so severe that parts of the model can detach completely from the build plate mid-print, leading to immediate print failure, wasted material, and valuable time lost. But what exactly causes this pervasive problem in 3D printing, and more importantly, how can you effectively prevent it to ensure successful, high-quality prints?
Understanding and mitigating warping is fundamental for anyone looking to achieve consistent results with FDM printers. It’s not just an aesthetic flaw; severe warping can compromise the structural integrity, dimensional accuracy, and overall functionality of your printed parts. This comprehensive guide will delve into the root causes of warping, exploring the underlying physics and material science, and then provide a detailed array of practical strategies and actionable tips to help you conquer this challenge for good. By implementing these techniques, you’ll be well on your way to smoother, more reliable 3D printing experiences.
What is Warping in 3D Printing?
Warping, in the context of FDM 3D printing, refers to the deformation of a printed object where its edges or corners lift upwards from the build platform. This lifting creates a curved base, rather than the flat surface intended by the design. The effect is most pronounced in the initial layers because these layers are directly exposed to the largest temperature differential between the hot nozzle/print bed and the cooler ambient air. As subsequent layers are added, the stress accumulates, often exacerbating the initial lift and potentially causing the entire print to detach from the bed. Visually, you might observe a smile-like curve on the bottom of your part, or notice the corners peeling up like potato chips.
The consequences of warping extend beyond mere cosmetic imperfections. A warped base means your part will not sit flat on any surface, impacting its stability and functionality. Furthermore, the internal stresses that cause warping can lead to layer separation, cracks, and a significant reduction in the mechanical strength of the finished product. For intricate designs or parts requiring precise dimensions, warping can render the print completely unusable. Therefore, identifying and addressing the causes of warping is crucial for maintaining print quality and efficiency in 3D printing.
Why Warping Occurs: The Physics of Thermal Contraction
At its core, warping is a direct consequence of thermal expansion and contraction, a fundamental property of the thermoplastic materials used in FDM 3D printing. When these plastics are heated, they become viscous and expand. Conversely, as they cool down, they contract. This phenomenon is particularly significant because 3D printing involves depositing molten plastic (often over 200°C) onto a relatively cooler build plate and into a cooler ambient environment. The process creates inherent temperature gradients that are difficult to eliminate entirely, leading to differential cooling and subsequent stress.
Consider a typical scenario: you’re printing with ABS filament, which requires a nozzle temperature of more than 200°C. Once extruded, this molten plastic quickly cools towards room temperature. The challenge arises because different parts of the print cool at different rates. The first layers, which are in direct contact with the print bed (even a heated one), begin to cool and contract almost immediately. As these initial layers shrink, they pull inwards. However, since they are ideally adhered to the print bed, this inward pulling force translates into an upward lifting force at the edges and corners, where the adhesion is often weakest or the leverage is greatest. This is the start of warping, a phenomenon exacerbated by materials with high thermal expansion coefficients.
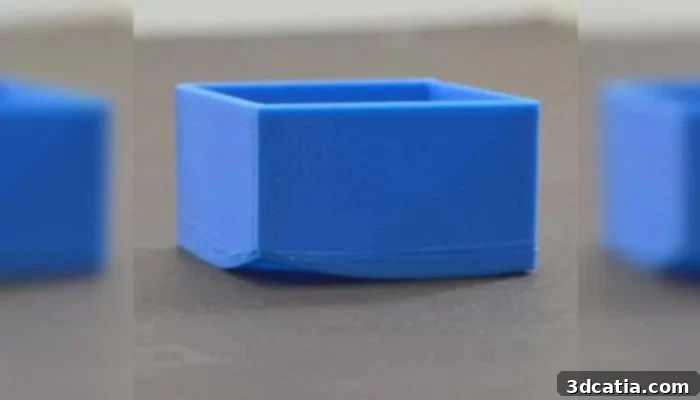
Photo Credits: Two Trees
The problem is compounded as more layers are added. Each new, hot layer heats the layer below it, but the overall cooling trend continues. The cooler, already contracted layers exert stress on the still-cooling, less contracted upper layers. This differential cooling creates internal stresses within the printed object. Materials like ABS are particularly prone to warping due to their relatively high coefficient of thermal expansion and significant shrinkage rate – often around 1.5% or more from printing temperature to room temperature. This substantial change in volume creates immense pulling forces. PLA, while less prone, can still warp, especially on large parts or in drafty environments, due to its lower (but still present) shrinkage. PETG sits somewhere in between, generally easier to print than ABS but more challenging than PLA regarding warping tendencies.
Extremely large or long parts, regardless of material, are also at a higher risk of warping. This is because the cumulative contraction over a larger area generates greater forces. Maintaining consistent temperature control across a large surface becomes more difficult, leading to more pronounced temperature gradients and thus increased differential shrinkage. Ultimately, the battle against warping in 3D printing is a battle against uncontrolled thermal contraction and the resulting internal stresses that literally pull your print off the bed.
Effective Strategies to Prevent 3D Printing Warping
Preventing warping requires a multi-faceted approach, addressing both the thermal environment and the physical adhesion of the print. By carefully controlling various parameters in your 3D printing workflow, you can significantly reduce the likelihood of your prints succumbing to this common and frustrating issue.
1. Master Temperature Management: The Foundation of Warping Prevention
As established, temperature is the primary driver of warping. Proper temperature management involves not just the filament’s printing temperature, but also the temperature of the print bed, the print chamber, and the surrounding environment. The goal is to minimize the temperature differential between the extruded plastic and its surroundings, allowing for more gradual and uniform cooling, which in turn reduces internal stresses.
- **Optimizing Heated Print Bed Settings:** A heated print bed is arguably the most critical component in preventing warping. It maintains the base layers of your print at a temperature above the plastic’s glass transition temperature, or at least warm enough to reduce the cooling rate and enhance adhesion. The ideal bed temperature varies significantly by material:
- **PLA:** Typically 50-65°C. While PLA shrinks less than other plastics, a warm bed significantly improves first-layer adhesion and prevents minor corner lifting.
- **PETG:** Usually 70-85°C. This range helps prevent corners from lifting and promotes better layer bonding without becoming too sticky.
- **ABS:** Often requires 90-110°C. ABS has a high shrinkage rate, so a hot bed is essential to keep the initial layers warm and reduce thermal stress.
- **Nylon:** Can require up to 100-120°C.
Always ensure your print bed heats up evenly and maintains its set temperature throughout the entire print duration.
- **Utilizing Heated Print Chambers or Enclosures:** For materials highly prone to warping like ABS, Nylon, or Polycarbonate, a heated print chamber or an enclosed printer is highly beneficial. These enclosures maintain a consistent, elevated ambient temperature around the print, significantly reducing the temperature differential between the extruded plastic and the air. This slower, more uniform cooling minimizes internal stresses and promotes better layer adhesion throughout the entire part, not just the base. If your printer doesn’t have a built-in enclosure, consider building a simple DIY enclosure from materials like IKEA furniture, acrylic sheets, or even a cardboard box for temporary use.
- **Controlling Room Temperature and Eliminating Drafts:** Even with a heated bed and chamber, external drafts can wreak havoc on your prints. A sudden gust of cold air can rapidly cool parts of your print, leading to uneven contraction and instant warping. Keep windows and doors closed to avoid direct air currents. Printing in a room with a stable, moderate temperature is always preferable. Avoid placing your 3D printer near air conditioning vents, open windows, or doorways where temperature fluctuations are common.
- **Optimizing Nozzle Temperature:** While not directly preventing warping at the bed, an optimized nozzle temperature ensures proper material flow and strong layer adhesion. Printing too cold can lead to poor layer bonding and increased internal stress, indirectly contributing to warping, as weak layers are more susceptible to the forces of contraction. Conversely, printing too hot can cause excessive oozing, stringing, and potentially degrade the material. Always refer to the filament manufacturer’s recommended temperature range and perform temperature tower tests if unsure.
2. Adjusting Print Speed for Better Adhesion and Cooling
Adjusting your print speed can also play a crucial role in preventing warping. As we’ve seen with other common issues like ghosting and stringing, a lower print speed often provides a better solution for FDM issues. For warping, reducing the speed, particularly for the first few layers, allows the plastic more time to properly adhere to the print bed and to cool down more gradually and uniformly. This gives the material a chance to settle and bond without developing excessive internal stress. A slower speed also allows the heated bed more time to transfer heat to the newly extruded plastic, maintaining a more consistent temperature gradient and reducing the thermal shock that can initiate warping.
3. Enhancing First Layer Adhesion with Raft, Brim, and Skirt
When direct print bed adhesion alone isn’t sufficient, slicer software offers several valuable options to create an expanded base for your print, drastically improving adhesion and reducing warping. These include the raft, brim, and skirt, each serving a distinct purpose.
- **Raft:** A raft involves printing several sacrificial layers of material directly onto the print bed, forming a sturdy, solid base much larger than your actual print’s footprint. Your model is then printed on top of this raft, effectively creating its own stable foundation.
- **Advantages:** Provides a strong, reliable adhesion surface, effectively isolating your print from any inconsistencies on the build plate. It significantly reduces the chances of warping, especially for parts with small contact areas, intricate bases, or complex geometries. It can also compensate for a slightly unlevel bed by providing a perfectly flat surface for the print.
- **Disadvantages:** Uses more material and increases print time due to the additional layers. Removal can be challenging, and the bottom surface of your print, which rested on the raft, might require post-processing (sanding, filing) to achieve a smooth finish, as it often has a textured appearance. Best for materials highly prone to warping or parts with very little initial bed contact.
- **Brim:** A brim is a single or multi-layer flat area printed around the base of your object, directly touching its first layer. It acts as an extension of your print’s footprint, increasing the surface area in contact with the print bed, similar to the brim of a hat.
- **Advantages:** Significantly improves first-layer adhesion and prevents corner lifting by distributing the shrinkage forces over a larger area. It uses less material and is quicker to print than a raft, making it a more economical option. Removal is generally easier than a raft, usually just requiring a hobby knife or snips to trim away the thin perimeter.
- **Disadvantages:** Still requires some post-processing to remove the brim from the part’s edges, which can leave a slight mark. The larger the brim, the more effective it is, but also the more material it uses and the more trimming required. Excellent for parts with moderate warping tendencies or larger flat bases where minor lifting is observed.
- **Skirt:** Unlike a raft or brim, a skirt does not directly touch your printed part. Instead, it prints one or more outlines around the object, at a specified distance from its perimeter.
- **Advantages:** Primarily used for priming the extruder and ensuring consistent filament flow before the actual part begins printing. This helps in achieving a perfect first layer without under-extrusion, which is critical for good adhesion. It also allows you to visually check if your nozzle height and bed leveling are correct before committing to the print, letting you make micro-adjustments if needed.
- **Disadvantages:** Does not directly aid in adhesion or prevent warping, as it doesn’t physically connect to the part. However, by ensuring a well-primed nozzle and calibrated first layer, it indirectly contributes to better overall print quality, which can help prevent other issues that might exacerbate warping.
The choice between these options depends on the severity of the warping issue, the material being used, and the geometry of the part. For highly critical prints with difficult materials or challenging geometries, a raft might be necessary. For most common scenarios with moderate warping tendencies, a brim offers a good balance of adhesion improvement and ease of post-processing. A skirt is almost always a good idea for calibration purposes, regardless of warping concerns.

A comparison of the design of a raft, skirt and brim (photo credits: Simplify3D)
4. Optimizing Print Bed Adhesion: Beyond Basic Settings
Even with optimal temperature and print aids, poor print bed adhesion remains a leading cause of warping. Ensuring your print sticks firmly to the build plate is paramount. Here are more detailed strategies and considerations for superior adhesion:
- **Print Surface Preparation and Type:** The surface of your print bed plays a significant role in how well your print adheres. Different materials often benefit from specific types of surfaces.
- **Glass:** Offers a perfectly flat surface and, when paired with adhesives, can provide excellent adhesion and a smooth, reflective bottom finish. Always ensure it’s perfectly clean for best results.
- **PEI (Polyetherimide) Sheets:** A very popular choice, often providing great adhesion for a wide range of materials (PLA, PETG, ABS) without the need for additional adhesives. PEI sheets can be smooth or textured, offering different surface finishes on your print’s base.
- **BuildTak or other specialized build surfaces:** These offer a textured surface that often provides excellent mechanical adhesion, especially for materials that benefit from a slight rougher grip.
- **Blue Painter’s Tape (Masking Tape):** For some materials, especially PLA, applying a layer of blue painter’s tape can provide a good adhesion surface. Ensure the tape is applied smoothly without bubbles or overlaps.
Regardless of the surface, always ensure it is meticulously clean. Fingerprints, dust, and residual oils from previous prints can significantly reduce adhesion. Use isopropyl alcohol (IPA) (70% or higher) or warm water with a mild dish soap to thoroughly clean the bed between prints, allowing it to dry completely.
- **Utilizing Adhesives for Enhanced Grip:** For challenging materials or particularly stubborn warping, a dedicated adhesion promoter can be a lifesaver, especially on smooth surfaces like glass.
- **PVA Glue Sticks:** Simple, effective, and widely available. Apply a thin, even layer to a heated print bed using long, overlapping strokes. It creates a tacky surface that adheres well to many plastics, especially PLA and ABS.
- **Hairspray:** A common household item, certain types of hairspray (typically those with higher polymer content and less fragrance) can create an excellent adhesion layer on glass or other smooth surfaces. Apply a thin, even mist to a cold print bed (to avoid inhaling fumes or overspray on printer parts), then heat the bed.
- **Sugar Water Solution:** For PLA, a solution of sugar dissolved in water can be lightly brushed onto a glass bed. Let it dry before heating the bed.
- **Specialized Adhesion Sprays/Liquids:** Brands like Magigoo, 3DLAC, or Vision Miner offer formulations specifically designed for 3D printing, tailored for various filament types and offering strong, consistent adhesion.
**Important Note:** Always test any new adhesive product on a small area or scrap piece first, and ensure it won’t damage your build plate during part removal. Some strong adhesives might bond too well, making removal difficult and potentially damaging the print or the bed surface. Always apply adhesives to a cold bed for safety and even application, then heat the bed.
- **Precision First Layer Calibration and Settings:** The quality of your very first layer is paramount – it sets the stage for the entire print.
- **Perfect Bed Leveling:** This cannot be overstated. A perfectly leveled bed ensures a consistent nozzle-to-bed distance across the entire print area. If the nozzle is too far from the bed, the filament won’t “squish” enough to adhere; if too close, it will scrape, clog, or cause poor extrusion. Manual leveling needs to be precise, and even auto-leveling systems benefit from periodic verification and calibration.
- **Optimizing First Layer Height & Width (Line Width):** Set your first layer height slightly higher (e.g., 0.2mm for a 0.4mm nozzle) to allow for good “squish” of the filament into the build plate, maximizing contact area. Some slicers also allow you to increase the first layer width or extrusion multiplier for the initial layer to lay down more material, further enhancing adhesion.
- **Slower First Layer Speed:** Print the first layer significantly slower than subsequent layers (e.g., 10-20mm/s). This allows maximum time for the molten plastic to bond with the print surface and cool uniformly without being pulled or disturbed by rapid nozzle movement.
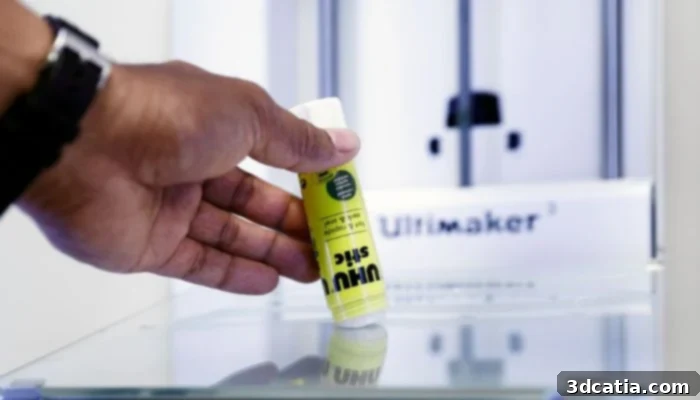
You can consider using glue (Photo credit: Makerbot)
5. Filament Considerations and Proper Storage
The quality and condition of your filament also contribute significantly to print stability and susceptibility to warping. Poor quality filament might have inconsistent diameters, leading to irregular extrusion, weak layer bonding, and adhesion issues. More importantly, many filaments are hygroscopic, meaning they absorb moisture from the air. Wet filament can lead to several problems during printing, including bubbles, popping sounds (as trapped water turns to steam), and ultimately weaker layer adhesion and compromised mechanical properties. This makes prints more susceptible to warping and other defects. Always store your filaments in a dry, airtight container, ideally with desiccant packets (like silica gel). If you suspect your filament is wet, consider drying it using a dedicated filament dryer or a food dehydrator at a low temperature before printing. Properly dried filament will extrude more smoothly and adhere better.
6. When All Else Fails: Advanced Troubleshooting and Support
If, after meticulously applying all the above strategies, you are still battling persistent warping, it might be time to delve into more advanced troubleshooting or seek external assistance:
- **Try a Different Filament Brand/Type:** Sometimes, a specific brand or even a particular batch of filament can be inherently problematic due to manufacturing inconsistencies. Experiment with a different manufacturer or even a different material (e.g., switching from ABS to PETG if your design allows and your printer can handle it). Some filaments are simply more forgiving than others.
- **Inspect Your Printer Hardware Thoroughly:** Conduct a detailed physical inspection of your 3D printer. Check for any physical damage or wear on your print bed surface, nozzle, hotend, or even the underlying frame. An old, worn, or partially clogged nozzle can lead to inconsistent extrusion. Ensure your printer’s frame is rigid and there’s no wobbling in the print bed or gantry system, as mechanical instability can translate into print defects, including warping.
- **Consult Manufacturer Support or Online Communities:** In the most serious and intractable cases, reaching out to your 3D printer manufacturer’s technical support can be invaluable. They may have specific recommendations for your model or be able to diagnose underlying hardware issues. Additionally, active 3D printing communities online (forums, Reddit, Facebook groups) are fantastic resources where experienced users can offer tailored advice based on your specific printer model and observed issues.
Conclusion: Conquer Warping for Flawless 3D Prints
Warping is undeniably one of the most common and vexing challenges faced by FDM 3D printing enthusiasts and professionals alike. However, by understanding its fundamental causes – primarily thermal contraction and differential cooling – and by systematically applying a range of preventive measures, you can dramatically improve your print success rate. From precise temperature control of your print bed and chamber to optimizing print speed, utilizing adhesion aids like rafts and brims, meticulous print bed preparation, and careful filament management, each step plays a vital role in achieving successful 3D prints.
Don’t let warping deter you from exploring the full potential of 3D printing. With patience, experimentation, and the comprehensive knowledge shared in this guide, you’ll be well-equipped to produce consistently high-quality, dimensionally accurate, and aesthetically pleasing 3D prints. Embrace these strategies, and you’ll transform frustrating failures into flawless creations. Happy printing!
Have you already experienced warping while 3D printing? Share your tips, experiences, or questions in a comment below or join the discussion on ourLinkedIn,Facebook, andTwitter pages! Don’t forget to sign up for our free weeklyNewsletter herefor the latest 3D printing news straight to your inbox! You can also find all our videos on ourYouTube channel.
*Cover Photo Credits: Makerbot