

Mastering Slic3r: Your Comprehensive Guide to Open-Source 3D Printing Slicing Software
In the dynamic world of additive manufacturing, the role of 3D printing software is paramount. Among the diverse array of tools available, slicers stand as an essential bridge, translating intricate 3D models into tangible objects. A slicer’s core function is to systematically *slice* a digital 3D model into a succession of horizontal layers. These layers are then converted into a specific set of instructions, known as G-code, which a 3D printer can precisely follow to build the object layer by layer. Given their critical importance in the 3D printing workflow, numerous slicing solutions have emerged, catering to a wide spectrum of users, from hobbyists to seasoned professionals. Today, we delve into one of the most well-established and respected open-source slicing solutions: Slic3r.
Slic3r is a testament to the power of community-driven development in the 3D printing industry. Launched in 2011 by Alessandro Ranellucci as a vital part of the pioneering RepRap community, it was conceived as open-source software, completely independent of commercial companies or specific printer manufacturers. This non-profit project ensures that Slic3r remains freely accessible, downloadable from its official website or GitHub repository. Its longevity and continuous evolution are impressive; currently available as Version 1.3.0, it represents the culmination of 48 different official iterations, each building upon the last to enhance functionality and user experience. Slic3r boasts broad compatibility with the most common 3D model file formats, including STL, AMF, and OBJ, and efficiently generates G-code or SVG files for a seamless printing process. Its versatility has made it an exceptionally popular choice, embraced by users across a multitude of 3D printers, from the early RepRap derivatives like Prusa Mendel and MendelMax to more modern machines such as UltiMaker, TAZ, and Rostock.
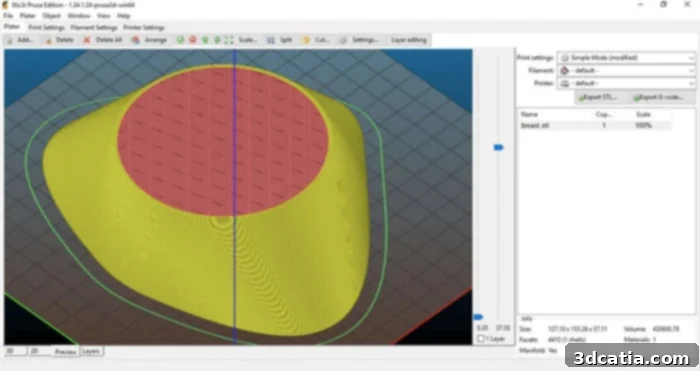
Photo Credit: Slic3r
Getting Started with Slic3r: First Steps to Successful 3D Prints
Embarking on your Slic3r journey begins with a straightforward process: downloading and installing the software. Slic3r is designed for broad accessibility, offering compatibility with Windows, Mac OS X, and Linux operating systems. Windows users have the flexibility to choose between 32-bit and 64-bit versions, ensuring optimal performance tailored to their specific system architecture. Once downloaded, the installation process is typically quick and intuitive. However, simply installing the software is only the first part of preparing for your initial 3D print. Before pressing print, it is absolutely crucial that your 3D printer machine is meticulously calibrated. The success of your print, and ultimately the quality of the final product, hinges directly on this preliminary setup. Without proper calibration, even the most perfectly sliced G-code can lead to disappointing results. For instance, if the extrusion multiplier or E-steps are not precisely tuned, the printer might extrude an incorrect quantity of filament, leading to issues like under-extrusion or over-extrusion. This, along with improperly leveled print beds or incorrect temperature settings, is a common cause of 3D printing problems such as poor layer adhesion, warping, or stringing. Investing time in thoroughly calibrating your machine – covering aspects like bed leveling, E-steps, PID tuning, and temperature calibration – will lay a solid foundation for consistent and high-quality prints when using Slic3r.
Slic3r Configuration: Fine-Tuning for Optimal Print Quality
Achieving optimal results in 3D printing goes beyond a well-calibrated machine; the configuration parameters within Slic3r itself play an equally vital role. These settings dictate how your model will be translated into G-code, influencing everything from print speed and material consumption to the structural integrity and aesthetic finish of your final print. Slic3r offers a comprehensive suite of configuration options, typically categorized into Print Settings, Filament Settings, and Printer Settings. Understanding and correctly adjusting these parameters is key to unlocking the full potential of your 3D printer and Slic3r.
Print Settings: Defining the Blueprint of Your Model
The ‘Print Settings’ section is where you define the intricate details of how your 3D model will be constructed. Key parameters here include layer height and perimeters, which significantly influence both the resolution and durability of your prints. The layer height, representing the thickness of each extruded layer, is a fundamental trade-off: a lower layer height (e.g., 0.1mm) results in finer details and a smoother finish, akin to higher resolution, but at the cost of significantly longer printing times. Conversely, a higher layer height (e.g., 0.3mm) speeds up the printing process but produces more visible layer lines and a coarser surface. Slic3r allows users to balance these factors based on the specific requirements of their project. Perimeters, on the other hand, define the number of vertical shells that form the outer and inner walls of each layer. A higher perimeter count increases the strength and rigidity of the printed part, especially useful for functional prototypes, while also improving the aesthetic quality by reducing the visibility of infill patterns. Slic3r supports both fixed perimeter counts for all layers and more advanced adaptive algorithms that can vary the perimeter count based on the geometry of the model, optimizing for both strength and material usage.
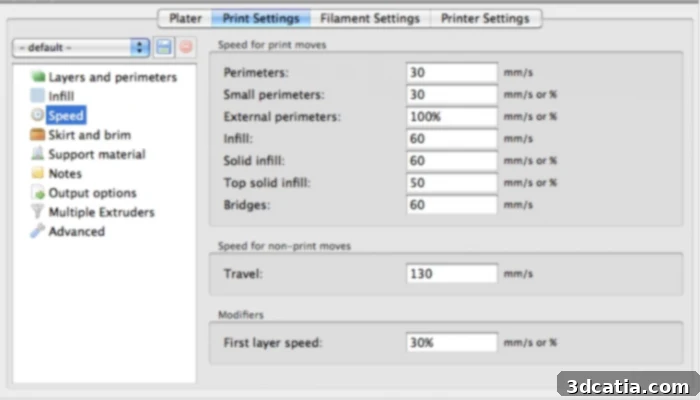
3D printing settings in Slic3r
Beyond external structures, Slic3r offers extensive control over infill parameters, which determine the internal material density and pattern of your model. While Slic3r can automatically generate infill, users can choose from various patterns such as rectilinear, grid, honeycomb, gyroid, or adaptive cubic, each offering unique properties regarding strength, flexibility, print time, and material consumption. A higher infill density generally results in a stronger, heavier part but consumes more filament and increases print duration. The infill also plays a crucial role in supporting the top surfaces of your model, preventing sagging. Furthermore, Slic3r provides options for support material, which is essential for printing models with overhangs or intricate features that would otherwise collapse during printing. While supports are automatically generated, users can adjust parameters like density, type (e.g., tree supports), and the angle at which they are required, impacting ease of removal and the finish of supported surfaces. Lastly, speed settings are another critical group of parameters, allowing you to fine-tune the extrusion speed for different elements of your print – including perimeters, infill, bridges, and the first layer. This granular control enables Slic3r to optimize the print process, balancing rapid production with maintaining structural integrity and surface quality across various sections of the model.
Filament Settings: Tailoring to Your Material
Filament settings, though not adjusted as frequently as print settings, are crucial for adapting Slic3r to the specific characteristics of your chosen material. These parameters are particularly important when using a new spool of filament or experimenting with different material types (e.g., PLA, ABS, PETG, Nylon). While Slic3r provides default values, it’s highly recommended to verify and fine-tune them. Key settings include filament diameter, which ensures accurate volumetric extrusion; flow multiplier, used to fine-tune the amount of plastic extruded for perfect layer adhesion and dimensional accuracy; and temperature settings for both the hot end (extruder) and the heated print bed. Different filaments require distinct temperatures for optimal melting and adhesion. For example, ABS typically requires higher extrusion and bed temperatures than PLA to prevent warping. Additionally, Slic3r allows users to input optional information such as filament density and cost per unit. This practical feature enables the software to accurately calculate the estimated weight of the printed model and its manufacturing cost, providing valuable insights for project planning and material management, especially for larger or commercial prints.

Photo Credit: Slic3r
Printer Settings: Configuring Your Machine for Success
The ‘Printer Settings’ configuration is often the least updated section once established, unless you frequently switch between multiple 3D printers or upgrade your hardware. This section defines the physical characteristics and capabilities of your specific 3D printer, allowing Slic3r to generate G-code that is perfectly tailored to your machine. One of Slic3r’s advanced features is its compatibility with dual-extrusion 3D printers, which significantly expands creative possibilities. For instance, parts of a model can be printed in different colors, or entirely different materials can be used – such as a soluble support material alongside a structural filament. To ensure precise printing with multiple extruders, Slic3r requires a careful definition of extruder offsets and other multi-material parameters. Another vital aspect covered in printer settings is connectivity. Users can configure USB printing, enabling a direct link between their computer and the printer. Furthermore, Slic3r supports serial connections and sophisticated remote printing options, including cloud-based solutions. Integration with powerful platforms like OctoPrint or Duet allows for comprehensive remote monitoring, control, and management of print jobs, ideal for print farms or simply enjoying the convenience of starting prints from anywhere.
Beyond basic machine definitions and connectivity, Slic3r is also equipped with an intelligent thermal management feature, a significant asset for improving print quality and preventing common defects. This system can dynamically regulate both the cooling fan speed and the overall print speed. By doing so, it ensures that each printed layer has adequate time to cool and solidify properly before the subsequent layer is deposited. This controlled cooling strategy is particularly effective in preventing issues such as warping, layer shift, and heat-induced deformation, especially for models with small features or rapid changes in geometry. Such a proactive approach to thermal regulation helps in achieving superior surface finish and structural integrity, significantly reducing the chances of print failures and saving both time and material.

A 3D-printed model in two colors via Slic3r (photo credits: Slic3r)
Slic3r stands out as a robust, community-driven, and highly configurable open-source slicing solution that has significantly contributed to the accessibility and advancement of 3D printing. Its continuous development, wide compatibility, and comprehensive feature set make it an excellent choice for anyone looking to gain granular control over their 3D prints, from initial concept to finished product. Whether you’re a beginner learning the ropes or an experienced user pushing the boundaries of additive manufacturing, Slic3r offers the tools needed to achieve high-quality results. Its emphasis on user control and the flexibility provided by its open-source nature ensures it remains a powerful and relevant software in the evolving 3D printing landscape.
What are your thoughts on Slic3r? Have you integrated this versatile slicer into your 3D printing workflow? We’d love to hear about your experiences and tips in the comments section below or join the conversation on our Facebook and Twitter pages! Don’t forget to subscribe to our free weekly Newsletter to receive all the latest news and innovations in 3D printing directly to your inbox!