
Mastering 3D Printing Bridges: A Comprehensive Guide to Flawless Overhangs
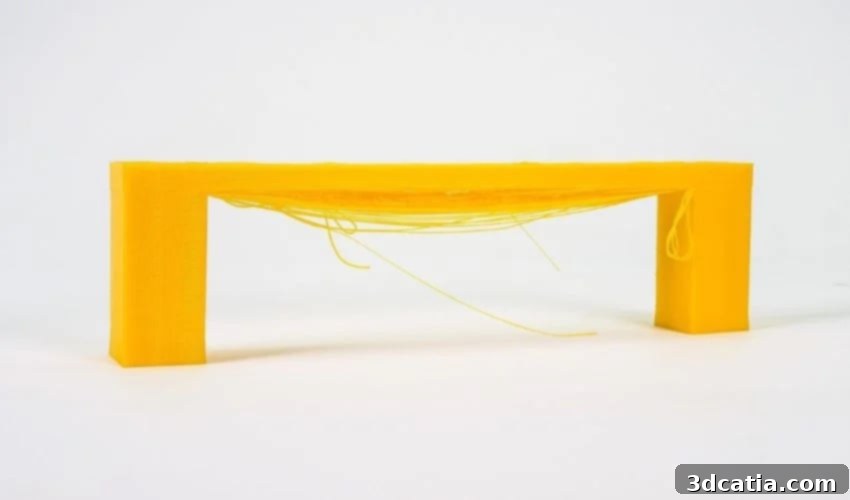
The journey into 3D printing, whether you’re a seasoned professional or an enthusiastic hobbyist, is often an exciting exploration filled with innovation and, sometimes, unexpected challenges. While the technology promises incredible creative freedom, encountering common printing issues is a rite of passage for many. We’ve previously delved into prevalent problems like stringing, ghosting, and warping, offering practical solutions to achieve smoother results. Today, our focus shifts to another significant hurdle in FDM/FFF 3D printing: bridging. The term “bridging” might conjure images of an architectural structure spanning a void, and that’s precisely what it is in the context of 3D printing. It involves extruding molten plastic across an open space or gap between two anchor points without any direct support from below. Ideally, this extruded material should form a perfectly straight, horizontal line. However, the reality often presents itself as undesirable sagging, drooping, or deformation, leading to what we commonly refer to as “poor bridging.” This article aims to comprehensively explore the causes behind these failures and provide actionable strategies to effectively address and overcome them, ensuring your 3D prints achieve seamless, high-quality bridges.
To better understand the intricacies of bridging, many liken the FDM 3D printing process to operating a hot glue gun mounted on a robotic arm. This analogy vividly illustrates the challenges associated with poor bridging. Imagine attempting to draw a straight line of hot glue between two elevated points without anything underneath to support it. Even if the initial drop successfully adheres to the first point, the subsequent glue extruded into thin air will almost certainly sag under its own weight before it has a chance to solidify, creating a messy, uneven span. Bridging in FDM 3D printing operates on a very similar principle. When the extruder attempts to deposit material across an unsupported gap, gravity becomes a formidable opponent. The molten plastic, lacking immediate structural support, tends to droop and deviate from its intended perfectly horizontal path. This sagging not only compromises the aesthetic quality of the print but can also weaken the structural integrity of the entire part. Understanding the fundamental mechanics of why this bridge-like structure often fails is the first step towards mastering the art of printing perfect bridges. In the following sections, we will delve into the critical factors that influence bridging success and provide specific, actionable insights on how to fine-tune your printer and settings for optimal results.
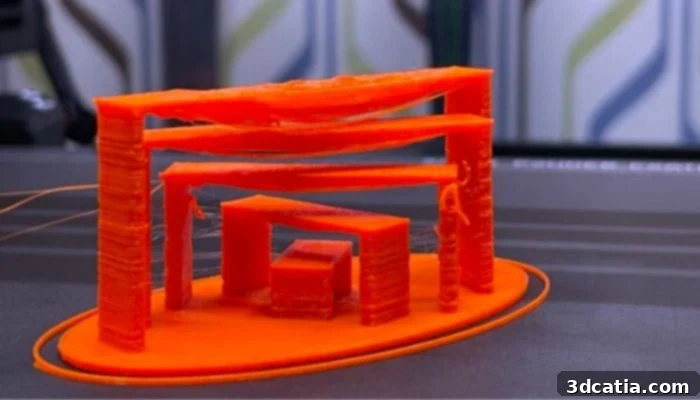
Achieving perfect overhangs and bridges in 3D printing involves numerous factors, from filament choice to environmental conditions (photo credit: N3DTech via Prusa Forum).
Temperature, Material, and Printing Speed: The Pillars of Successful Bridging
Just as with any complex challenge in 3D printing, poor bridging is rarely due to a single cause; rather, it’s often a confluence of specific factors that can be identified and controlled. Revisiting our hot glue gun analogy, we can glean crucial insights into the underlying problems. One of the most pivotal properties is the filament temperature. If our hot glue gun analogy taught us anything, it’s that attempting to span a gap with overly liquid adhesive at extreme temperatures is a recipe for failure. Similarly, in FDM 3D printing, improper heating of the filament is a primary contributor to bridging issues. If the filament is heated excessively beyond its optimal extrusion temperature, it becomes highly viscous, almost too fluid. This increased fluidity causes the plastic to drip excessively as it spans the gap, making it unable to hold its shape against gravity, leading to significant sagging. Conversely, if the filament is not heated sufficiently, its viscosity will be too high, making it difficult to extrude smoothly, potentially causing under-extrusion or, paradoxically, still leading to sagging because the material doesn’t flow correctly to create a taut bridge and solidify quickly enough. Finding the ‘sweet spot’ for temperature is essential for minimizing drip and maximizing structural integrity during bridging.
Beyond temperature, the choice of 3D printing filament itself plays an immensely crucial role in bridging success. Different materials exhibit unique thermal and rheological properties, meaning they behave differently when heated and extruded. Therefore, selecting a material suited for challenging overhangs and bridges is paramount. PLA (Polylactic Acid), for instance, is often considered a suitable choice for bridging. This is because PLA generally requires lower printing temperatures compared to other plastics and solidifies relatively quickly once extruded, which helps it resist sagging. However, even with PLA, careful management of its viscosity is necessary, often requiring printing with an open pressure chamber (or simply without an enclosure) to allow for effective cooling. Other materials like PETG and ABS can be more challenging for bridging due to their higher glass transition temperatures and longer cooling times. PETG, while strong, can be stringy and prone to sagging if not cooled aggressively. ABS often requires an enclosure to prevent warping, which can sometimes hinder effective localized cooling for bridges. Being acutely aware of the specific properties of your chosen filament and optimizing the printing conditions accordingly will significantly improve your bridging results in 3D prints.
Furthermore, the 3D printer speed settings, much like in other aspects of 3D printing, critically influence bridging quality and can often lead to print failures if not properly configured. If the print speed is set too high for a bridging section, the material may not have adequate time to properly extrude, adhere to the previous layers (or the anchor points), and cool sufficiently before gravity pulls it down. The filament is deposited too quickly, unable to form a stable bond or solidify before the next segment is laid down, resulting in sagged and weak bridges. It is therefore advisable to approach bridging sections with a cautious reduction in speed. Given the distinct properties of various filaments, experimenting with printing speed for bridging is highly recommended. This involves incrementally reducing the print speed specifically for bridging layers until an optimal balance is achieved. However, there’s a delicate equilibrium to maintain: printing too slowly can also be detrimental. Excessively slow speeds might lead to over-extrusion, insufficient layer adhesion as the nozzle lingers too long, or even heat creep, which can result in clogs or an unsolidified, blobby 3D printed part due to too much localized heat build-up. The goal is to find the fastest speed at which the filament can still form a clean, sag-free bridge.
To fine-tune this intricate process for perfect 3D print bridges, it’s absolutely crucial to adjust specific settings within your slicer software. One of the most impactful settings is the Bridge Fan Speed. This parameter allows you to control the cooling fan’s intensity exclusively when the printer is laying down bridge-like sections, providing targeted cooling to solidify the material faster. Depending on your slicer, you can typically find this setting in various locations: in PrusaSlicer, navigate to Filament Settings > Cooling > Bridges Fan Speed; in Cura, it’s usually under Print Settings > Experimental > Bridge Fan Speed; and in Simplify3D, you’ll find it within FFF Settings > Cooling > Fan Overrides > Bridging Fan Speed Override. Often, setting this to 100% for bridging layers is a good starting point for most materials like PLA. Beyond fan speed, consider other dedicated bridging settings like “Bridge Flow Ratio” (adjusts extrusion width/height for bridges, often slightly under-extruding to prevent sagging) and “Bridge Speed” (allows for a different print speed specifically for bridges, typically lower than overall print speed). Moreover, the orientation of your 3D model plays a profoundly significant role in successful bridging. By strategically rotating your model on the build plate, you can often minimize the number or length of bridges required, or convert challenging bridges into more manageable overhangs that can be printed with less difficulty or with simple support structures. Optimizing model orientation can drastically improve print quality and reduce the likelihood of bridging failures.
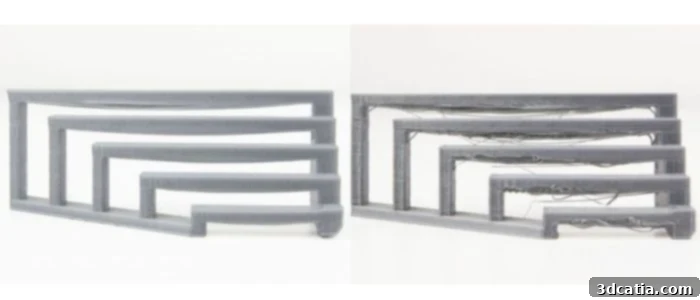
Poor bridging in FDM 3D printing can manifest as sagging, stringing, or an uneven surface, often requiring multiple iterations to resolve (Photo credit: UltiMaker)
Optimizing Ventilation and Exploring Support Strategies for Robust Bridges
As we’ve established, precise control over the material temperature is paramount for achieving successful 3D prints, especially when dealing with unsupported spans. However, the ventilation of your 3D printer, specifically the part cooling fan, is an equally significant, if not more critical, factor when it comes to forming strong, clean bridges. Ventilation plays a pivotal role in rapidly cooling down the extruded material. Immediately after the hot filament is deposited, a strategically directed airflow from the part cooling fan helps to reduce its temperature quickly. This accelerated cooling leads to faster hardening of the plastic, which is essential for it to maintain its shape against the force of gravity across the empty space. A rapid solidification minimizes the likelihood of deformation, sagging, and dripping. It’s crucial to ensure that your print is adequately positioned on the build plate and that the part cooling fan ducts are properly designed and aligned to provide a direct and effective cooling effect on the bridging sections. For printers with adjustable fan shrouds, making sure the airflow is concentrated on the nozzle tip and the freshly extruded filament can make a substantial difference. Remember that while more cooling is generally better for bridges, some materials like ABS or ASA require careful balancing to prevent cracking or delamination, so incremental adjustments are key.
If, despite all the aforementioned adjustments to temperature, speed, material, and fan settings, you continue to struggle with particularly challenging geometries or very long bridges, there are alternative approaches to consider. In the realm of FDM 3D printing, certain complex models featuring extreme overhangs or extensive unsupported gaps simply cannot be printed reliably without additional assistance. This is where support structures for 3D printing become indispensable. Implementing such supports strategically underneath bridge-like shapes can provide the necessary temporary foundation, ensuring the integrity of the print as the extruder traverses these otherwise unsupported areas. These supports essentially create a scaffolding that prevents the molten plastic from sagging, allowing it to solidify correctly. Depending on your 3D printer and the specific filament used, you have several options. You can often use support material made from the same filament as the printed object itself, which is then mechanically removed after printing. Alternatively, for more intricate designs or to minimize post-processing, you can opt for soluble support materials (like PVA for PLA or HIPS for ABS) that dissolve upon contact with water or other specific solvents, leaving behind a pristine final print without any physical removal marks. Proper support settings, including density, pattern, and interface layers, are crucial for easy removal and effective support.
Another powerful factor to experiment with, especially for internal bridges or to enhance the overall structural integrity around bridged sections, is the infill settings for 3D printing. Infill refers to the internal structure of your 3D print, and while it doesn’t directly support external bridges, it significantly impacts the robustness and stability of internal spans. For instance, using a higher infill percentage, such as 80%, will result in significantly smaller empty spaces within the print. This denser internal structure provides more material for the bridging layers to adhere to and creates a more robust foundation, effectively strengthening any internal bridges or the layers immediately above external bridges. The increased material also helps dissipate heat more evenly. Conversely, a lower infill percentage, such as 5%, will create much larger empty spaces. While this saves material and print time, it significantly increases the risk of unstable bridges and can lead to internal sagging or even print failure if the bridging layers lack sufficient anchor points. Therefore, thoughtfully adjusting the infill percentage and even experimenting with different infill patterns (like grid, rectilinear, or gyroid, which offer varying strengths and support characteristics) can dramatically impact the quality, stability, and overall success of your 3D printed bridges. A higher infill density or a stronger infill pattern around critical bridging areas can provide the necessary backbone for achieving perfectly executed unsupported spans.
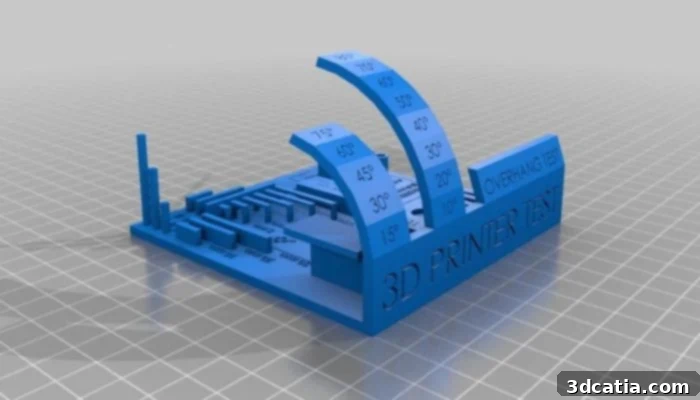
The angle of your overhangs directly influences the likelihood of successful 3D printing, with steeper angles posing greater challenges (Photo credit: Faultydata via Cults)
Beyond these primary factors, several other considerations can contribute to improving 3D printing bridge quality. Ensuring your print bed is perfectly leveled provides a consistent and strong foundation for the initial layers, which are the anchor points for any bridges. An unlevel bed can lead to poor adhesion at the start of a bridge, causing it to fail. Regularly cleaning your nozzle is also important, as a partially clogged nozzle can result in inconsistent extrusion, making it impossible to lay down a smooth, even bridge. Calibrating your extrusion multiplier or flow rate is another often-overlooked step; precise material deposition prevents both over-extrusion (which can lead to sagging due to excess material) and under-extrusion (which results in weak, gappy bridges). Furthermore, understanding the impact of layer height on bridging is beneficial. While thinner layers might look better, they also mean less material per layer and potentially less structural integrity for a bridge. Sometimes a slightly thicker layer can provide more body to resist sagging. Finally, remember that achieving pristine bridges often requires patience and systematic troubleshooting. Utilizing dedicated bridging test prints available online can be an excellent way to dial in your specific printer’s settings without wasting a large amount of filament on a full model. By systematically adjusting one setting at a time and observing the results, you can gradually optimize your printer for virtually any bridging challenge.
After exploring this extensive array of tips and recommendations for achieving successful 3D printing with challenging overhangs and perfect bridges, it is essential to re-emphasize a crucial point: the most suitable solution is rarely a one-size-fits-all approach. The optimal configuration is always intricately influenced by the specific design and complexity of the model you are attempting to print, the unique characteristics of the chosen filament material, and the capabilities and nuances of the particular 3D printer being used. Each of these variables interacts in complex ways, demanding a tailored and often iterative approach to problem-solving. By understanding the underlying principles and systematically applying these strategies, you’ll be well-equipped to tackle even the most daunting bridging scenarios and elevate the quality of your FDM 3D prints.
Have you ever experienced problems with bridging in 3D printing? What strategies did you find most effective in fixing 3D printing bridging problems? Share your insights and experiences in a comment below or join the conversation on our LinkedIn, Facebook, and Twitter pages! Don’t forget to sign up for our free weekly Newsletter here to receive the latest 3D printing news straight to your inbox! You can also find all our comprehensive videos and tutorials on our YouTube channel, offering visual guides to further enhance your 3D printing expertise.