
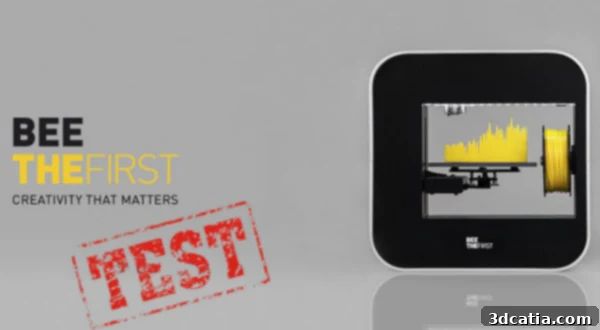
BEETHEFIRST 3D Printer Review: A Comprehensive Look at Unboxing, Setup, and Print Performance
The excitement of unboxing a new 3D printer is a sensation that never truly fades, even after experiencing numerous models. Each package holds the promise of a new adventure, a fresh set of challenges, and the potential for incredible creations. Today, we delve into that familiar thrill, thanks to our friends at Cubeek3D, who graciously provided us with this intriguing little machine: the BEE. Join us as we explore what treasures this box contains and what new 3D printing experiences await.
https://youtu.be/ZbvKOgPbqqw
Unboxing the BEE: First Impressions and Thoughtful Packaging
Our journey began with the delivery of the BEE, housed in a box whose thoughtful design immediately brought a smile to our faces. But the pleasant surprises didn’t stop there. Upon opening, we discovered a complimentary T-shirt nestled within – a delightful and unexpected bonus that truly set this unboxing apart from the usual sea of foam, polystyrene, and cardboard wedges. This initial gesture spoke volumes about the brand’s approach to customer experience.
Beyond the initial pleasantries, the packaging itself revealed an abundance of protective measures, ensuring the printer’s safe transit. The only elements immediately visible upon opening were two strategically embedded white handles, designed to make removing the printer from its box a remarkably easy task. This small detail highlighted a user-centric approach from the very beginning.
Every aspect of the BEE’s packaging seemed to be meticulously engineered for user comfort and a seamless setup experience. Each protected component, secured by custom-fit cardboard, was clearly numbered. This intuitive numbering system guides users through the unpacking process, ensuring parts are removed in the correct sequence, minimizing confusion and the risk of damage. It’s a testament to the thought put into the user journey, right from the moment the box arrives.
The BEETHEFIRST Printer: Design and Core Features
With the protective layers removed, the BEE itself stood ready for connection and accessory installation. What immediately captivated us was its design: a truly somber and elegant aesthetic. While fundamentally a cube, the softened, rounded corners on all four edges infuse it with a subtle yet distinct touch of class. This refined simplicity suggests a machine built for efficiency and quiet integration into any workspace.
One of the most striking aspects of the BEE’s design is the deliberate absence of an LCD screen or any physical control knobs. This minimalist approach strongly suggests a printer primarily controlled via its dedicated software. The only visible external elements, reinforcing this minimalist philosophy, are:
- Front: A subtly illuminated LED logo, adding a touch of modern sophistication.
- Back: A single, straightforward ON/OFF switch and a neatly arranged set of ports for necessary connectors, maintaining a clean and uncluttered profile.
Essential Accessories for Your 3D Printing Journey
Once the printer was unveiled, it was time to examine the accompanying accessories. The kit, while not overly extensive, contains all the necessary tools to get started and maintain the BEE. As you can see, the focus is on practical essentials rather than overwhelming additions:
- Classic Blue Tape: A standard but crucial item for ensuring optimal print bed adhesion, especially for PLA.
- Spatula: Essential for carefully removing finished prints from the build plate without causing damage to either the print or the surface.
(photo – Placeholder for a photo showing these items, as indicated in original content)
- USB Cable: For seamless connectivity between your computer and the printer, enabling data transfer for printing.
- Power Cable: The standard cable to energize your BEE.
- An Upgraded Cable: The purpose of this “upgraded cable” isn’t immediately clear from the original text, but it suggests a more robust or specialized connection for enhanced performance or specific functions. We will explore its role further during our testing.
- Sharp Pointed Tip: An invaluable tool specifically designed for removing stubborn PLA residues from the print head, ensuring consistent extrusion and preventing clogs.
- Hexagonal Wrench: This key tool is provided for disassembling the printer’s hull, should it become necessary to access and unclog the extruder – a common maintenance task for any 3D printer owner. Its inclusion implies user-level maintenance is anticipated and supported.
- Quick Start Guide: A concise, 10-page guide available in English and Portuguese, providing essential setup instructions. Its CE certification confirms compliance with European safety standards.
We will dedicate more time to the upgraded cable, the pointed cleaning tip, and the hexagonal wrench later in this review, as their specific uses and implications for maintenance and operation deserve a closer look.
The included black PLA filament comes in a proprietary coil format, noticeably smaller in diameter than the standard spools used by many other well-known printers. This particular coil features an opening of 16 mm, a diameter of 134 mm, and a width of 50 mm. While proprietary formats can sometimes limit user choice, the compact size is clearly integrated into the printer’s design philosophy.
Accompanying this unique coil is a 3D-printed coil stand. We suspect this particular stand might be a control piece, printed by the BEE itself, showcasing its capabilities right out of the box. Beyond its smaller diameter, the reel holder boasts a distinctive attachment system: it ingeniously mounts on the right side, immediately adjacent to the print tray. This clever placement demonstrates thoughtful design, optimizing space and filament path, suggesting the developers considered both aesthetics and practicality.
Finally, let’s turn our attention to the print tray itself. This component is quite unique and might elicit a “love it or hate it” reaction from users. It’s a modest Plexiglas square, measuring 20.2cm by 14.7cm. What makes it distinctive is its attachment system: three perfectly triangulated magnets ensure a snug and secure fit. This design is highly effective at preventing any unwanted shock or shake to the meticulously adjusted printing mechanism, thereby contributing to print stability. While some might prefer more traditional clamping systems, this magnetic approach offers both convenience and reliability.
To give a better sense of the BEETHEFIRST’s physical presence, let’s compare it to some other popular 3D printers on the market. These visual comparisons highlight its compact and sleek design in relation to its contemporaries, emphasizing its elegant form factor which is often sought after in modern home or office environments. The BEE consistently appears more minimalist and less industrial than many of its peers, making it an attractive option for those prioritizing aesthetics alongside functionality.
BEE (bottom left) vs Makerbot Replicator 2 (top left) Makerbot Replicator Gen 5 (bottom right) Ultimaker Ultimaker 2 (top right)
The Bee left and the UP! Plus 2 PP3D right.
BEETHEFIRST Software: Intuitive Control and User Experience
With the BEE fully unpacked and admired, our next step was to bring it to life through its software. The process begins by visiting the manufacturer’s website, where a convenient link at the bottom-left corner directs users to the software download page. This hub also provides access to essential manuals and helpful video tutorials, creating a comprehensive resource for new users. The online videos, in particular, are a significant asset, offering clear visual guidance on the machine’s overall operation and various functionalities.
The BEE software boasts broad compatibility, available in three versions to accommodate a wide range of users: MacOS, Windows 7/8/10, and Linux. Upon successful installation, a concise tutorial automatically pops up, introducing users to the software’s various features and guiding them through the initial steps. Should you ever need a refresher, the “Quickguide” option is always readily accessible, ensuring that help is just a click away. We found the entire software experience to be exceptionally intuitive. Much like the printer’s external appearance, the application itself is characterized by its simplicity and effectiveness, making it approachable for both novices and experienced users alike. For a visual demonstration, check out the software in action in the video below:
https://youtu.be/jHl4sSccsDQ
The software’s interface is cleanly organized. Four distinct tabs on the left side are dedicated to object manipulation, allowing users to modify their 3D models with ease. On the top right, three additional controls manage the printer itself, offer guidance, and facilitate the loading of STL files. An informative bar on the right side of the screen provides real-time data and status updates. By clicking on “Models,” users can access a database of six pre-registered demonstration files – models we will be showcasing during our printing tests. Additionally, the software allows for effortless loading of your own custom 3D files.
Once a 3D file is loaded, the “Move” tab empowers users to precisely position their object along the X, Y, and Z axes. Beyond simple translation, you can orient the model with granular precision or, for quick adjustments, apply a 90° rotation with just a few clicks. This level of control is incredibly practical for optimizing STL file placement on the build plate, which in turn helps to limit the quantity of necessary support structures. By ensuring a flat and smooth part surface makes direct contact with the tray, adhesion is maximized and post-processing efforts are minimized. Furthermore, the software provides options to resize the STL model or apply a mirror effect, expanding design possibilities.
With the part meticulously positioned and prepared, the next crucial step is to load the PLA filament. This is conveniently managed through the “Maintenance” tab. Once the nozzle reaches the optimal temperature, users simply select “load” to initiate the filament insertion process or “unload” to replace the material. The small metal ring located on the top right of the printer serves as the entry point for the filament. For print bed calibration, a simple piece of paper is all that’s required to ensure the precise distance between the nozzle and the print tray. The primary adjustment point is managed directly through the software, while the other two calibration points are fine-tuned using the manual wheels positioned beneath the tray. The “Maintenance” menu also thoughtfully includes a practical tool for cleaning the print head, simplifying routine upkeep. Throughout these critical setup and maintenance procedures, the software provides clear, step-by-step guidance, making the entire process remarkably straightforward and user-friendly.
All preparations complete! Piece? Check! Tray? Check! Filament? Check and double-check! And now, ladies and gentlemen, it’s time to print!
Upon clicking the “Print” button, you are presented with the available print settings. It’s worth noting that more technical or advanced users might find these parameters somewhat limited, potentially leading to a degree of disappointment. The focus here is clearly on simplicity and ease of use, rather than granular control over every printing variable.
Available Printing Parameters:
- Resolution: Users can choose between “low” or “high,” which presumably corresponds to layer height, influencing print detail and speed.
- Density: Options include “low,” “medium,” or “high,” controlling the infill percentage of the print, thereby affecting strength and material usage.
- Addition of a Raft: This highly practical option facilitates the attachment of the part during printing, proving especially effective for ensuring a strong first layer on this particular printer.
- Addition of Supports: Necessary for more complex parts with overhangs, these structures prevent drooping and ensure geometric accuracy.
While these basic settings cover essential printing needs, we do regret the absence of more advanced parameters such as specific temperature settings for the nozzle and bed, print speed adjustments, retraction settings, and other fine-tuning options. Such controls are typically sought after by experienced users looking to optimize prints for different materials or achieve specific surface finishes. Their omission suggests the BEE is geared more towards a plug-and-play experience rather than extensive experimental control.
First 3D Prints: Exploring the BEE’s Capabilities
To help users get started immediately, the manufacturer provides a selection of pre-loaded 3D files within the software. These models serve as excellent initial tests and demonstrations of the BEE’s printing capabilities. The database includes a diverse range of objects such as the EEB logo, a three-part vase designed for assembly, a functional jar with a cap, whimsical mustaches, and a charming windmill. These options allow new users to experience the printing process without the immediate need to source or design their own files.
Printing Objects: Performance and Quality Analysis
To rigorously evaluate the BEE’s printing performance, we initiated our test with a standard benchmark print that has been consistently used across all our 3D printer reviews at 3Dnatives. This specific test model is designed to challenge printers with a variety of geometric features: flat surfaces, intricate curves, sharp corners, and areas requiring supports across all three axes. This comprehensive approach allows us to observe how the BEE handles different printing scenarios and to critically assess its output quality.
When examining the flat parts of our benchmark print, we observed that the print quality was slightly coarser compared to results achieved with previous models we’ve tested. To further illustrate this, we conducted another well-known test: our famous TreeFrog model, originally designed by MorenaP.
In the image below, you’ll see a direct comparison: our print from the MakerBot Replicator 2 on the left, and our print from the BEETHEFIRST on the right.
As visually evident, the BEETHEFIRST print exhibits some minor material shortages, particularly noticeable on the top surfaces of the frog’s legs and thighs. This issue proved challenging to overcome, primarily because, at the time of our testing, the software did not allow for direct adjustments to critical parameters like temperature and print speed. The inability to fine-tune these settings limits the potential for optimizing print quality and addressing specific material flow issues, which is a significant consideration for users expecting a high degree of control.
The underside of 3D prints is equally telling, often revealing significant differences in “finishes” and adhesion quality. Upon close inspection, the print from the BEE (on the right) displayed a noticeably coarser start. While this characteristic undoubtedly ensures perfect adhesion of the piece to the print tray, which is a desirable quality, the overall initial layers were less clean and smooth when compared to the print produced by the MakerBot (on the left). This trade-off between strong adhesion and surface aesthetics on the bottom layer is an important point for users to consider.
Below, we provide a detailed look at various aspects of the prints. On the left, you’ll see the support structures generated by the BEE. We quickly ceased extensive post-processing efforts on these, as they proved considerably more complicated to remove compared to supports from other printers we’ve tested. While removable, extracting them requires significantly more time and energy, potentially leading to surface damage if not handled with extreme care. The middle photo highlights the raft generated by the BEETHEFIRST’s software: it’s notably flexible, almost elastic, making it very effective for initial adhesion and remarkably easy to remove from the print. In the photo on the right, we present a comparison of infill patterns: the classic honeycomb structure of the MakerBot at 15% density (left side of the image) versus the BEETHEFIRST’s infill, set at “medium” density. This comparison illustrates the different approaches to internal structure generation between the two machines.
Customer Service and Troubleshooting: A Real-World Test
No review is truly comprehensive without encountering and resolving a technical problem, as these scenarios often reveal the true quality of customer support. During our testing, we faced an issue with loading the filament; it was impossible to feed the material into the printer. This might have been linked to using a non-proprietary filament format with the BEE’s unique coil system. We reached out to the company’s customer service, available in English and Portuguese, and were genuinely surprised by their rapid response: a solution arrived in our inbox in less than an hour. This swift support truly enhanced our user experience.
Thanks to the clear guidance from customer service, we successfully navigated the issue through a precise four-step process. This hands-on experience not only resolved our problem but also provided valuable insight into the printer’s internal mechanisms:
Step 1: Remove the Upper Casing Screws
The first step involved carefully removing the four screws securing the upper casing of the printer. This gave us access to the internal components and the filament loading mechanism.
Step 2: Detach the Handle and Observe the Loading System
Next, we removed the handle by unscrewing the central screw. This step was particularly enlightening as it allowed us to observe the intricate filament loading system. Given the small diameter of the proprietary coils, the filament is guided through a tube that swirls horizontally until it reaches the extruder. This clever design is intended to prevent filament pinching or tangling, a common issue in many printers. Understanding this mechanism helped us appreciate the engineering behind the BEE’s compact design.
Step 3: Access the Extruder by Removing the Metal Tab
With the handle out of the way, we then unscrewed a larger screw by hand, which allowed us to remove a metal tab. This action revealed the extruder assembly itself, bringing us closer to the source of the blockage.
Step 4: Clear the Blockage and Clean the Toothed Wheel
The final step involved carefully removing the jammed end of the filament that was causing the blockage. If necessary, customer service advised using a toothbrush to gently clean the toothed wheel of the extruder, removing any accumulated PLA deposits that might have become encrusted and contributed to the feeding issue. This maintenance insight is crucial for long-term printer health.
This troubleshooting experience, while a temporary setback, ultimately reinforced our positive impression of the BEE’s customer support and provided valuable insight into the printer’s maintainability. The guidance was clear, concise, and highly effective, allowing us to quickly resume our testing. It demonstrated that even with its minimalist design, the BEE is built with a degree of user serviceability in mind, supported by an responsive and efficient support team.