
Optimizing 3D Printed Parts: A Comprehensive Guide to Heat Treatment in Additive Manufacturing
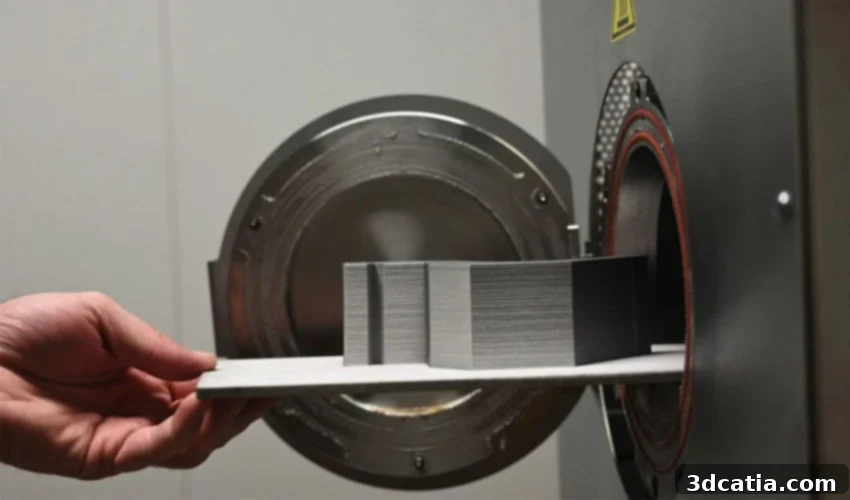
Post-processing represents an indispensable stage in the additive manufacturing workflow. Indeed, a diverse array of methods is employed across the industry, each tailored to the specific 3D printing technology and material used. These range from crucial steps like depowdering and support removal to aesthetic enhancements such as coloring. Among these vital post-processing techniques, heat treatment stands out as a powerful way to fundamentally alter and enhance the properties of additive manufacturing components.
This category of post-processing encompasses several distinct forms, each with unique applications and mechanisms. The specific heat treatment chosen will depend significantly on the desired final properties, the material type (metals, polymers, ceramics), and the initial 3D printing method. Key techniques include sintering, annealing (especially for metals), curing (for photopolymers), and hot isostatic pressing (HIP). The overarching goal of these heat treatment processes is clear: to alleviate internal stresses accumulated during the printing process and, crucially, to significantly improve the mechanical properties of the 3D-printed part. By carefully controlling temperature cycles, manufacturers can influence microstructural characteristics, thereby enhancing attributes like strength, ductility, hardness, and fatigue resistance, which are paramount for end-use applications.
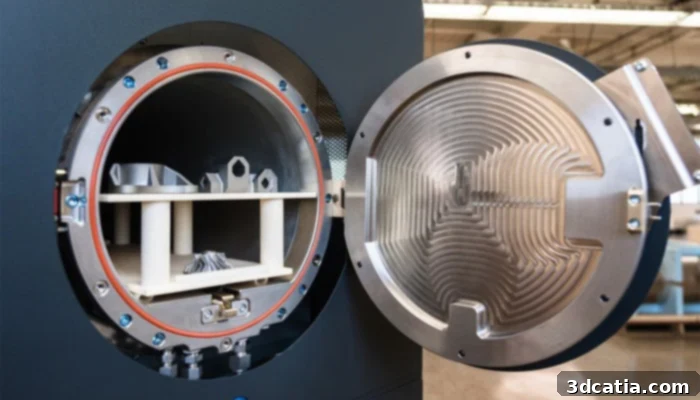
A range of equipment is available for heat treatment in additive manufacturing (photo credits: Markforged)
In additive manufacturing, the inherent layer-by-layer deposition and rapid heating and cooling cycles within the build chamber subject parts to varying thermal gradients. These temperature fluctuations are a direct consequence of the chosen printing process and can lead to the accumulation of undesirable residual stresses within the material. These internal stresses can compromise a part’s structural integrity, potentially leading to warping, cracking, or premature failure in service. Therefore, applying appropriate heat treatment after the initial printing phase is not merely beneficial but often critical. Beyond mitigating residual stresses, heat treatments profoundly influence the mechanical characteristics of the parts, enhancing properties such as bending strength, tensile strength, ductility, fracture toughness, and final hardness. Understanding the nuances of each heat treatment method is essential for unlocking the full potential of 3D-printed components. Let’s delve deeper into the various heat treatment methods and their specific roles in refining 3D-printed parts.
Sintering: A Critical Post-Processing Step for Metals and Ceramics
Sintering is a cornerstone heat treatment method employed extensively in additive manufacturing, particularly for metal and ceramic parts. While often referred to as a post-processing technique, it is more accurately described as an indispensable step within the manufacturing process itself, particularly mandatory for technologies like binder jetting and certain indirect 3D printing methods. In these processes, a “green part” is initially formed, which is essentially a porous structure comprising powder particles held together by a polymeric binder or a plastic matrix containing metal/ceramic particles.
The primary objective of sintering is to transform this fragile green part into a dense, solid, and mechanically robust component. This is achieved by carefully heating the part in a specialized sintering furnace to a temperature just below the melting point of the primary material (metal or ceramic). During this controlled heating cycle, the binder material is systematically removed through pyrolysis or evaporation, leaving behind the bare metal or ceramic particles. As the temperature is maintained, these particles begin to bond together through atomic diffusion, forming necks and consolidating the material. This process significantly reduces the porosity of the parts and drastically increases their density, hardness, and overall mechanical strength.
The phenomenon of shrinkage is a crucial consideration during sintering. As the material particles coalesce and the binder is removed, the overall volume of the part decreases. This reduction typically ranges from 15% to 20% of the original green part’s dimensions. Designers and engineers must meticulously account for this predictable shrinkage during the initial design phase to ensure the final printed and sintered component meets the precise dimensional tolerances required. Precise control over sintering parameters, including temperature ramp rates, dwell times, and cooling profiles, is vital to achieve the desired microstructure and mechanical properties without introducing defects like excessive warpage or internal cracks. Sintering is therefore fundamental to producing high-performance metal and ceramic components via additive manufacturing.
Curing: Heat Treatment for Polymer 3D Printed Parts
When focusing on polymers within additive manufacturing, specifically those produced using vat photopolymerization techniques like stereolithography (SLA), digital light processing (DLP), and LCD-based systems, curing emerges as a critical heat treatment technique. This post-processing step is exclusively used for parts fabricated with photopolymer resins, with the explicit aim of enhancing their final mechanical, thermal, and chemical properties.
In their liquid state, photopolymer resins are composed of various monomers and oligomers that are not fully bonded. During the 3D printing process, exposure to a UV light source initiates a polymerization reaction, cross-linking these monomers to form the desired solid part. However, after the initial printing, some areas of the part may not be optimally cross-linked, and a portion of the monomers often remain unreacted. This incomplete polymerization can compromise the overall strength, durability, and stability of the printed component, leaving it somewhat brittle or tacky.
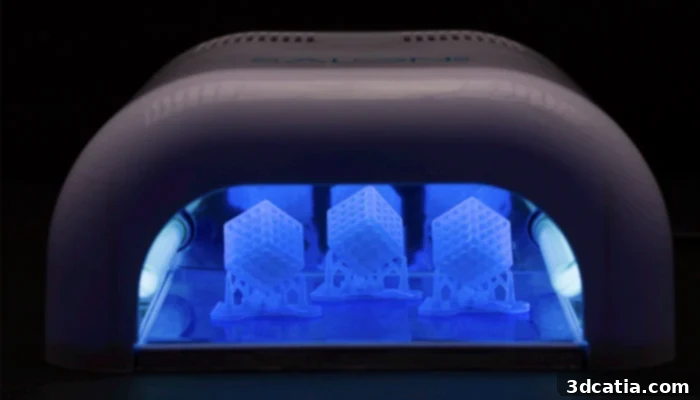
Curing is a common heat treatment method for parts made with resin 3D printing (photo credits: Formlabs)
This is where the post-curing stage becomes indispensable. After a part has been successfully printed, it typically undergoes a cleaning process to remove any excess non-photopolymerized liquid resin and then has its printing supports carefully removed. The part is then placed in a specialized curing machine, often a UV chamber. Many 3D resin printer manufacturers, such as Formlabs with its Form Cure solution, offer dedicated curing stations designed to optimize this process. Inside the UV chamber, the part is exposed to specific wavelengths of UV light, often accompanied by controlled heating. This secondary exposure initiates further cross-linking reactions among the remaining unreacted monomers, completing the polymerization process.
The result is a significantly harder, more robust, and more durable part with improved mechanical properties, including increased tensile strength, impact resistance, and heat deflection temperature. Curing effectively reduces the inherent fragility of freshly printed resin parts, minimizing the risk of breakage during handling and use. Furthermore, it helps to set the resin’s final color and makes the part safer to handle by reducing the presence of skin-sensitizing unpolymerized resin. The effectiveness and duration of the curing process are influenced by several factors, including the type of resin used, the part’s geometry, and its size. Generally, larger or thicker parts may require longer curing times to ensure complete cross-linking throughout their entire volume. This critical post-processing step is a fundamental consideration in the production workflow for high-performance resin 3D-printed components across various industries.
Annealing as a 3D Printing Heat Treatment Method
Annealing is a widely utilized heat treatment method that involves exposing a 3D-printed part to a specific elevated temperature, holding it at that temperature for a predetermined period, and then gradually cooling it. This controlled thermal cycle is primarily implemented to relieve internal stresses, increase ductility, reduce hardness, and improve the machinability and overall stability of the material. The precise temperature and duration of the annealing process vary significantly depending on the material used and the desired property modifications.
This technique is extensively employed for metals, where it can refine grain structure, improve strength-to-weight ratios, and enhance fatigue resistance. Beyond metals, annealing is also applicable to glass and certain polymers. For thermoplastics, materials like PLA (Polylactic Acid) and PETG (Polyethylene Terephthalate Glycol) can benefit from annealing, which improves their thermal stability and mechanical strength by promoting molecular rearrangement and increasing crystallinity. However, it’s crucial to note that annealing is not universally suitable for all thermoplastics; for instance, amorphous polymers like ABS (Acrylonitrile Butadiene Styrene) are generally not recommended for annealing, as the heat can exacerbate warping or introduce undesired dimensional changes due to rapid stress release.
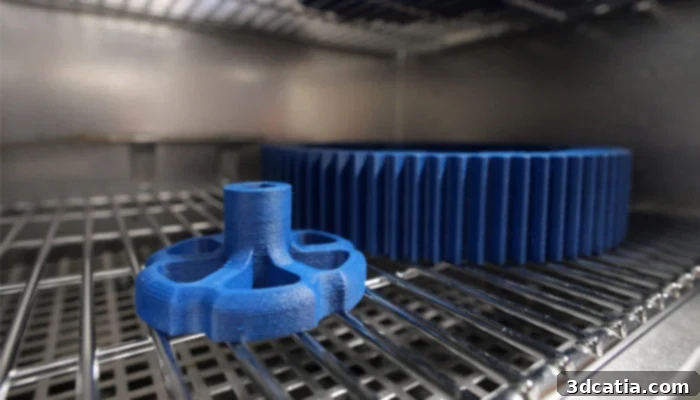
Some thermoplastics are compatible with annealing, enabling it to be used as a heat treatmen method (photo credits: UltiMaker).
The mechanism behind annealing varies slightly between material types. For metals, annealing typically involves heating the material to a temperature where recrystallization and grain growth can occur, often above its recrystallization temperature but below its melting point. This process reduces dislocations and internal defects, leading to a more uniform and refined microstructure. In the context of polymers, annealing entails heating the material to a temperature above its glass transition temperature (Tg) but below its melting temperature (Tm) for semi-crystalline plastics. This allows the polymer chains to reorganize, increasing the degree of crystallinity and thus improving the material’s stiffness, strength, and thermal resistance, enhancing the stability of the final part.
The duration of the annealing process significantly influences the resulting properties and microstructure of the final part. Longer exposure to heat generally leads to more extensive structural changes, such as larger grain sizes in metals or higher crystallinity in polymers. For plastic components, prolonged annealing can accelerate shrinkage, a factor that must be meticulously considered during part design to maintain dimensional accuracy. In 3D metal printing, annealing is particularly effective in improving the ductility and ultimate tensile strength of parts, making it a critical treatment for materials like stainless steel and other high-performance alloys. By precisely controlling the annealing cycle, manufacturers can tailor the properties of 3D-printed components to meet demanding application requirements.
Advanced Heat Treatment Methods Specifically for Metals
To conclude our exploration of heat treatments in additive manufacturing, let’s examine a few additional, highly specialized methods predominantly used for metal 3D-printed parts. These techniques are often employed when extreme material performance, density, and freedom from defects are paramount, such as in aerospace, medical, and automotive applications.
The first of these advanced methods is **Hot Isostatic Pressing (HIP)**. HIP combines very high temperatures with isostatic (uniform from all directions) inert gas pressure, typically using argon. When applied simultaneously to a 3D-printed metal part, this process significantly increases its density and overall strength. In practice, the part is enclosed within a high-pressure containment vessel, heated to a specific temperature (often just below the material’s melting point), and then subjected to high-pressure inert gas. This combination causes any internal voids, microporosity, and residual internal stresses to collapse and densify, effectively eliminating nearly all internal defects. The result is a component with dramatically improved fatigue life, ductility, and ultimate tensile strength, making it comparable to, or even exceeding, conventionally manufactured parts. This technique is also highly compatible and effective for ceramic components.
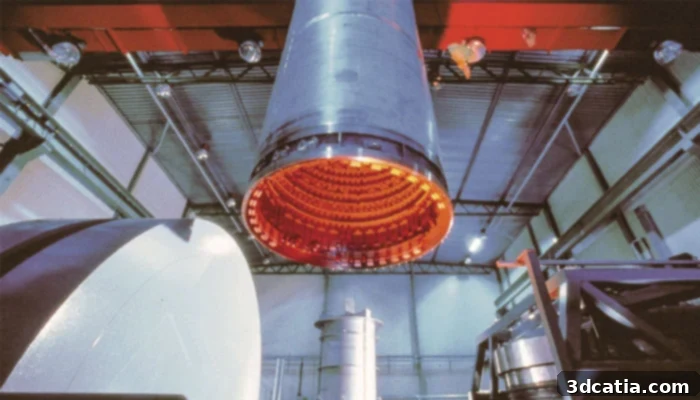
The HIP tank is installed on top of the 3D-printed part (photo credits: Bodycote).
Another critical heat treatment for enhancing 3D-printed metal parts is **Quenching**. This process involves heating the part to a very high temperature, often into the austenitic or solutionizing range for specific alloys, and then cooling it very rapidly. The rapid cooling, typically achieved by immersing the part in a quenching medium such as oil, water, or a polymer solution, has a profound impact on the component’s microstructure. For steels, quenching can lead to the formation of martensite, a very hard and brittle crystalline structure. While quenching dramatically increases hardness and strength, it often introduces significant internal stresses and can render the part too brittle for practical applications. Therefore, quenching is frequently followed by **Tempering**, where the part is reheated to a lower temperature and held for a period, which reduces brittleness and improves toughness without sacrificing too much hardness.
Furthermore, some advanced metal alloys, particularly those used in demanding applications, benefit from **Solution Treatment and Aging (STA)**, also known as precipitation hardening. This involves heating the alloy to dissolve alloying elements, quenching to trap them in solid solution, and then aging at an intermediate temperature to allow fine precipitates to form, significantly increasing strength and hardness. The list of compatible heat treatment methods with additive manufacturing continues to grow as the technology evolves. You now have a comprehensive overview of the most prevalent and impactful techniques available and their critical importance in achieving high-performance 3D-printed components. It is crucial to remember that parameters such as material selection, printing process, and anticipated part shrinkage must be taken into account right from the initial design phase to ensure successful and reliable outcomes.
We hope this detailed guide provides valuable insights into the world of heat treatment for 3D-printed parts. If you have any questions or comments, please let us know in the comments section below or on our LinkedIn, Facebook, and Twitter pages! Don’t forget to sign up for our free weekly Newsletter here to get the latest 3D printing news straight to your inbox! You can also find all our videos on our YouTube channel.
*Cover photo credits: Mark3D