
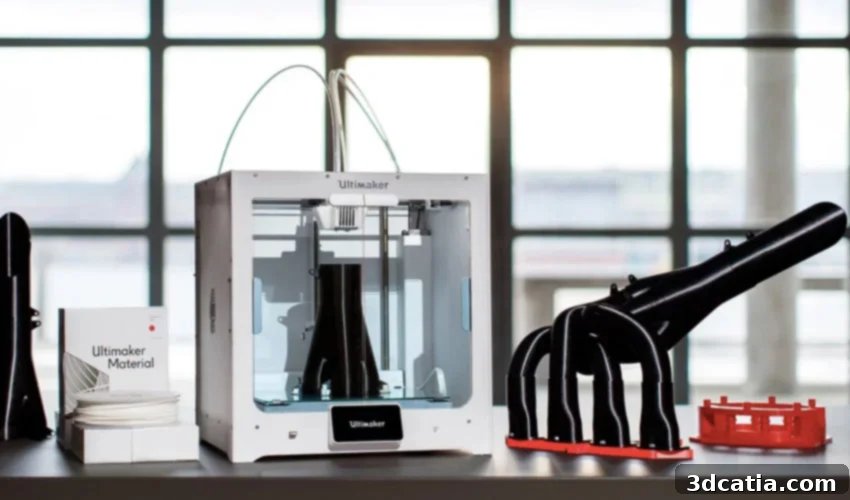
Ultimaker S5 Review: Unveiling Ultimaker’s Flagship Professional FDM 3D Printer
Since its grand introduction at the Hannover Fair 2018, the Ultimaker S5 has solidified its position as a leading force in the Fused Deposition Modeling (FDM) 3D printing landscape. This latest generation machine from the renowned Dutch manufacturer represents a significant leap forward, designed to meet the rigorous demands of professionals and advanced users. The S5 stands out with its substantially larger print volume – the most expansive in the Ultimaker lineup at the time of its release – alongside an intuitive full-color touchscreen interface and a fully enclosed build chamber. These features collectively contribute to making the Ultimaker S5 one of the most capable and reliable FDM 3D printers available on the market today.
The Ultimaker S5 builds upon the impressive legacy of its predecessor, the Ultimaker 3. The Ultimaker 3 marked a pivotal moment for the brand with the groundbreaking introduction of its modular Print Core system. These innovative components, which easily install within the print head, allow users to adapt the printer’s extruders to various filament types, thereby significantly optimizing print quality, minimizing the risk of nozzle clogs, and simplifying machine maintenance. With a launch price of €6,594 including VAT, many naturally questioned what the Ultimaker S5 offered to justify this investment. What specific improvements were implemented in this new model? Does it truly outperform other professional-grade FDM machines on the market? We embarked on a comprehensive test to answer these crucial questions, delving into every aspect of the Ultimaker S5 to provide a detailed and insightful review.
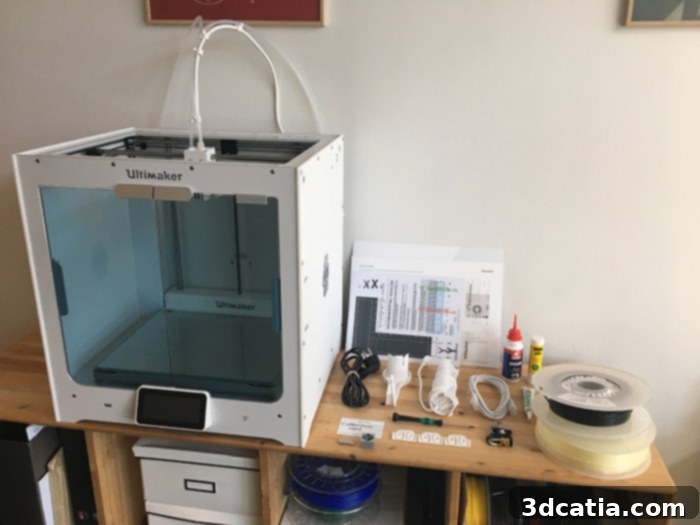
The unpacked Ultimaker S5 3D Printer
1. Unpacking and First Impressions of the Ultimaker S5
As is characteristic of every Ultimaker product, the experience begins with an immediate appreciation for meticulous design and presentation. The S5 arrives in beautifully crafted packaging that not only protects its contents but also hints at the premium machine within. Upon opening, the sleek design of the 3D printer itself is instantly noticeable, exuding a sense of professional elegance. Accompanied by a clear and concise user manual, Ultimaker’s dedication to aesthetic appeal and user-friendliness is evident from the outset, setting a high standard for the entire user journey.
One of the most striking aspects that becomes immediately apparent during unpacking is the Ultimaker S5’s rather impressive physical dimensions, measuring 495 x 457 x 520 mm. This substantial size quickly highlights the significant difference compared to its predecessors. The S5 truly distinguishes itself by offering an expansive production volume, boasting an increase of over 70% compared to the Ultimaker 3 Extended. This enhanced build capacity allows the S5 to create significantly larger parts, supporting dimensions up to 330 x 240 x 300 mm, a substantial upgrade from the Ultimaker 3 Extended’s 215 x 215 x 300 mm. This larger volume is a game-changer for professionals needing to print bigger prototypes, functional parts, or small batches of components without requiring assembly of smaller pieces.
The Ultimaker S5 comes with a comprehensive suite of accessories and components, thoughtfully curated to ensure a smooth and productive printing experience right out of the box. Key inclusions are a durable glass print tray, two Print Core AA 0.40mm for standard printing, and one Print Core BB 0.40mm specifically designed for support materials like PVA. To get started immediately, Ultimaker provides one 750g spool of PLA Tough filament – a robust material ideal for functional prototypes – and one 750g spool of PVA, a water-soluble support material that simplifies post-processing. Additional essentials include a convenient coil holder with a filament guide, the necessary power supply, a calibration sheet and card for accurate setup, an Ethernet cable for network connectivity, replacement nozzle caps, a tube of UHU glue for build plate adhesion, lubricant and grease for routine machine maintenance, a hex screwdriver for minor adjustments, and a USB key for transferring print files. This extensive package ensures users have everything they need to begin their 3D printing journey with the S5.
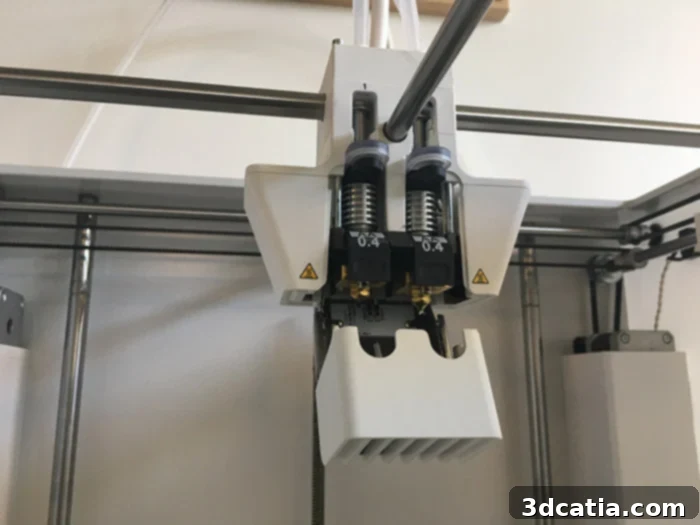
The 3D printer head S5 equipped with two 0.4mm Print Core AA
Ultimaker’s commitment to continuous innovation is also highlighted by future accessory plans. The manufacturer indicated that an anodized aluminum print tray would be released in the coming months, specifically engineered to enhance adhesion and performance when printing with more demanding technical materials such as ABS, CPE+, and PC. Furthermore, Ultimaker planned to launch a specialized Print Core CC by the end of the year. This Print Core would be dedicated to handling highly abrasive materials, including metal composite filaments and carbon fiber-loaded plastics, significantly expanding the S5’s material versatility and enabling a broader range of industrial applications.
Let’s take a moment to appreciate one of the S5’s most noticeable upgrades: the full-color, tactile screen prominently placed on the front panel. Measuring 4.7 inches (11.9 cm), this interactive display represents a significant departure from previous Ultimaker models, which were often criticized for featuring control screens reminiscent of basic calculators. This intuitive touchscreen interface is a major improvement for the brand, greatly enhancing the user experience. It allows for effortless navigation through settings, real-time monitoring of print progress, and, crucially, the ability to directly view the 3D model before initiating a print. This visual confirmation helps prevent errors and ensures the correct model is being processed, making the S5 much more user-friendly and efficient.
Another subtle yet revolutionary design change can be found in the integration of front doors. While previous Ultimaker models offered an optional protective hood, the S5 now features default glass doors that are seamlessly integrated into its design. This thoughtful addition serves multiple critical purposes. Primarily, it enhances the safety of the machine by enclosing the moving parts and hot components. More importantly for print quality, these doors create a fully enclosed printing environment, allowing for much better control over the internal temperature. Maintaining a stable temperature within the build chamber is vital for minimizing warping and improving print success rates, especially when working with sensitive materials or when producing large, intricate parts.
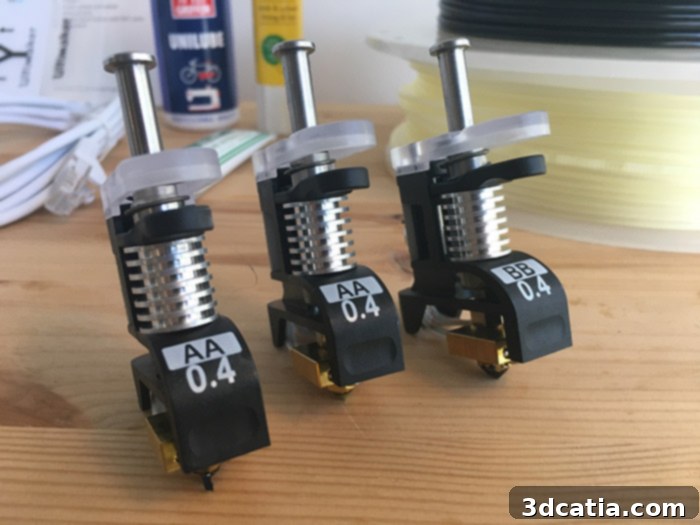
The three Print Cores delivered with the Ultimaker S5 3D Printer
2. Installing and Operating the Ultimaker S5
The installation process for the Ultimaker S5 is remarkably straightforward and does not present any particular difficulties, even for those new to professional 3D printing. The initial setup involves a few logical steps: connecting the Bowden tubes, correctly installing the coil holder, inserting the appropriate Print Cores into the print head, carefully placing the glass print tray, and finally, connecting the mains power plug. Once the physical components are in place, the second phase involves configuring the Wi-Fi connection through the intuitive touchscreen interface and loading the chosen filaments. Overall, the installation is quite traditional in its logic, but executed with Ultimaker’s characteristic attention to user experience, making it accessible and quick.
Ultimaker has integrated several smart features into the S5 to streamline operation and minimize user error. The machine is equipped with an EEPROM chip for automatic recognition of the installed Print Cores. This ensures that the printer always knows which Print Core is in use and applies the correct settings. Furthermore, an NFC (Near Field Communication) system is employed for detecting the filament spools installed at the back of the machine. This intelligent detection system reads data directly from Ultimaker’s NFC-enabled filament spools, automatically adjusting settings in the slicing software (Cura) and ensuring that the correct material profiles are always applied. These innovations significantly simplify material management and Print Core changes, virtually eliminating the possibility of setup mistakes and ensuring optimal print parameters.
The automatic bed leveling system has also received a significant overhaul and enhancement with the Ultimaker S5. What was formerly an optional step on previous models is now a mandatory procedure before each print. This crucial change is designed to meticulously compensate for any minor calibration errors and ensure perfect first-layer adhesion, which is paramount for the success of any 3D print, especially larger ones. On the Ultimaker 3, bed verification involved probing only a few select points on the print surface. In contrast, the S5 now performs a comprehensive scan of approximately thirty points across the entire build plate. While this involves a slightly longer preparation time for each print, the benefit is a significantly higher success rate and unparalleled reliability, particularly critical for a large-format machine like the S5, where first-layer failures can lead to substantial material waste and lost time.
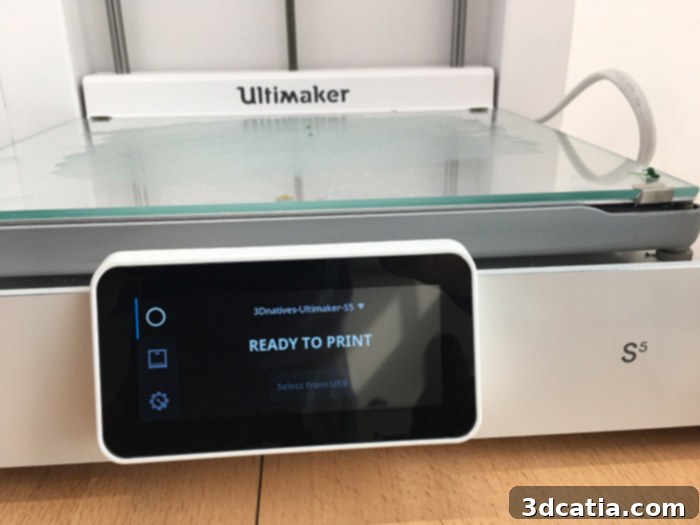
A full-colour touch screen is installed on the front of the new model
This novelty, while adding a few extra minutes to the pre-print routine, fundamentally elevates the S5’s reliability, leading to a much higher success rate for prints. For a large-format printer like the S5, which inherently has a greater potential for issues if calibration is off, this meticulous thirty-point leveling system is an indispensable feature. Another significant advantage is that manual Z-axis calibration is now, for all intents and purposes, a thing of the past. While still technically possible, users will rarely need to manually adjust the distance between the nozzle and the print tray, except in unusual problem scenarios. Furthermore, for X/Y calibration, the three Print Cores supplied with the machine come pre-calibrated from the factory, meaning this operation will only be necessary if a user purchases and installs an additional, new Print Core, further simplifying setup and ongoing maintenance.
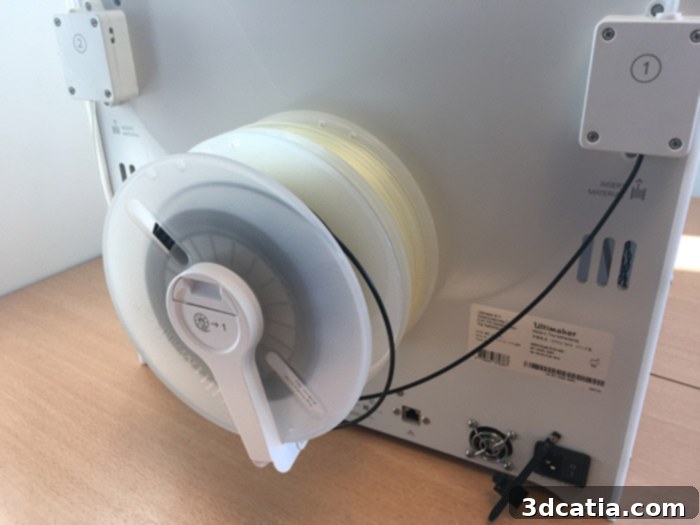
The reels are installed on the back of the S5 and are automatically detected in Cura
3. Cura Software: The Brain Behind the Ultimaker S5
As expected, the Ultimaker S5 3D printer seamlessly integrates with Cura, Ultimaker’s powerful and widely acclaimed slicing software. On this front, there isn’t much radically new, as Cura is already a well-established and highly regarded tool within the 3D printing community. It consistently receives regular updates and enhancements directly from Ultimaker, ensuring it remains at the cutting edge of slicing technology. Without delving into all the specificities of the software, it’s worth highlighting the ever-increasing array of printing parameters available for fine-tuning, particularly those related to dual extrusion, which further unlocks the S5’s capabilities.
Cura offers a progressive disclosure of its settings, catering to users of all experience levels. By navigating to Preferences / Settings, users can choose to display Basic, Advanced, or Expert modes. Each mode reveals a progressively longer and more detailed list of parameters, allowing for granular control over every aspect of the printing process. Some of the more advanced settings can indeed require significant experimentation and numerous print hours to fully master, but they offer unparalleled opportunities for optimization. Furthermore, an experimental mode is often available, allowing users to test and provide feedback on new parameters currently being developed and evaluated by Ultimaker’s dedicated teams, ensuring that Cura continually evolves and improves.
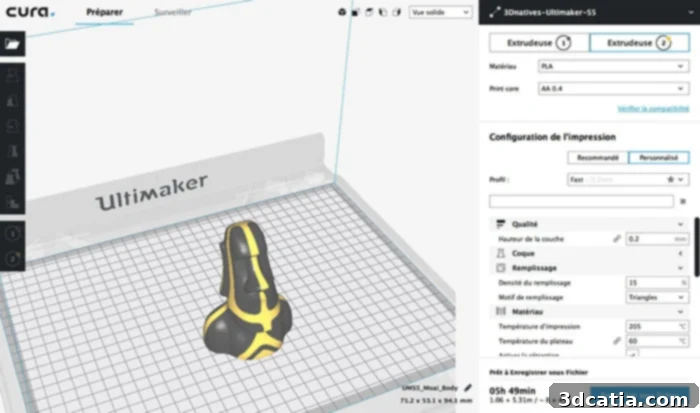
Cura, the faithful slicer of the Ultimaker
Among these innovative parameters, “adaptive layers” stands out as a particularly valuable feature. This setting intelligently adjusts the layer thickness based on the complexity of the object’s geometry. For example, it can use finer layers for highly detailed or curved sections, and thicker layers for less critical, simpler areas. This smart optimization allows users to strike a balance between print quality and printing time, ensuring that critical aesthetic elements are preserved while overall print duration is reduced where possible. Another incredibly useful parameter is the “support interface.” This feature enables the addition of an intermediate layer, often made from a soluble material like PVA, between the main printed part and its support structures (e.g., made from PLA). This significantly simplifies post-processing, as soluble interfaces can be easily dissolved, leaving a clean surface finish on the part and saving considerable time and effort in support removal.
During our extensive testing, we consistently observed that Cura, by default, generated notably longer print times compared to other popular slicers on the market, such as Simplify3D or IdeaMaker. For instance, our detailed Torture Test model, which we often use for benchmarking, showed a difference of up to four hours in estimated print duration when sliced with Cura versus other software. Upon consulting with the excellent support team at Makershop (a big thank you to Charly for the insights), it became clear that this discrepancy is primarily attributed to a specific parameter within Cura: the default line width setting. It appears that, by design, Cura adopts a more conservative approach than many other slicers, prioritizing the final print quality and structural integrity over raw printing speed. While this commitment to quality is admirable and often results in superior prints, it’s an important point for users to be aware of. This characteristic is not a fundamental limitation but rather a deliberate choice that can be optimized with experience. Users seeking faster prints can adjust the line width and other speed-related parameters, understanding the potential trade-offs involved in terms of print resolution or strength. This flexibility allows the Ultimaker S5, paired with Cura, to cater to both quality-focused and speed-focused production needs.
4. First Impressions: Print Performance and Quality
Once the Ultimaker S5 was fully installed and configured, it was time for the most anticipated phase: launching the first series of prints. To thoroughly evaluate its capabilities, we started with our standard suite of benchmark models, including our usual torture test designed to push the printer’s limits, and a classic 3D Benchy to assess foundational print quality. We then progressed to a more diverse and challenging selection of models. These included Kijai’s intricate “Forbidden Watchtower,” Henryseg’s “Triple Gear” (an excellent test for dual extrusion, printed with PVA-type soluble supports), Jarbaugh’s highly detailed “Pine Cone Cache,” and Cosmo Wenman’s artistic reproductions of the “Venus of Milo” and MakerBot’s “Human Skull.” To specifically test the S5’s dual extrusion capabilities for multi-color printing, we also selected models like Marcfelis’ “Easter Island Moai,” David_Mussaffi’s “Twisted Bottle & Screw Cup,” and R3ND3R’s “Star Cone.” We invite you to examine the impressive results for yourself in the images below.
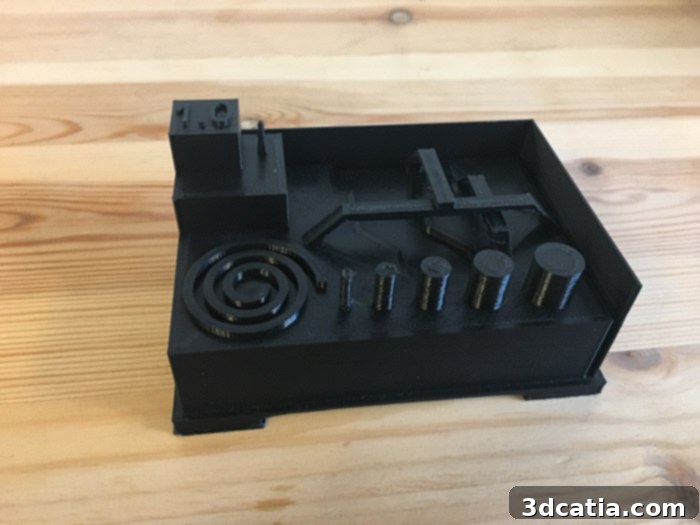
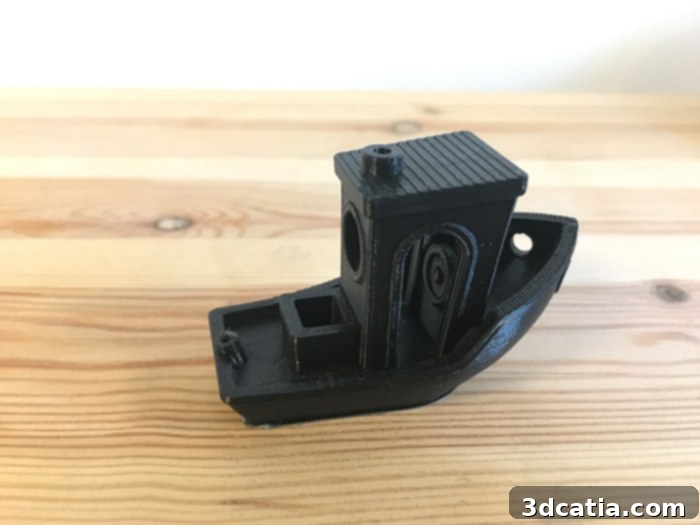
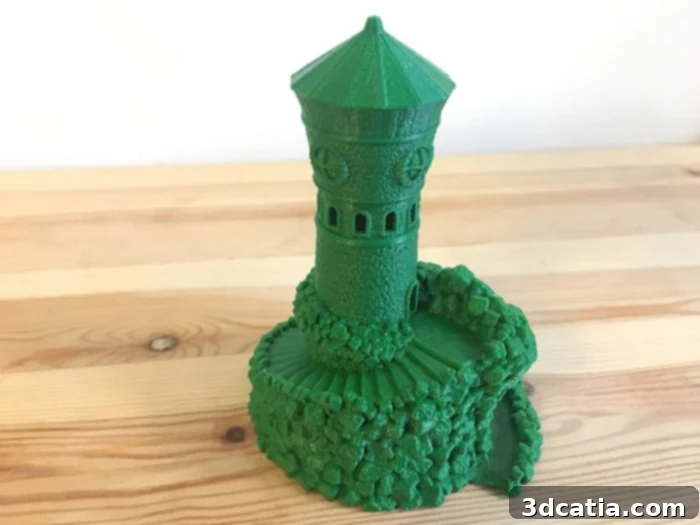
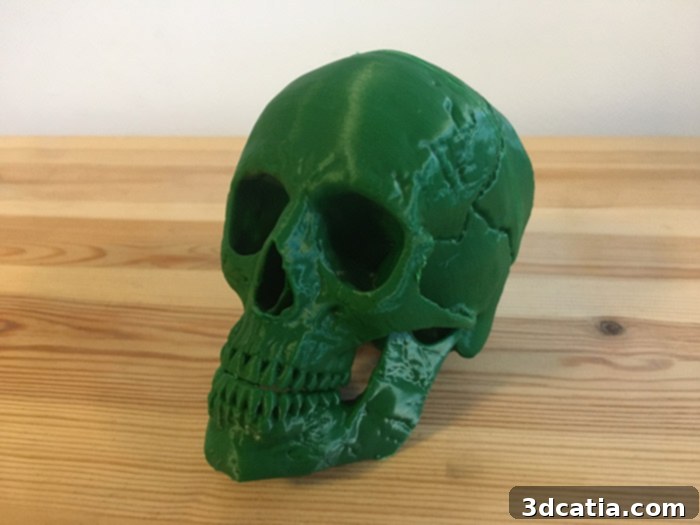
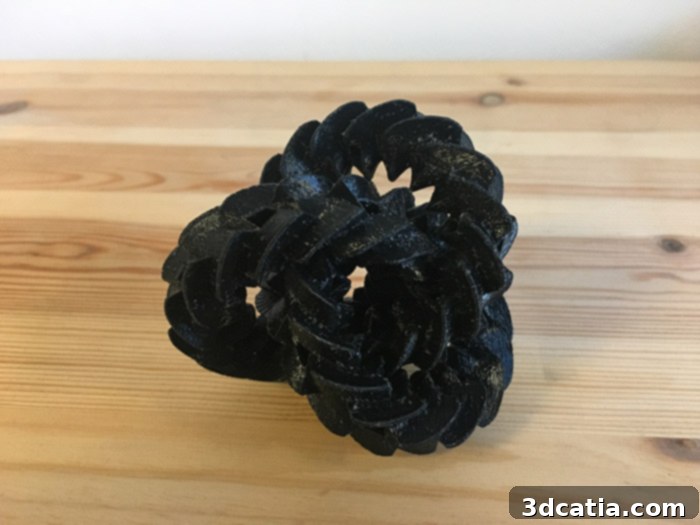
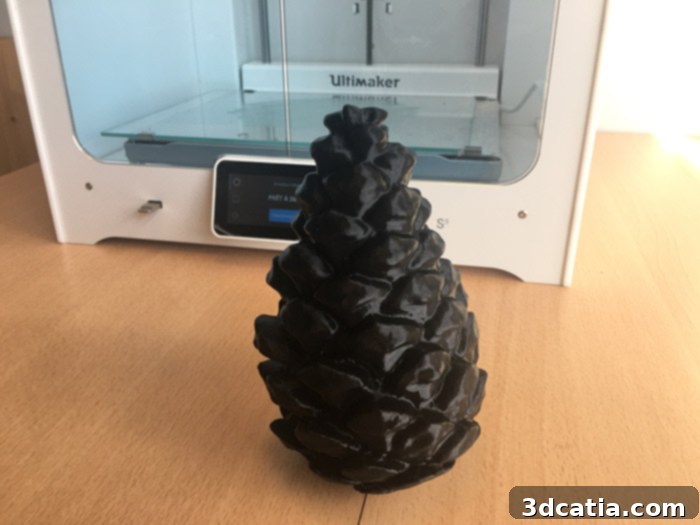
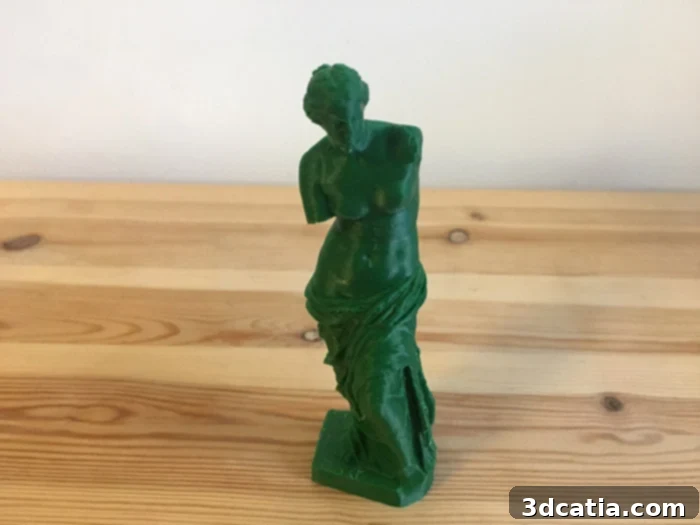
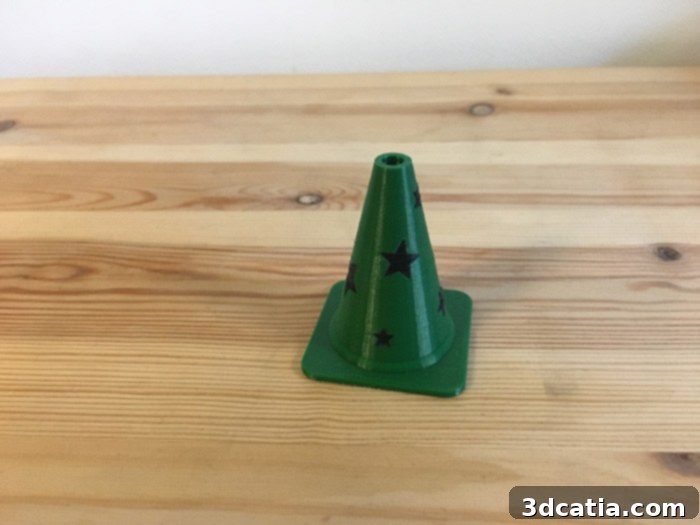
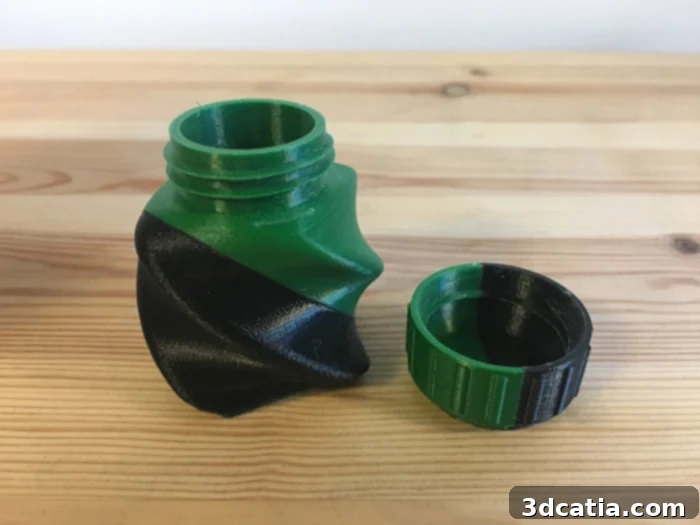
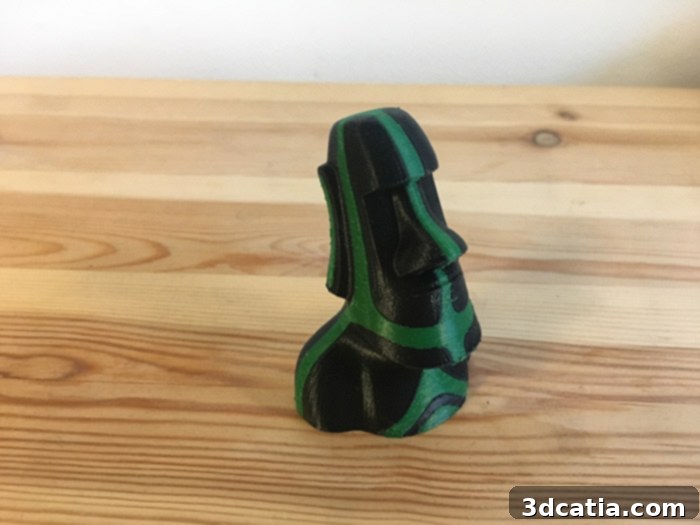
Across all our test prints, the Ultimaker S5 consistently delivered exceptional results, affirming its status as a high-performance FDM 3D printer. The meticulous automated bed leveling and the stable, enclosed build environment played a crucial role in ensuring excellent first-layer adhesion and preventing warping, even on larger models. Details were consistently sharp, overhangs were handled with remarkable precision, and the overall surface finish on most models was smooth and professional. The dual extrusion system, in particular, proved to be highly reliable. Prints utilizing soluble PVA supports, such as the “Triple Gear,” showcased incredibly clean interfaces and effortless support removal, leaving behind parts with pristine undersides that would be difficult to achieve with break-away supports. For multi-color prints, the S5 demonstrated excellent material switching and minimal oozing, resulting in vibrant, well-defined two-tone objects. The machine’s ability to handle Ultimaker’s Tough PLA with such consistent quality also highlights its versatility for producing functional prototypes and strong end-use parts. The synergy between the hardware, Print Cores, and Cura software is evident in these results, demonstrating a cohesive system engineered for reliability and high-quality output across a diverse range of applications and materials.
Find all of our 3D printer tests in the 3Dnatives Lab
The Ultimaker S5 truly stands as a testament to professional-grade FDM 3D printing. Its combination of an expanded build volume, intuitive touchscreen interface, intelligent material management with Print Cores, and highly reliable automated calibration systems makes it an outstanding choice for businesses, educational institutions, and professionals seeking consistent, high-quality results. While its default Cura settings may favor quality over speed, its robust feature set and the potential for future material compatibility (with upcoming Print Cores and build plates) justify its position and price point within the market. It’s a machine built for productivity, precision, and ease of use, designed to integrate seamlessly into professional workflows and deliver reliable performance day in and day out.
What are your thoughts on the Ultimaker S5? Have you had a chance to experience its capabilities firsthand? We’d love to hear your feedback and experiences in a comment below or join the conversation on our Facebook and Twitter pages! And don’t forget to sign up for our free weekly Newsletter to get all the latest news in 3D printing sent straight to your inbox, keeping you informed on the ever-evolving world of additive manufacturing!