
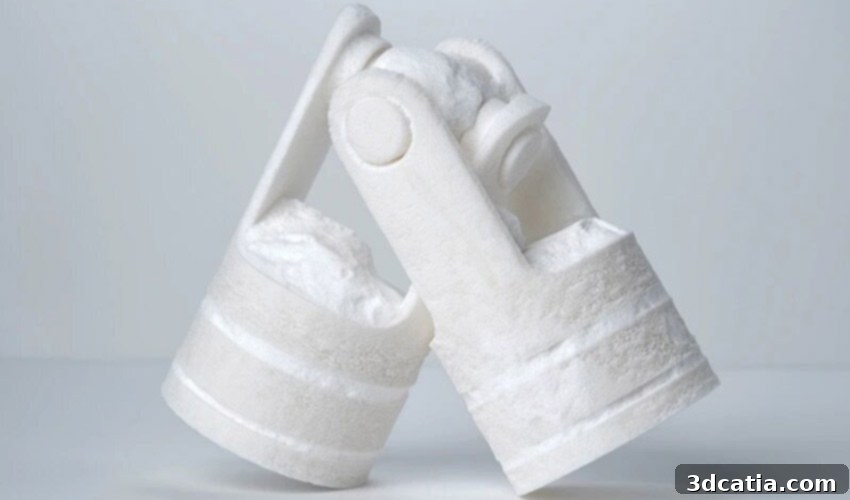
Mastering 3D Printing Post-Processing: A Comprehensive Guide to Cleaning and Support Removal for Optimal Part Quality
After successfully completing the 3D printing phase, the journey to a flawless final part often necessitates crucial post-processing steps. This guide delves into one of the earliest and most fundamental stages: cleaning the printed part. This involves not only the meticulous removal of printing supports but also the elimination of any excess, un-solidified material. The specific cleaning methodology can vary significantly, contingent upon the chosen additive manufacturing technology, the material employed, and the part’s geometric complexity. For instance, powder bed fusion processes commonly require depowdering, while resin-based technologies rely on thorough rinsing. Understanding these diverse cleaning methods is paramount to navigating the potential challenges encountered during post-processing and ensuring the highest quality outcome.
Regardless of the 3D printing process utilized, post-processing is almost always an unavoidable stage. These steps encompass a wide range of tasks, from the initial removal of supports and excess material to more advanced procedures like dewaxing, heat treatment, surface finishing, and even painting. Historically, post-processing has been perceived as a time-consuming and labor-intensive bottleneck in the additive manufacturing workflow. However, the industry is rapidly evolving, with an increasing number of innovative solutions aimed at automating these tasks. Despite advancements, cleaning remains a particularly challenging post-processing step, often fraught with pitfalls that can significantly impact the final product’s quality and efficiency. A proper understanding and execution of cleaning protocols are therefore essential for any serious 3D printing operation.
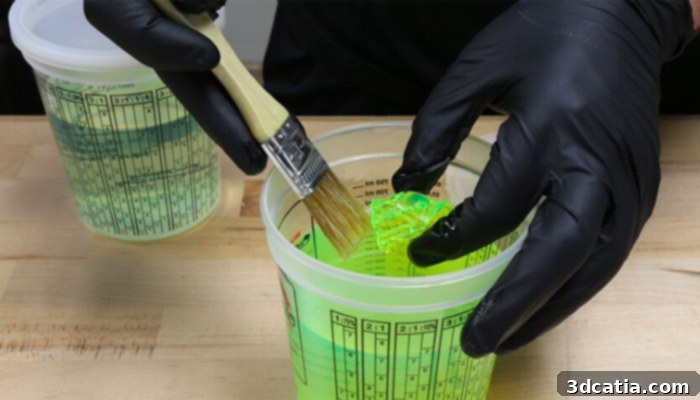
Cover Photos: Matterhackers
Removing Excess Material: The First Essential Step
The first critical phase of post-processing cleaning involves the removal of any residual material that did not integrate into the final printed object. This excess material can often compromise the part’s aesthetics, functionality, and even its mechanical integrity if not properly addressed.
Eliminating Uncured Resin from Stereolithography (SLA) and Digital Light Processing (DLP) Prints
For resin-based 3D printing processes, such as SLA and DLP, the immediate post-print step is the removal of uncured liquid resin. This uncured resin, which coats the surface of the photopolymerized part, must be thoroughly rinsed away before it can solidify and adhere to the model, obscuring fine details and creating an undesirable sticky finish. This delicate step, commonly known as “washing” or “rinsing,” is crucial because residual resin can negatively affect the surface quality, dimensional accuracy, and subsequent post-curing effectiveness of the already-cured part.
To facilitate this essential cleaning, a variety of specialized machines are available on the market. These typically consist of tanks equipped with mechanisms for agitating cleaning solutions, allowing users to immerse and effectively clean their printed parts. Many leading resin 3D printer manufacturers, such as Formlabs with its Form Wash system, offer integrated solutions that streamline this process. The cleaning process almost invariably requires the use of chemical solvents. Isopropyl alcohol (IPA) is the most common choice due to its effectiveness and relatively low cost, but other chemicals like tripropylene glycol monomethyl ether (TPM) are also used, offering different evaporation rates and safety profiles. When handling these chemicals, operator safety is paramount. It is imperative to wear recommended personal protective equipment (PPE), including chemical-resistant gloves, safety glasses, and, in some cases, a respirator, in a well-ventilated area to prevent skin contact, eye irritation, or inhalation of fumes. Proper disposal of used solvents is also a critical consideration for environmental safety.
Depowdering: Essential for Powder Bed Fusion Technologies
Additive manufacturing processes that utilize powder beds, such as Selective Laser Sintering (SLS), Multi Jet Fusion (MJF), and others, necessitate a specialized post-processing step known as depowdering. As the name implies, this involves the meticulous removal of any unsintered or unbound powder that surrounds the printed part after the build process is complete. The significance of this step can vary slightly depending on the specific technology. In SLS, for instance, printed parts are often embedded within a compact mass of unsintered powder, commonly referred to as the “print cake.” After the powder bed has cooled sufficiently—a crucial step to prevent part warping or damage, with cooling times varying based on the polymer used—the operator must carefully extract the parts from this powder cake.
Initial depowdering can be performed manually. However, this requires operators to be equipped with appropriate personal protective equipment, including gloves and a mask (preferably an FFP2 or higher rated mask) to prevent inhalation of fine powder particles, which can be respiratory irritants. Modern SLS machines increasingly feature integrated powder recovery stations, which significantly automate and facilitate this process. These stations often incorporate vacuum systems to efficiently remove excess powder, not only cleaning the parts but also enabling the recycling of the unsintered material. The ability to recover and reuse a significant portion of the powder, often mixed with a percentage of “new” powder for subsequent builds, is a key economic and environmental advantage of these technologies.
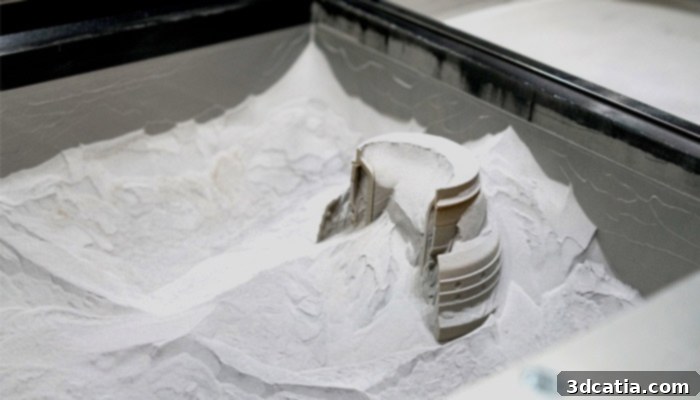
Photo Credits: 3D Logics
Once the parts are initially recovered from the build chamber, the depowdering process is often refined. This might involve using brushes, compressed air, or specialized vacuum wands to remove finer remnants of unsintered material from the part’s surface and intricate features. For higher manufacturing volumes or for parts with complex geometries and hard-to-reach internal channels, investing in an automated depowdering solution becomes highly advisable. These systems can drastically reduce manual labor, freeing up operators for other tasks, and more importantly, achieve a consistent and thorough clean, even in areas inaccessible by hand. Among the various technologies available, sandblasting (or bead blasting) is one of the most common and effective methods. Depending on the desired surface finish, cost-effectiveness, and environmental considerations, users can select from a range of blasting media, including glass beads, plastic beads, or ceramic particles.
Depowdering solutions vary in sophistication and price point. Some automated sandblasters integrate a rotating drum and a compressed air gun for uniform blasting, while others might simply combine a powerful vacuum cleaner with a dedicated blasting cabin. The choice depends on specific budgetary constraints, the scale of production, and the desired level of automation and finish. Beyond efficiency, automated depowdering offers significant advantages in terms of part consistency and operator safety. Manual cleaning can lead to irregularities in depowdering, visible fingerprints or blemishes on the part, and even burns if the operator is exposed too long or too closely to high-pressure air. Automated systems mitigate these risks, ensuring a uniform finish and a safer working environment. Furthermore, specialized depowdering stations can improve powder reclaim rates, reducing waste and operational costs over time.
Removal of Printing Supports: Sculpting the Final Form
Once the printed part is free of excess material, the next critical post-processing step for many technologies is the removal of printing supports. It’s important to note that this step is generally not required for polymer powder bed fusion solutions like SLS, MJF, and SAF, as the surrounding unsintered powder inherently acts as a support structure for the printed part. However, for technologies like Fused Deposition Modeling (FDM), Stereolithography (SLA), Digital Light Processing (DLP), and various metal 3D printing methods, supports are indispensable for successful fabrication, particularly for features with overhangs, bridges, or steep angles that would otherwise collapse during printing.
Supports, while essential for structural integrity during printing, pose the subsequent challenge of removal. This process can often be intricate and requires careful consideration, as improper support removal can lead to damaged surfaces, loss of dimensional accuracy, or even breakage of the part itself. The method of support removal is largely dictated by several factors: the complexity of the part’s geometry, the type of material used for the main part, the material used for the supports, and the tools or systems available to the user. Let’s explore the common techniques for support removal.
Manual support removal is often the most accessible method and typically involves physically breaking away or cutting the supports from the printed part. For easily detachable supports or those with minimal contact points, this can sometimes be done simply with fingers. However, for more robust supports or delicate parts, specialized tools are indispensable. These commonly include flush cutters, cutting pliers, small knives, scalpels, and sometimes even dental picks for intricate areas. When dealing with polymer supports, it is crucial to carefully cut or snap each contact point to minimize the risk of damaging the final part’s surface. This is a meticulous process that demands patience and precision to avoid leaving marks, gouges, or breaking off small features. After initial removal, residual support nubs might require further finishing with sanding paper, files, or rotary tools to achieve a smooth surface.
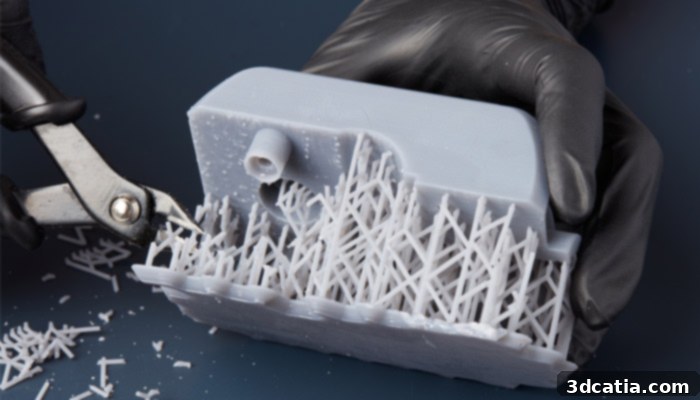
The use of cutting pliers is common to remove print supports (photo credits: Formlabs)
For enhanced efficiency and reduced risk of damage, particularly with complex geometries, soluble printing supports offer a significant advantage. This technique involves immersing the part, along with its soluble supports, into a specific liquid that dissolves the support material without affecting the main part. Common soluble support materials include PVA (Polyvinyl Alcohol), which readily dissolves in plain water, and HIPS (High Impact Polystyrene), which dissolves in limonene. Dedicated support removal machines, often resembling agitated washing stations or ultrasonic baths, are designed to accelerate this dissolution process, providing ultra-precise results and minimizing the need for manual intervention. The primary benefit of soluble supports is their ability to reach and dissolve supports from internal cavities and intricate features that would be impossible or extremely difficult to access manually, resulting in cleaner, higher-quality parts with less post-processing labor.
Finally, for metal 3D printing, support structures are inherently strong and rigidly bonded to the part due to the high temperatures involved in the printing process. Consequently, their removal requires much more robust and specialized methods than those used for polymers. CNC machining, such as milling, is frequently employed to precisely cut away metal supports. Other advanced techniques like Electrical Discharge Machining (EDM), particularly wire EDM, are also common for separating parts from their build plate and removing intricate support structures without inducing excessive stress or heat. Grinding and manual filing may also be necessary for final finishing, making metal support removal a labor-intensive and equipment-heavy stage of post-processing. The design of metal supports is often optimized not just for structural integrity during printing, but also for ease of machining post-print, which is a critical consideration in the design phase.
Effective cleaning and support removal are foundational to achieving high-quality 3D printed parts. These initial post-processing steps directly influence the aesthetics, dimensional accuracy, and functional performance of the final product. As additive manufacturing continues to evolve, so too will the methods and technologies available for streamlining these essential processes. The trend towards greater automation promises to make 3D printing even more accessible and efficient for a wider range of industrial applications. Understanding and implementing the correct cleaning and support removal techniques is crucial for anyone looking to maximize the potential of their 3D printing endeavors.
What cleaning and support removal methods do you integrate into your 3D printing workflow? Share your insights and experiences in the comments below or join the conversation on our LinkedIn, Facebook, and Twitter pages! Don’t miss out on the latest advancements in additive manufacturing—sign up for our free weekly Newsletter here to get top 3D printing news delivered straight to your inbox. You can also discover more about 3D printing technologies and applications by visiting our YouTube channel.
*Cover Photo Credits: Spengler